
Managing your company or organisation's structure
The Divisions page lets you add and edit divisions, subsidiaries or sub-companies within your organisation, allowing for more detailed team and member management.
How to add a new division
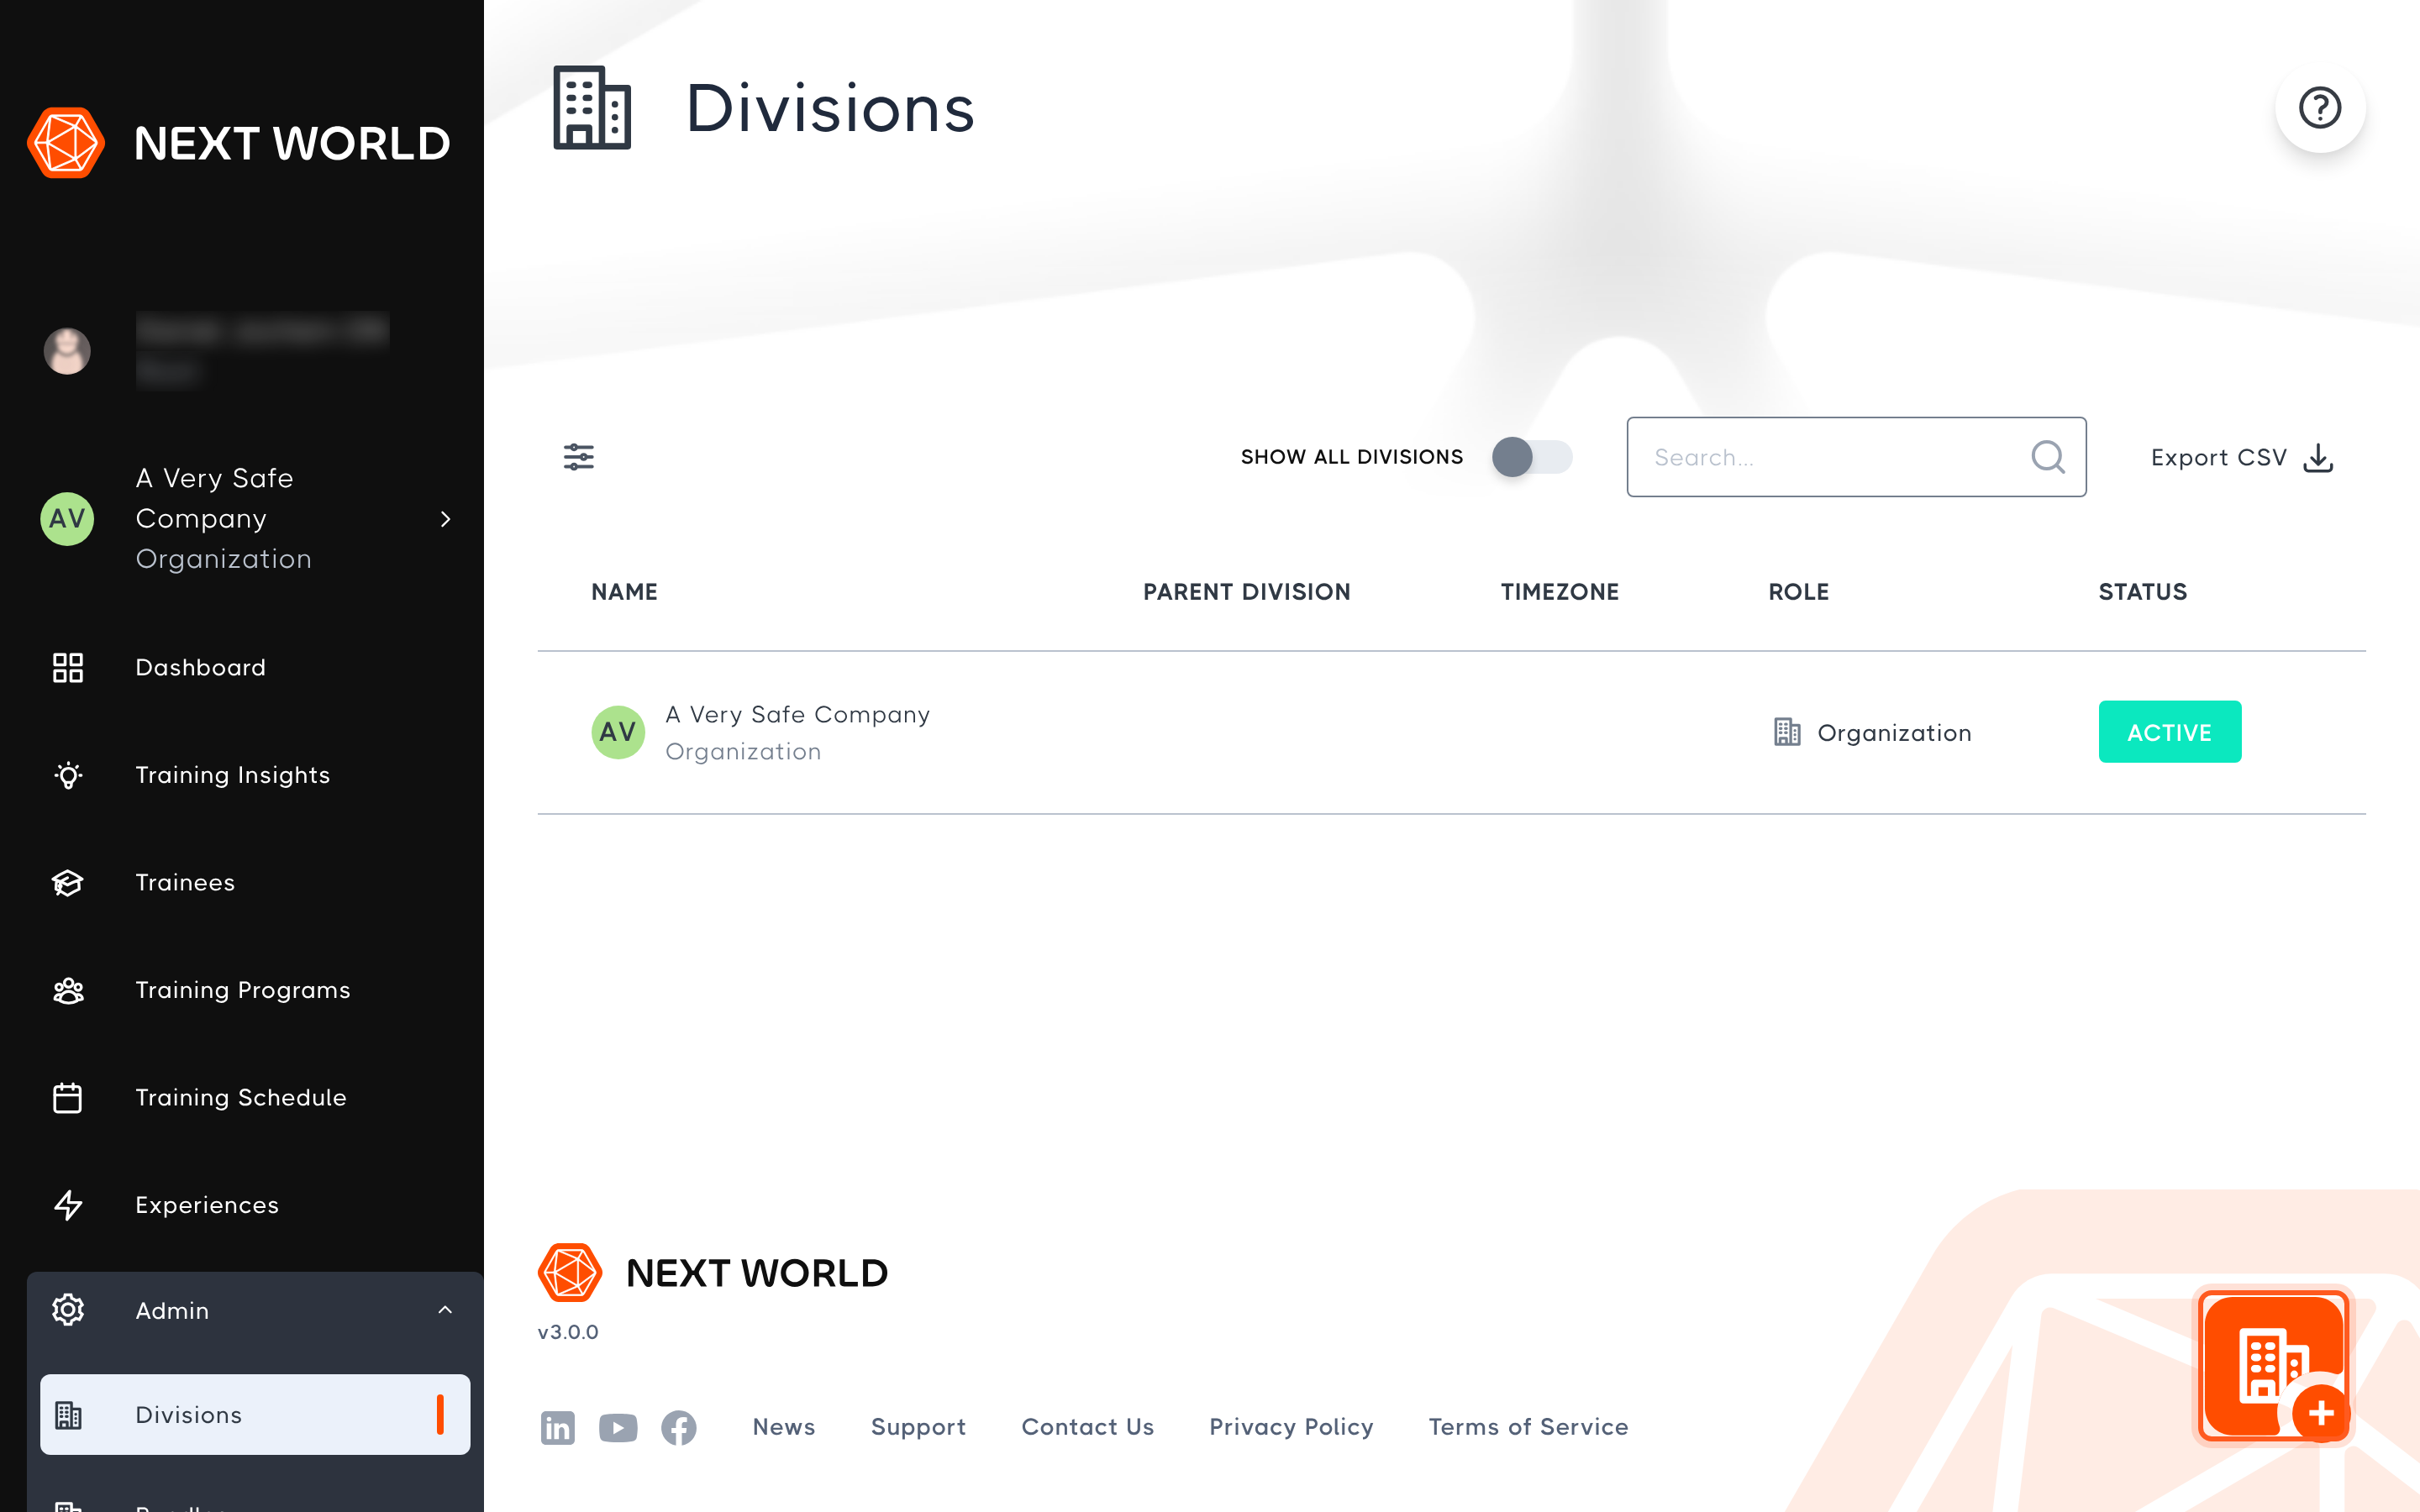
Go to Admin > Divisions and select the orange + button in the bottom-right corner.
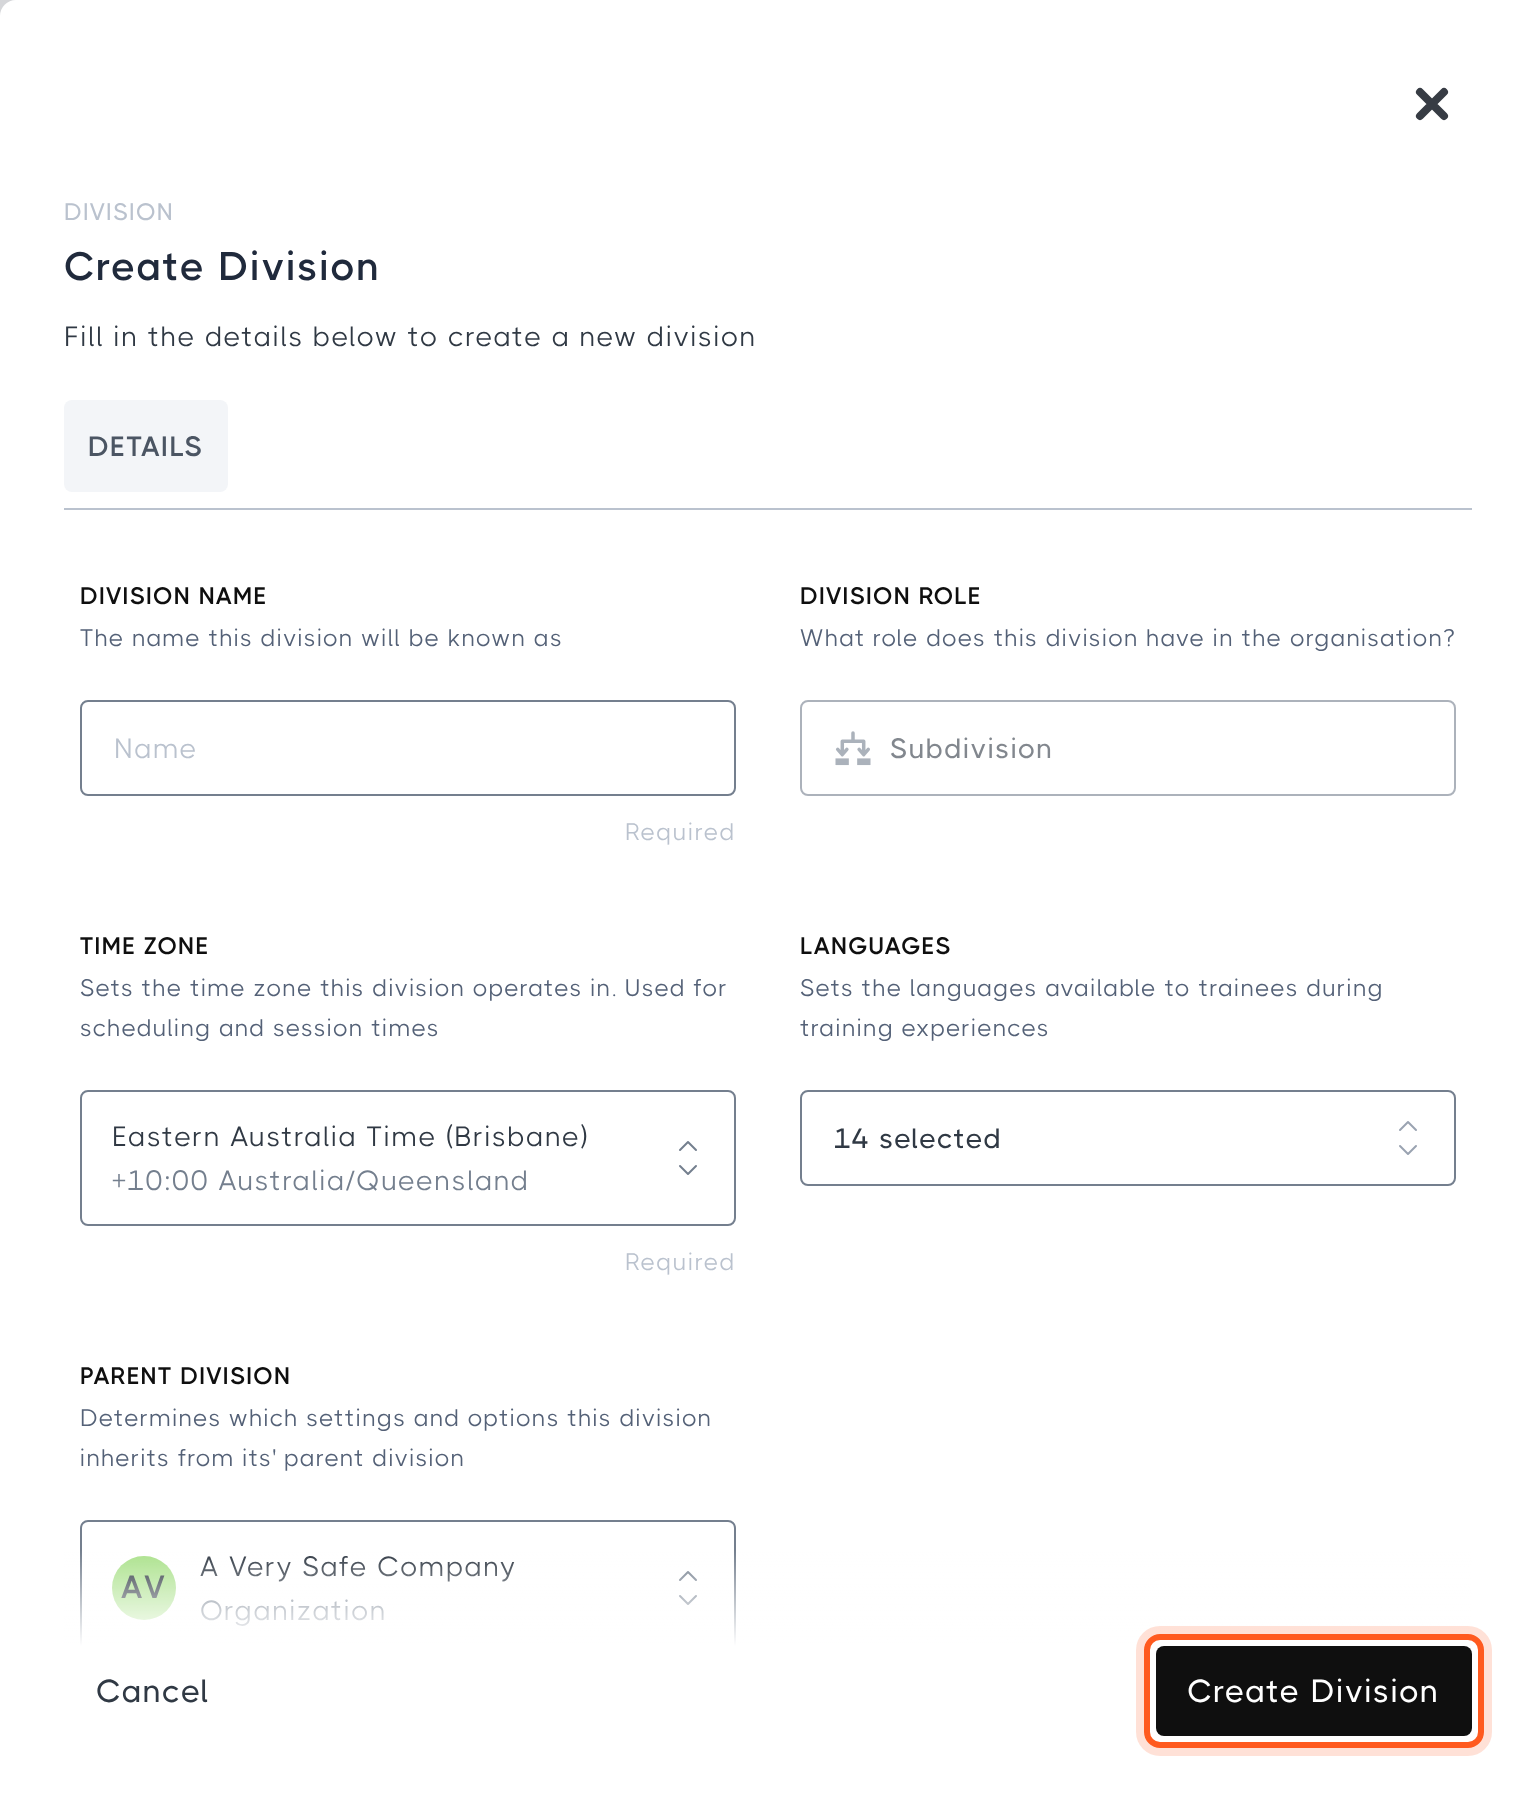
Fill in the following details:
- Division Name: the name the division will be known as
- Division Role: the division's role in your organisation (usually Subdivision)
- Time Zone: the time zone the division operates in, used for scheduling and session times
- Languages: the languages available to its trainees during training experiences
- Parent Division: the division this one sits under. The new division inherits settings and options from its parent, including training programs and course bundles.
When you're done, select Create Division.
The Divisions page only lists your current division by default. Turn on Show All Divisions above the table to see your subdivisions too.
How to edit or archive a division
Go to Admin > Divisions and select the division you want to edit. On the Details tab you can change the division's name, role, time zone, languages and parent. The Experiences tab shows which courses are available to the division, and you can change these from the Bundles tab. Select Update to save your changes.
To archive a division, select Archive at the bottom of the Details tab. You can't archive the division you are currently viewing the Portal as, so switch to a different division first.
Archiving a division disables all members, devices, training programs and subdivisions under it. Move anything you want to keep to another division before archiving.