**Please note:** Users **must** be in at least one programme before they can be scheduled with this feature. You can add a user to a programme from here by clicking on their **Name** > **Manage Programmes**.
You can book in a trainee for training by 3 different methods: - Click on the **Schedule Training** button in the top right-hand corner > fill out the required information > confirm by selecting **Schedule**. [](https://docs.nwxr.app/uploads/images/gallery/2023-04/ezgif-com-video-to-gif.gif) - Click on the desired time slot on the calendar view. This will pre-fill the time and date of the training for you, so you only need to enter the trainee's name and experience they need to complete. [](https://docs.nwxr.app/uploads/images/gallery/2023-04/ezgif-com-video-to-gif-1.gif) - Drag the name of the trainee into the desired time slot on the calendar view. Using this method, you will only need to select which experience they need to complete.[](https://docs.nwxr.app/uploads/images/gallery/2023-04/ezgif-com-video-to-gif-2.gif) Once you have hit **Schedule**, the user will be sent an email (if the have an email address attached to their account) informing them of what course they need to complete, the date and time, and their unique 4-digit access code. #### How to cancel scheduled training To cancel a training session, simply click on the **Training Appointment** > select **Remove** > and **Confirm**. [](https://docs.nwxr.app/uploads/images/gallery/2023-04/ezgif-com-video-to-gif-4.gif) #### Training Schedule FAQ **Q:** Do all users need to be scheduled for training before they can use the VR headsets? **A:** No, not at all. The training schedule is not a prerequisite, and users can complete training at any time. It is an organisational tool. **Q:** If I schedule someone in for training, does that mean nobody else can do it at that time? **A:** If you have multiple headsets, you can schedule multiple people on the same timeslot. The scheduling tool is purely for administrative assistance and does not limit headset access. **Q:** Can I change the duration of the booking? **A:** Not currently. The default training timeslot is 1 hour. # Organising your trainees into Training Programmes Training programmes (formerly known as 'training cohorts') allow you to create unique training setups for users across your organisation that have different training requirements to ensure that all of their training is up to date and relevant. Each programme is comprised of a list of courses, a frequency that those courses need to be completed, and included members. Any member added as a trainee of that programme will need to complete all of the courses within it for their training status to be "certified", and keep that training up to date by repeating it at the set frequency (for example, every 6 months). For example, you may have warehouse pickers that need to complete an array of courses such as **Hand Safety, Manual Handling** and **Working Around Forklifts**, so you can create a dedicated "Warehouse Training" programme for them. However, you may also have office staff that only need to complete courses pertinent to their job (such as **Office Hazards** and **Slips, Trips and Falls**) - so you could create an 'Admin' programme just for them. And you might want *every* member of your organisation to be trained in using fire extinguishers, so you could create a programme for that purpose and include everyone. Training status and expiry dates are dependent on training programmes, so it is important that your users are set up correctly.Training programmes are how the platform keeps track of who's training is current, overdue or expired, so it is important that all of your members are set up in a programme
#### Setting up Training Programmes To view your current training programmes or create a new one, select **Training Programmes** from the left navigation bar. It will show you a summary of all your organisation's programmes and their details. [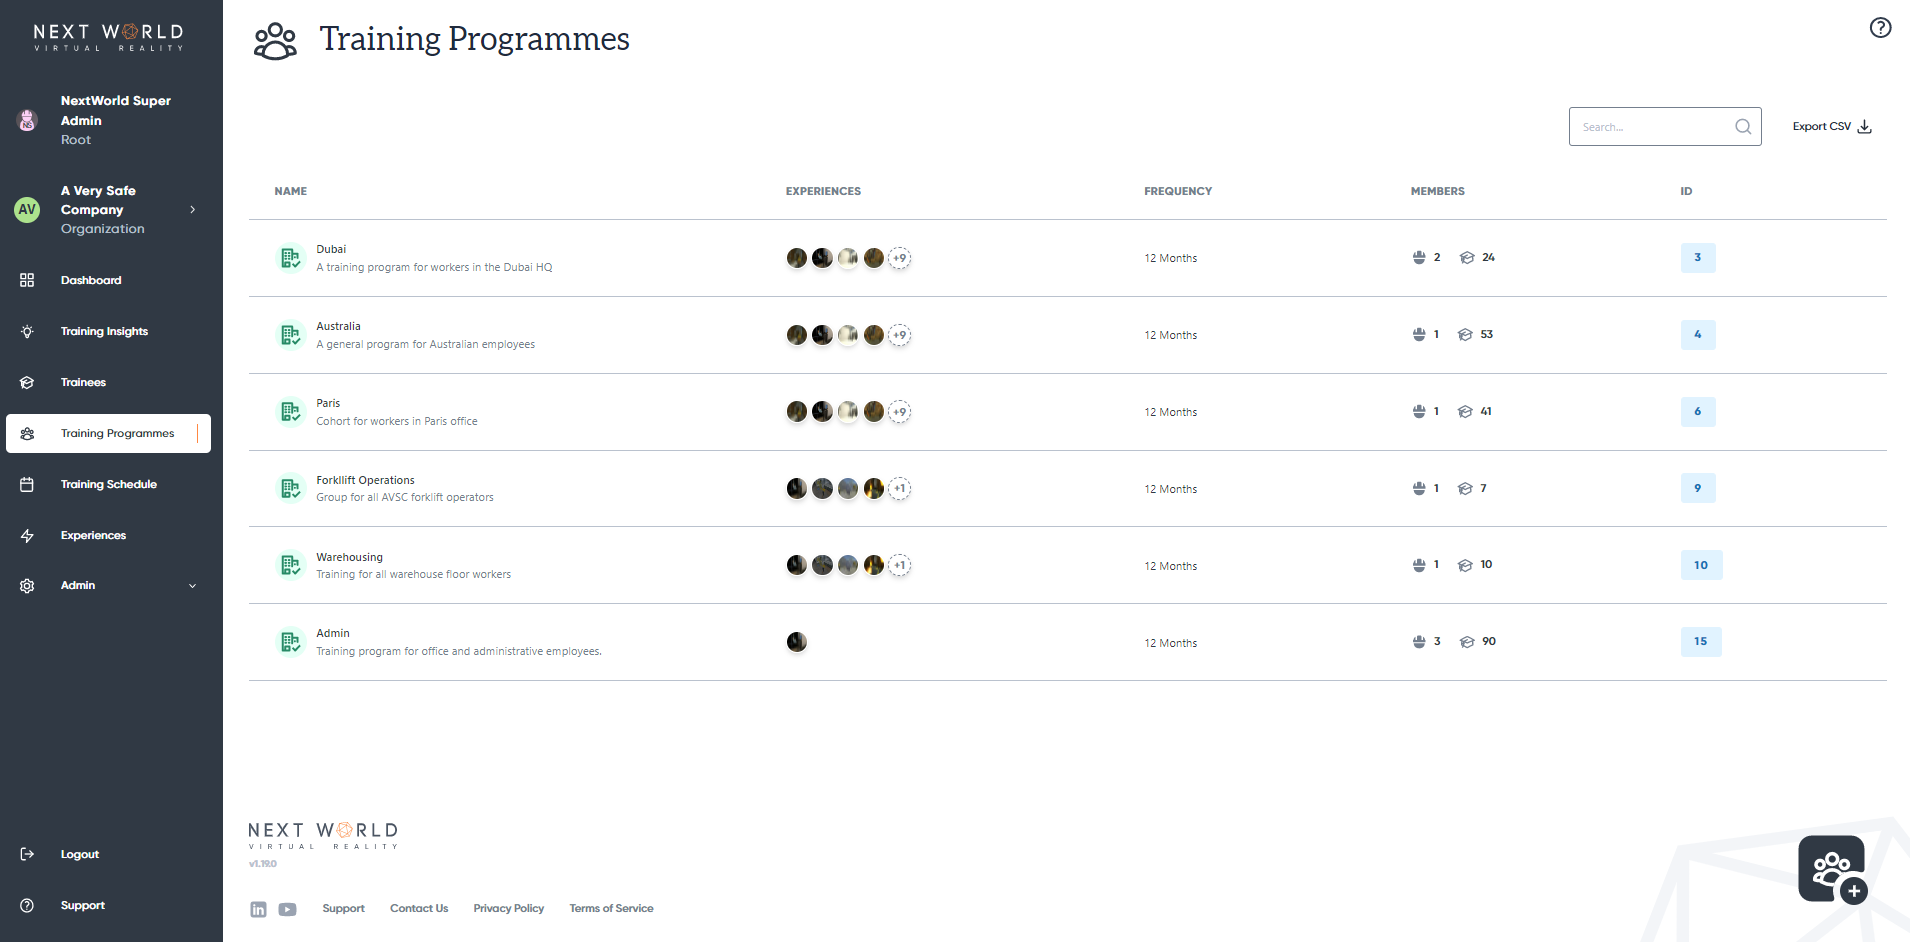](https://docs.nwxr.app/uploads/images/gallery/2023-04/A1iimage.png) To create a new programme, select the **Create New** icon on bottom-right to be guided through the set-up wizard. You will need to walk through the following steps: 1. **Enter Details** - Programme Name - Programme Description (optional) - Training Frequency (how often your trainees will be required to complete the experiences) 2. **Select Experiences** - Select which experiences are included in this programme (what your trainees will be required to complete) 3. **Define Members** - Select which members will be trainees in the programme by selecting their requirement as **Train** - Select at least one owner of the programme by marking their requirement as **Manage** 4. **Confirm Summary** - Review the details you've entered, and then select **Create** to finish [](https://docs.nwxr.app/uploads/images/gallery/2023-04/ezgif-com-video-to-gif-9.gif) #### Editing and deleting programmes You can edit the details of a programme by selecting it in the **Training Programmes** Section. From there you can edit the details, included experiences and members. To delete a programme, select **Archive** under the **Details** tab.Archiving a training programme is permanent and cannot be undone. It will affect the training status of any member within it
#### Adding additional users to the programme You can also add members to an existing programme from the **Manage Member** pop-out. You can access this by selecting the member's name under **Trainees** or **Admin** > **Members**, and then selecting the **Training Programmes** tab. This will show you a list of existing programmes, and you can easily add the user to any of them. By clicking on the expand icon (**+**), you can expand the details to see what courses are included in that particular programme. When done, select **Update** to save. Similarly, you can manage your own programmes by selecting your name at the top of the navigation bar and following the same steps. [](https://docs.nwxr.app/uploads/images/gallery/2023-04/ezgif-com-video-to-gif-11.gif)Any place that requires a member to be a part of a programme (such as the scheduler, for example) will also give you the option of to manage a user's programme details if they are not part of one yet
#### # Exporting data to CSV The portal has the ability to export a number of different datasets to a CSV file for your convenience. You can export the following data tables: - Session Data - Trainees - Training Programmes - Divisions - Members - Devices #### How to export data On the page you want to export the table from, simply click the **Export CSV** button in the top-right of the page. This will begin the download of the CSV to your device. [](https://docs.nwxr.app/uploads/images/gallery/2023-05/ezgif-com-video-to-gif-13.gif)Any filters you have applied to the table will apply to the exported data. If you want a complete export of all data, be sure to clear any filters first.
#### How to export session data from a date range If you only want to export the session results from a specified date range, you can do that with the help of filtering. Go to **Training Insights** > click on the **Filter Icon** > select the desire date range by entering a **From Date** and **To Date** > click **Export to CSV**. This method can be applied to any other page with exporting functionality. For example, if you want to export a list of all Trainees that are overdue for training, you can do so from the Trainees page by applying the Training Status filter of **Overdue**. # Managing the members of your division The division management page gives you the ability to add or edit the members of your organisation, allowing for more granular team and member management. #### How to add a member To add a new member to your organisation, go to **Admin** > **Members** and select the **Create New** icon on the bottom-right. From there, you can fill out the following details: - **Name** = enter the employee's full name - **Email (optional for trainees)** = allows for the member to be sent notifications by email - **Division** = select which division the user will be a part of - **Role** = designates the role of the user on the portal - **Position (optional)** - **External Reference (optional)** When you're done, select **Add member** to save them to your organization. This will generate a unique 4 digit access code for them to access training on the VR headsets. If they have an email address, they will also be emailed instructions to set up a password for the platform.**Manager** or **Admin** members require an email address, as they will need to access the platform
#### How to bulk add members You can also bulk add members by selecting **Import Multiple Members** where you can add multiple members at once or import from a CSV file. #### How to delete a member To delete a member, navigate to **Admin** > **Members** > select member > press **Archive**Archiving a member is permanent and cannot be undone. You will lose all of their training data and they will not be able to access training with the same access code.
Multiple members cannot have the same email address, even after being archived. If you intend to create a new user with the same email address after archiving an old record, make sure to remove the attached email address first, otherwise you will not be able to use that email again.
#### FAQ **Q: What is an External Reference?** A: An external reference is a field where you can add your own reference IDs to a user, for example an employee number or site ID. **Q: Where do notifications go if a user doesn't have an associated email address?** A: Any notifications will be forwarded to the manager(s) of any training programmes that user is a part of. # Setting up your headset The device management page under the **Admin** tab allows you to add and edit the VR Headsets licenced to your organisation. Registering your device here allows access to the Next World course library within the headset.To add a new device, you must have administrative privileges within your organization. If you cannot add a device, please contact **
Since you have added new information to the platform, your headset will need to be connected to the internet to synchronise this data.
#### How to edit or remove a device Navigate to **Admin** > **Devices** to show a list of existing devices. Click on the device you would like to edit. From here, you can change the device's alias and division. To remove the device, select **Archive.**Archiving a device is permanent and cannot be undone. This will result in your being unable to access the course library from that device ID.
#### FAQ **Q. I registered my device but it is not updating on the headset** A. Make sure your device is connected to a stable internet connection so the new data can synchronise. # Managing your company or organisation's structure The division management page gives you the ability to add and edit divisions, subsidiaries or sub-companies within your organisation, allowing for more granular team and member management. #### How to add a new division Open **Divisions** under the **Admin** section, then select the **Create New** icon to add a new division. From there, give the division a name, select it's role, and confirm which division or organisation will be its parent. The new division will inherit the settings and options from its parent, including training programmes and course bundles. You can also set the division's time zone and select what languages its users will have access to. Once done, select **Create Division**. [](https://docs.nwxr.app/uploads/images/gallery/2023-05/ezgif-com-video-to-gif-15.gif) #### How to add a edit or delete a division Go to **Admin** > **Division** > select the division you want to edit. From here you can edit the divisions name, role, timezone, languages and parent. You can also view which courses are available to the division from the **Experiences** tab, and edit these courses from **Bundles**. To delete the division, select **Archive** from the **Details** tabArchiving a division is permanent and will affect any users and devices registered under that division. Please be sure to move any existing entries before archiving a division.
# Finding training insights and data One of the most valuable aspects of VR safety training is the ability to collect a user's training session data and then analyse that data to draw conclusions, giving us a much more in-depth insight into their learning. From the **Training Insights** page, you are able to review the results of your users when they complete a course. #### How to access training insights You can access these sessions by clicking on the **Training Insights** tab on the left navigation bar. This will bring up a list of all the training sessions completed by users in your organisation. By default, session will be sorted by most recent sessions first, however you can use the search bar to search for a particular member, or use the filter icon to filter by date range or experience. You can also choose to see members of the organisation's divisions, in-progress training or incomplete sessions. [](https://docs.nwxr.app/uploads/images/gallery/2023-04/ezgif-com-video-to-gif-12.gif) From here, you can click on a session to view its results. [](https://docs.nwxr.app/uploads/images/gallery/2023-05/ezgif-com-video-to-gif-20.gif) These session results will give you an in-depth look at how the user performed during the course, as well as how they benchmarked against others in your organisation and globally. # How to find trainees who require training (expired or untrained) To see who needs training, head to the trainees page and use the training status filters. #### The Trainees Page [](https://docs.nwxr.app/uploads/images/gallery/2023-05/expired-trainees.gif) The trainees page displays all of your division's trainees, along with their training status. #### Filter and Sort by Status In order to find out who has expired training, you can open the filters draw and select the expired status. If you click the **STATUS** header, you can sort your trainees by training level, clicking a second time will invert the order. # How to access the Next World Platform Portal To access the Portal, point your browser to http://nwxr.app, then using the login screen, enter your username and password. These details will have been provided by Next World or your organisation's administrator. [](https://docs.nwxr.app/uploads/images/gallery/2023-05/image.png) #### Create An Account If your organisation is new to Next World, you'll need to contact us to create an account. More information is available here. If you're part of an existing organisation, you should contact your manager or administrator in order to gain access. If you believe you have an account but don't know what the password is, you can try [resetting your password.](https://docs.nwxr.app/books/next-world-support/page/how-to-change-or-reset-your-password "How to change or reset your password") #### Forgotten Password If you've forgotten your password, you can use the password reset link. More information is available [here](https://docs.nwxr.app/books/next-world-support/page/how-to-change-or-reset-your-password). # How to view information from other divisions and subsidiaries Larger companies are often split into divisions. The Portal has features to allow you to switch between them, or view information from them all at once. #### Changing divisions You can change divisions by selecting your division from the top-right corner of the dashboard. [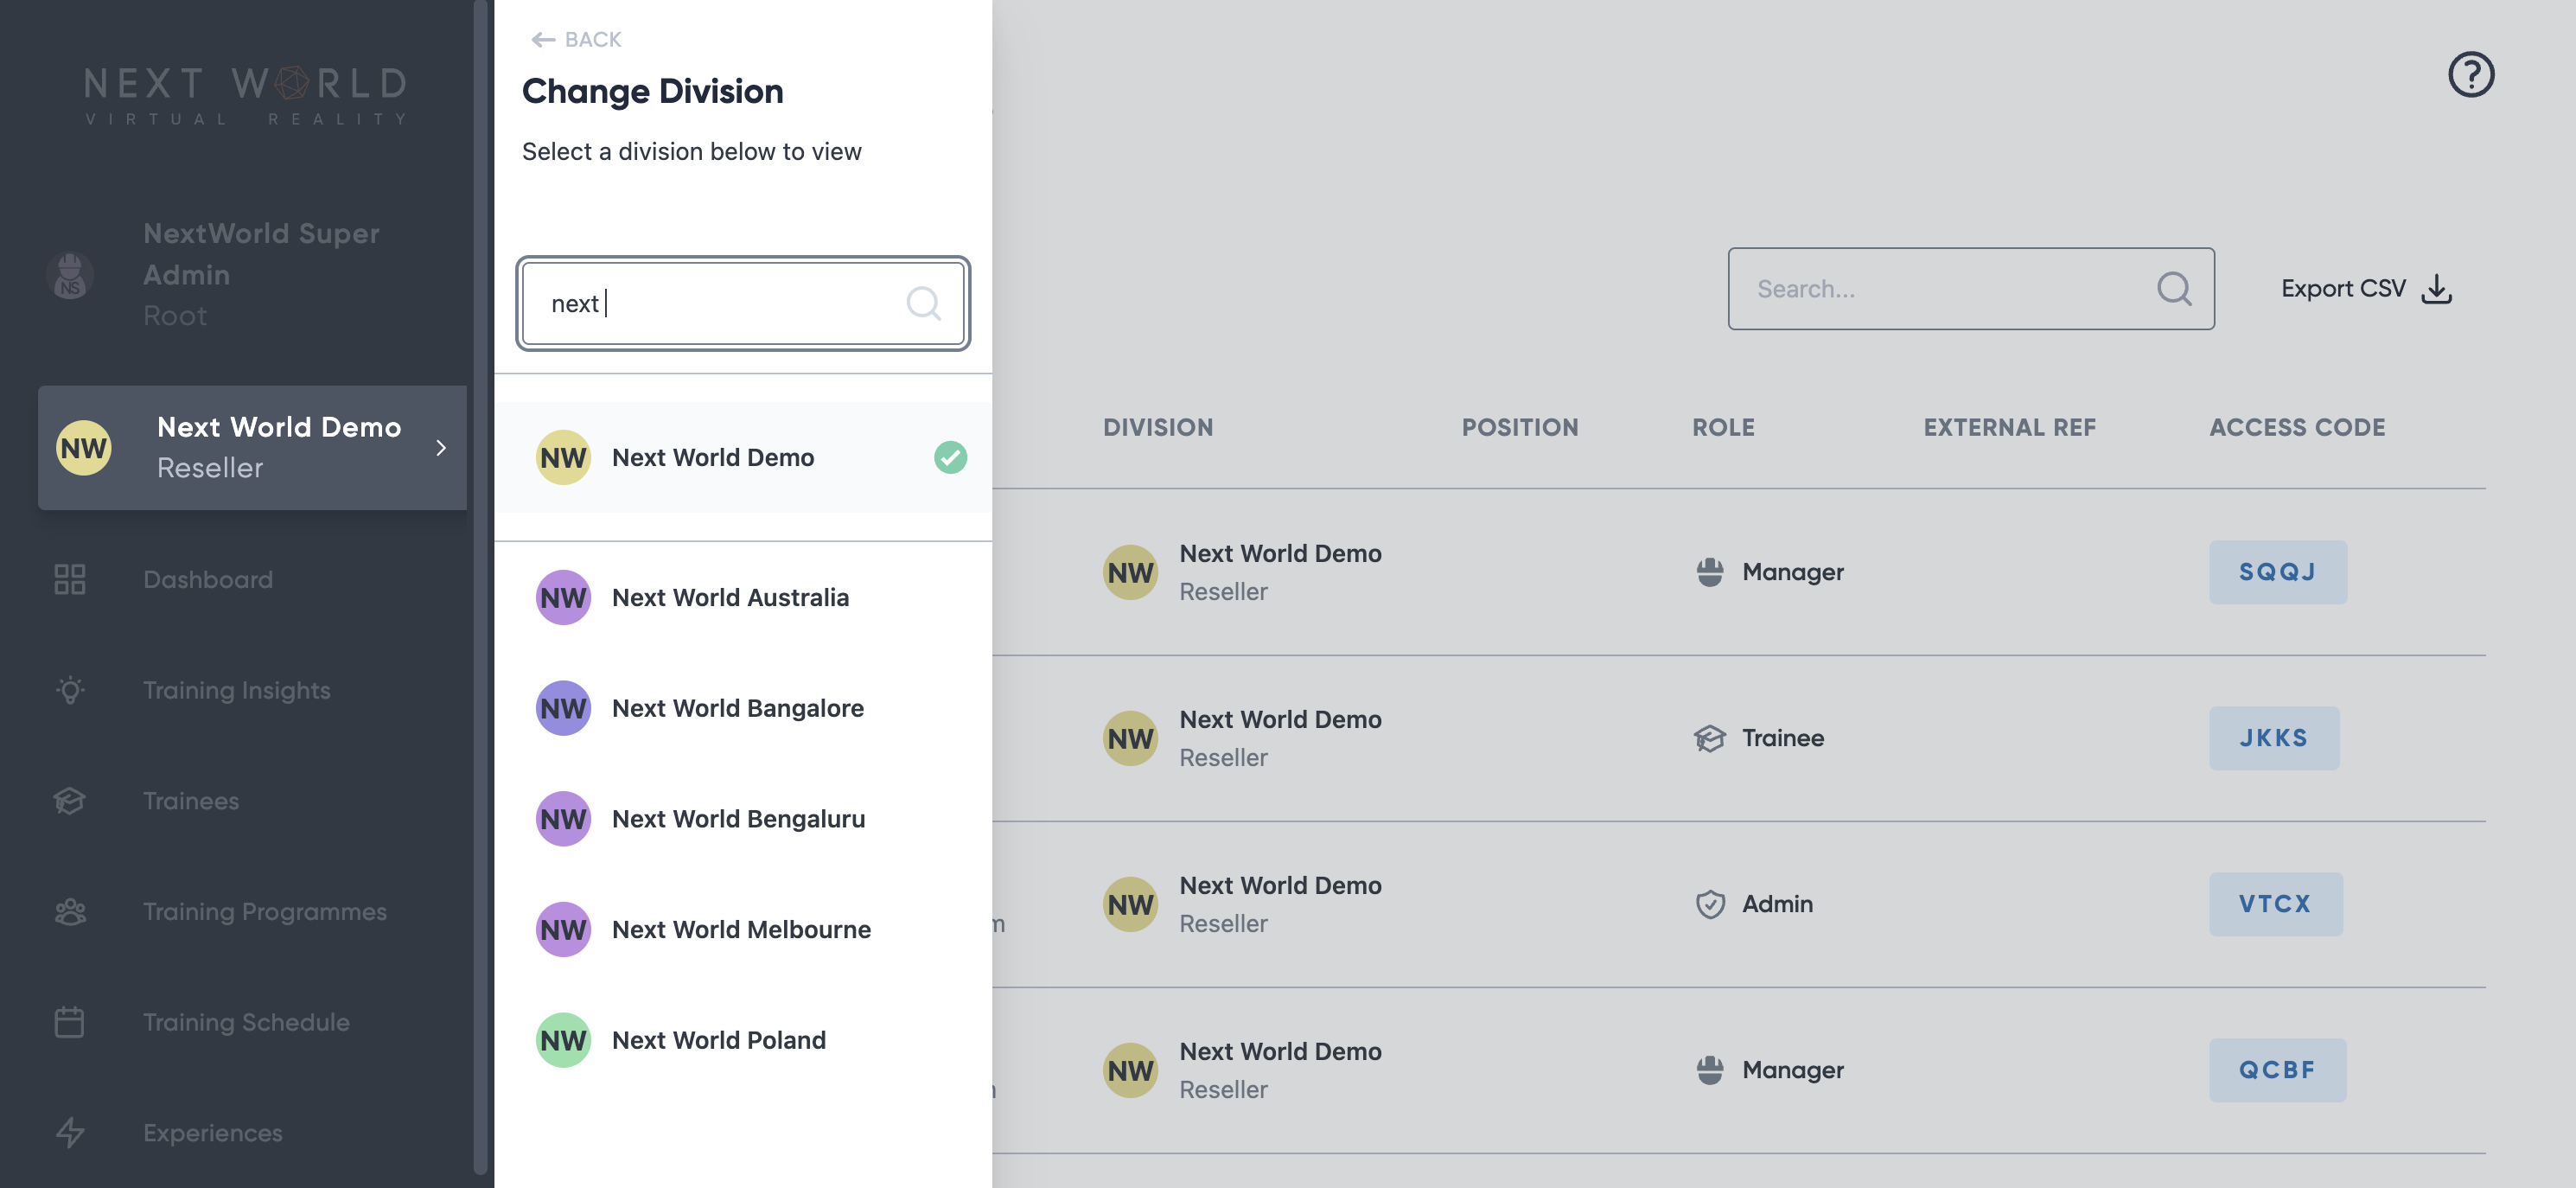](https://docs.nwxr.app/uploads/images/gallery/2023-05/22rimage.png)From there, you'll be given a list of divisions to change to. Find the division you want to assume the point-of-view of and select it. When you're done, simply follow the procedure again, but this time click the parent division (your organisation). Alternatively, you can log out and log back in to go back to your organisation. #### Viewing information from multiple divisions Throughout the Portal, many pages allow you to view information from subdivisions and subsidiaries. This can be useful if you'd like to see all information from your company in one place. 1. 1. Change divisions to the top level company 2. Select the **Include Subdivisions** filter from the filters menu. # Using filters in the Platform Portal to control tables Filters are useful when looking for particular subsets of information through the Portal. #### Applying Filters Most pages, including **Training Insights**, **Trainees**, **Schedule** and the **Admin pages**, allow for filtering of data. In order to access filters, click the [](https://docs.nwxr.app/uploads/images/gallery/2023-05/1jyimage.png) icon[ ](https://docs.nwxr.app/uploads/images/gallery/2023-05/1jyimage.png)at the the top-left of any table. It should display next to any filters that are active. [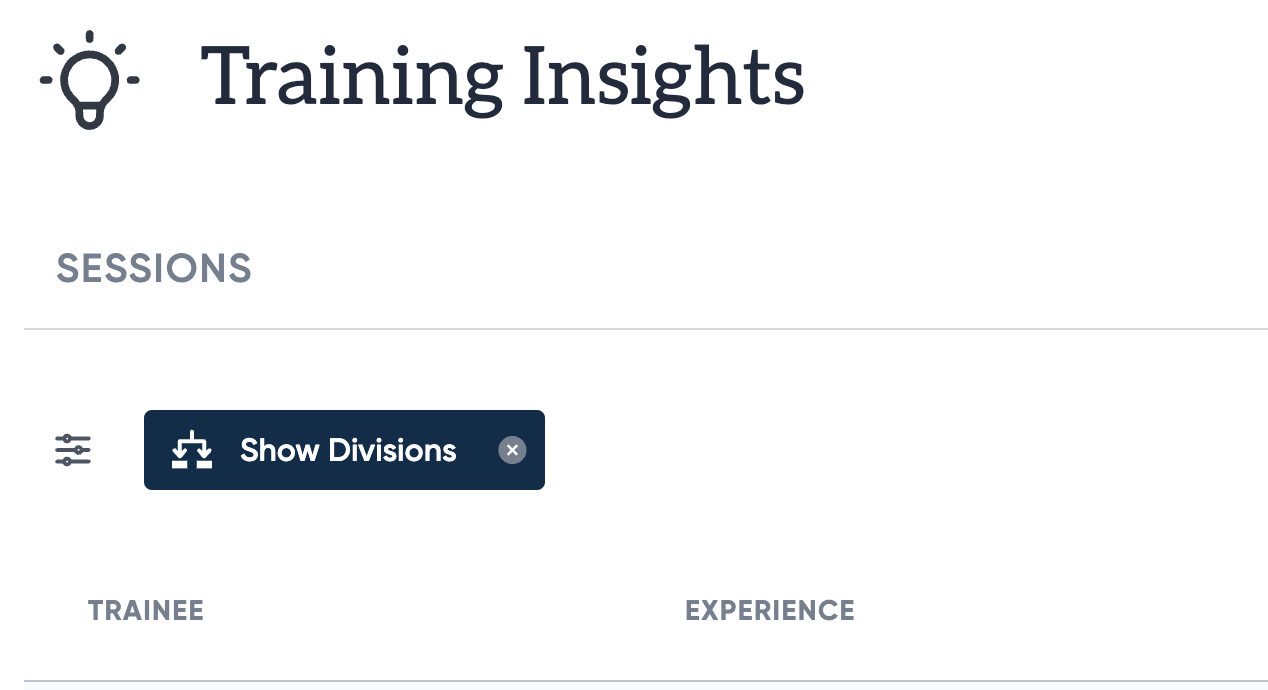](https://docs.nwxr.app/uploads/images/gallery/2023-05/8hTimage.png) In the picture above, the **Show Divisions filter is active, indicating that the table below is showing data from all subdivisions within the organisation. # Training States: How to tell what stage an employee's training is at After assigning trainees to one or more Training Programmes, their overall training status will now be displayed as an icon on their avatar. There are many states, each denoting a stage on a trainees journey from being added to the platform, to achieving their completion certificate. Individual training states for each course assigned to a trainee through their Training Programme, are also available for viewing on the trainee's profile page. [](https://docs.nwxr.app/uploads/images/gallery/2023-05/67Kimage.png) See below for a detailed breakdown of each training status and what they mean: #### **Ungrouped**  This is the first stage status for a new trainee. The ungrouped status displays when a trainee is not currently a member of any Training Cohorts. In order to schedule training for a trainee, or view their current training state for a course, they must be added to a Training Cohort. #### **Untrained** **** The Untrained status displays when any course this trainee has been assigned to has not yet been attempted by the trainee, or has not yet been scheduled for the trainee. #### **Scheduled**  The Scheduled status displays when a trainee has been scheduled for a session of a particular course within their Training Cohort. #### **Overdue**  The Overdue status displays when a trainee has been scheduled for a session, but has not completed a session within a reasonable timeframe of their scheduled time and date. #### **Expiring** **** The Expiring status displays when a trainee has previously successfully completed a course, but their completion date is nearing the expiry date set by the corresponding Training Cohorts' **Training Frequency.** See the **Expired** status below for an overview on how Training Frequency affects a trainees' Training Statuses. #### **Expired**  The Expired status displays when a trainee has previously successfully completed a course, but their completion date falls outside the allocated **Training Frequency** period specified in their Training Cohort. For example, if a trainee has access to the Fire Hazards course through a Training Cohort they are a member of, and that Training Cohort has a **Training Frequency** set to **6 months** - If this trainee successfully completes a Fire Hazards session on **January 1st**, but does not complete another session before **July 1st**, their training state will be set to **Expired** and their "training priority" will be considered very high.**Note:** If a trainee is a member of multiple Training Cohorts that each have the same courses, but have different Training Frequencies, the shortest Training Frequency will be used to calculate the trainees Training State.
#### **Unsuccessful**  The unsuccessful status displays when a trainee has attempted a scheduled session, but has been unsuccessful in completing the course with a passing score. #### **Certified**  The Certified status displays when a trainee has successfully completed a course, and is still within the specified **Training Frequency** set by the assigning Training Cohort. # Headsets, VR and Training Information on how to undertake training in a Next World headset or using Next World software. # Accessing Virtual Reality training modules This article will explain how to access your desired training module once you are in the headset. If the headset has not been setup yet, [take a look at this article on setting up a headset.](https://docs.nwxr.app/books/next-world-support/page/setting-up-a-vr-device-for-the-next-world-environment "Set up a brand new headset") #### Make sure you ready for training Putting on a headset and powering it on, will take you immediately to Next World Home. Here you will be greeted by E.L.I.O.T! [](https://docs.nwxr.app/uploads/images/gallery/2023-04/screenshot-com-nextworld-nextworldmenu-2023-04-27-15-26-23-065-724-modified.jpeg) E.L.I.O.T will check to see that your controllers are activated, in the correct hands, and are functioning correctly. If anything is wrong, E.L.I.O.T will assist you in fixing the issue. if you are currently seated, E.L.I.O.T may also ask you to check where the floor is. You'll be instructed to hold your controller to the ground to get an accurate reading. [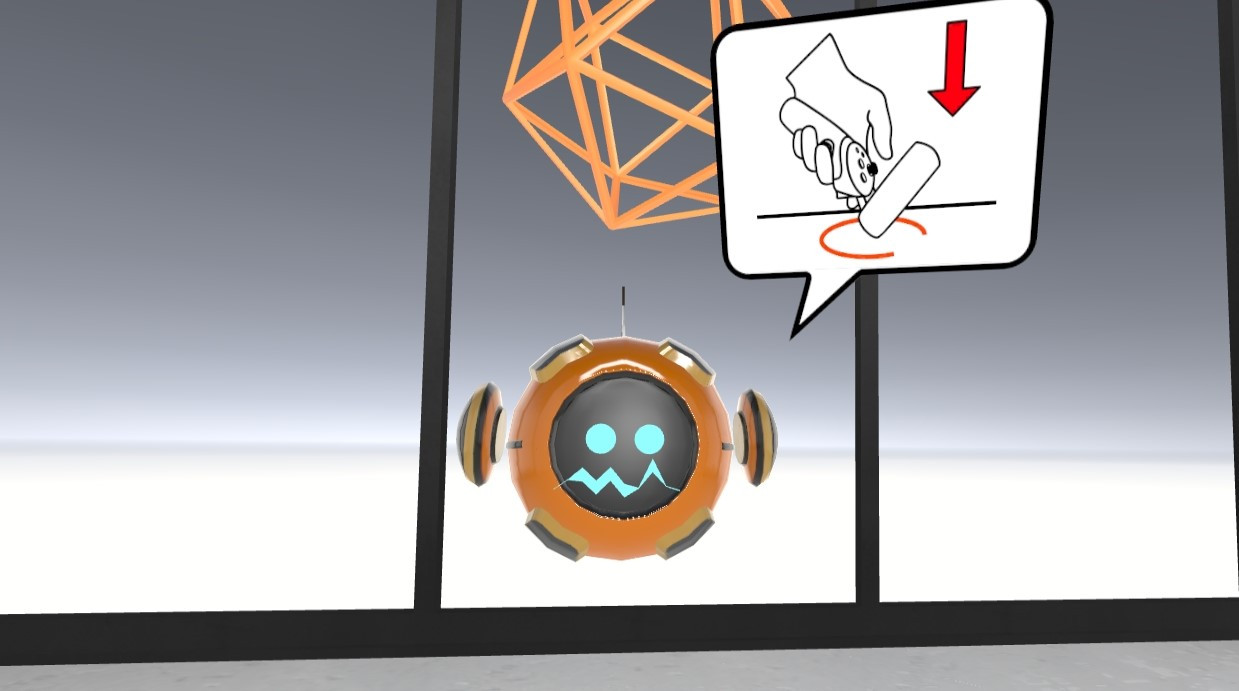](https://docs.nwxr.app/uploads/images/gallery/2023-04/screenshot-com-nextworld-nextworldmenu-2023-04-27-15-26-47-570-565-modfiied.jpeg) #### Login with your access code Once E.L.I.O.T is happy with your setup, you'll be asked to enter your login code. This is the unique 4-character code that represents you for your training. You will have received a code when scheduled for training. If you do not know your code, please talk to your trainer. [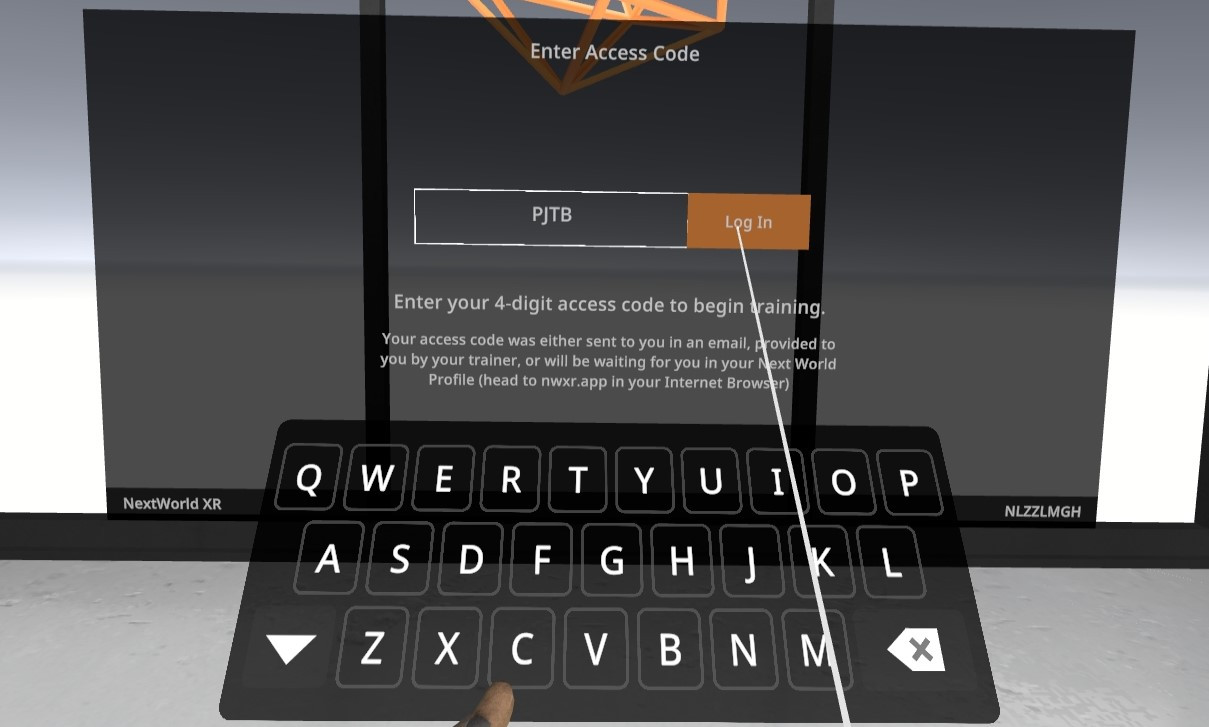](https://docs.nwxr.app/uploads/images/gallery/2023-04/screenshot-com-nextworld-nextworldmenu-2023-04-27-15-24-53-181-761-cropped.jpeg)Enter your code, then click 'Log in'. #### Pick the correct experience You'll be faced with a selection of all the experiences available to you. Use the scroll bar or the joystick on the controller to look through the list, and when you find the experience you are looking for, click on it. [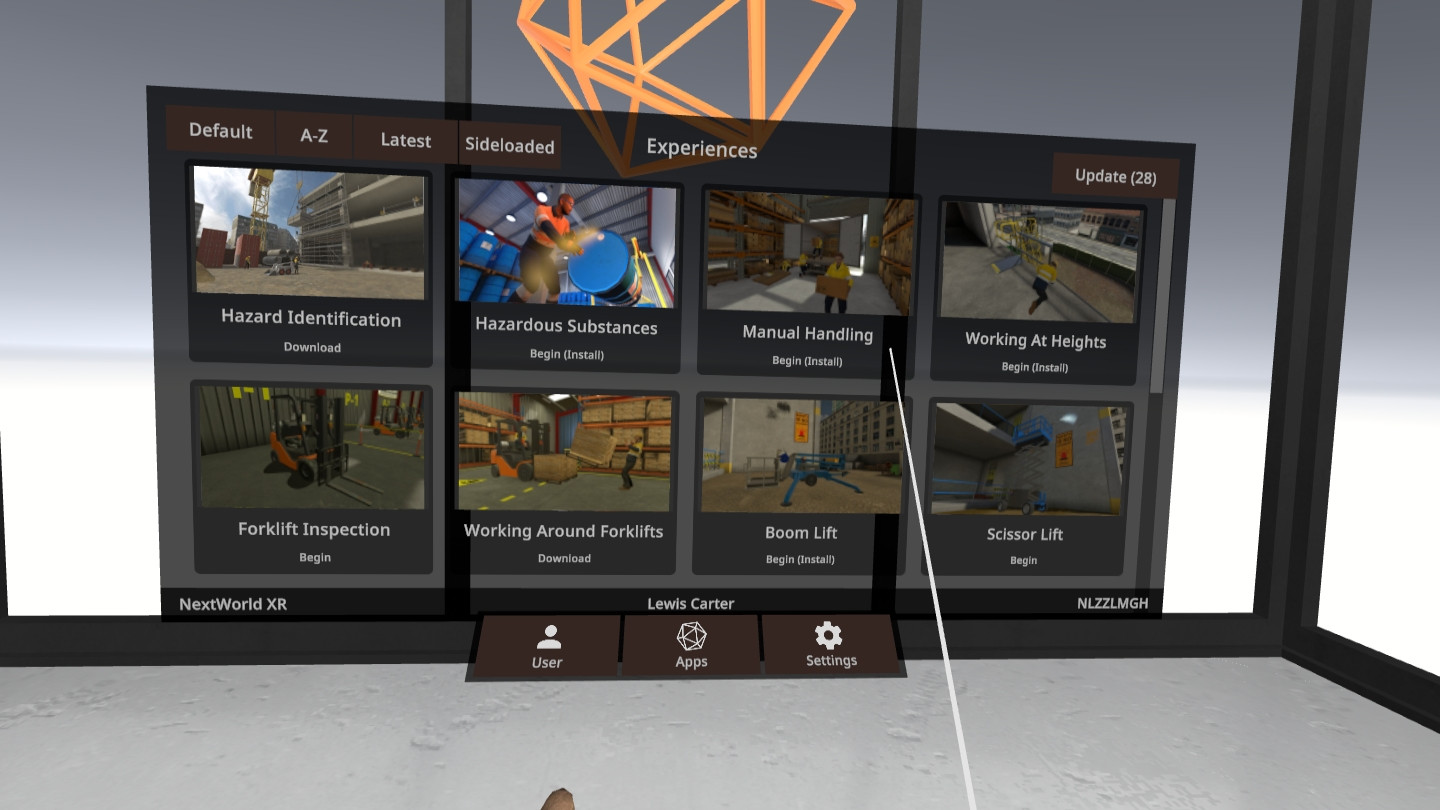](https://docs.nwxr.app/uploads/images/gallery/2023-04/screenshot-com-nextworld-nextworldmenu-2023-04-27-15-25-48-711-634.jpeg)This will launch the experience. Enjoy the training! # How to administer your trainees on device Sometimes you have trainees who don't know their access code. This article will explain how to allow those trainees to still access the training experiences with insights. #### Use the headset as normal Have the trainee follow the steps [described in this article](https://docs.nwxr.app/books/next-world-support/page/accessing-virtual-reality-training-modules "Access training modules") when first wearing the headset. #### Enter the Trainer's code When they have reached the access code page, have them enter your own training code. This access code signifies that you - as a trainer - are logging in. #### Select the correct person from the list of Trainees There will be a list of all your trainees to select from. Use the joystick or scrollbar to scroll through the list and find the correct person and select it. [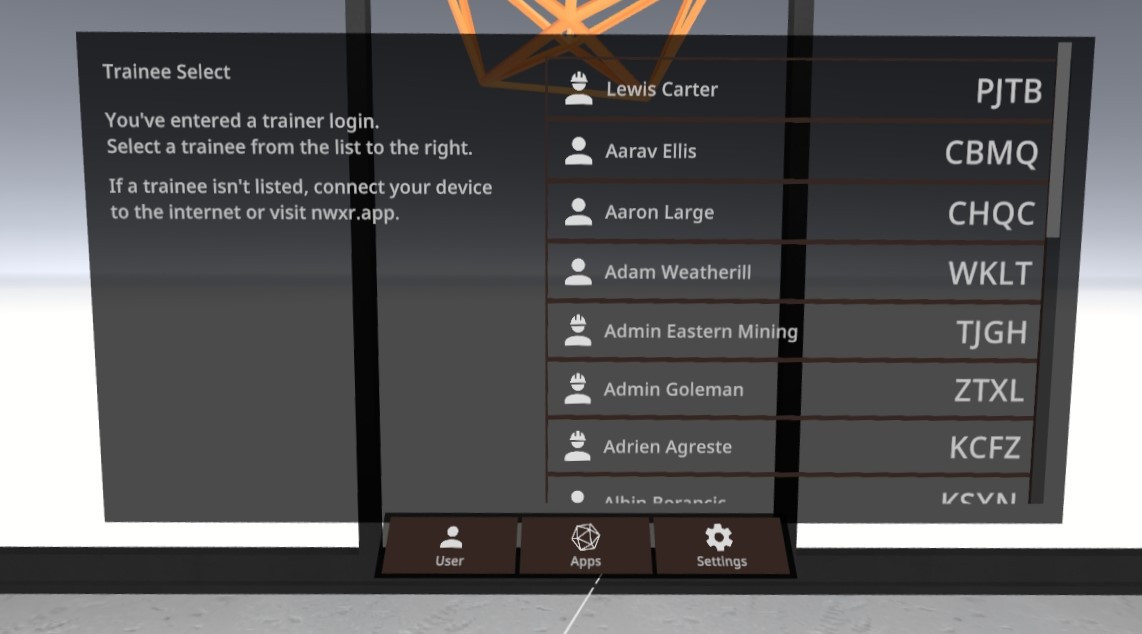](https://docs.nwxr.app/uploads/images/gallery/2023-04/HmIscreenshot-com-nextworld-nextworldmenu-2023-04-27-15-51-51-647-157-cropped.jpeg)When they find their own name, make sure they take note of their code, then select their name to move on. # How to share/screencast your VR view to a screen Screencasting allows a trainer to view what's going on in a VR headset while a trainee is using it. #### Accessing screencasting After turning on the headset and setting the player boundary, press the Pico button on your hand controller to bring up the Pico menu. From there, select the screencasting icon, which will display several options depending on whether you have internet access or not. Let's explore each of these options. #### Casting to a phone or tablet The first option is Cast to TV, which can be used with any device that has access to the Android Play Store. To use this option, download the *Cast for Pico* app from the Play Store on your phone, tablet, or TV, and then connect to the device from your headset by selecting "Connect" after opening the app. This option requires both the headset and the device you are casting to be connected to the same internet network. #### Casting to an Internet Browser The next option is Cast to Browser, which allows you to cast to any device that can open a Chromium-based browser, such as Chrome, Edge, or Brave. However, this option will not work for Safari or Firefox. After selecting this option, copy the IP address displayed on the screen into your internet browser. Again, both the headset and the device you are casting to must be connected to the same internet network. #### Casting using Miracast The final option we will cover is Miracasting, which is an option that does not require an internet connection. Select the icon at the top-right of the screen to see a list of available devices to cast to, such as any Smart TV with Miracasting functionality, or any Windows PC or laptop with the Connect app. If you are trying to Miracast to a Windows PC or laptop, you will first need to check if the Connect app is enabled, and if not, enable it. To connect to a device from your headset, simply select the device from the screen and it will begin casting. # How to troubleshoot connection problems Having issues with your device not connecting? This article goes through some steps to help diagnose and solve the issue. #### Troubleshooting Connections From Agent, you should be able to see the connection status and the time. The connection status should show Connected and the time set to your current time. [](https://docs.nwxr.app/uploads/images/gallery/2023-04/yQiimage.png) If your device isn't connected or your time is incorrect, click the Wi-Fi (middle) button and you'll be taken to the Pico's settings where you can set the Wi-Fi Network and time. Both will need to be correct to connect successfully. ##### Locating Version Information In order to check your software versions and/or last connection time: press the Settings button as shown below. [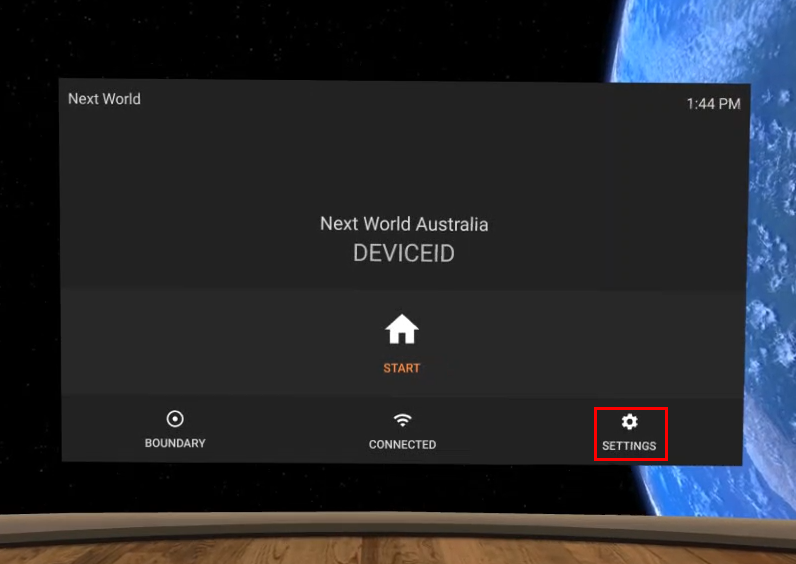](https://docs.nwxr.app/uploads/images/gallery/2023-04/NHkimage.png) Scroll down to **Version**. You can see the last connection time here as well as the Agent and Home versions installed. This will also show you if updates are available for them. [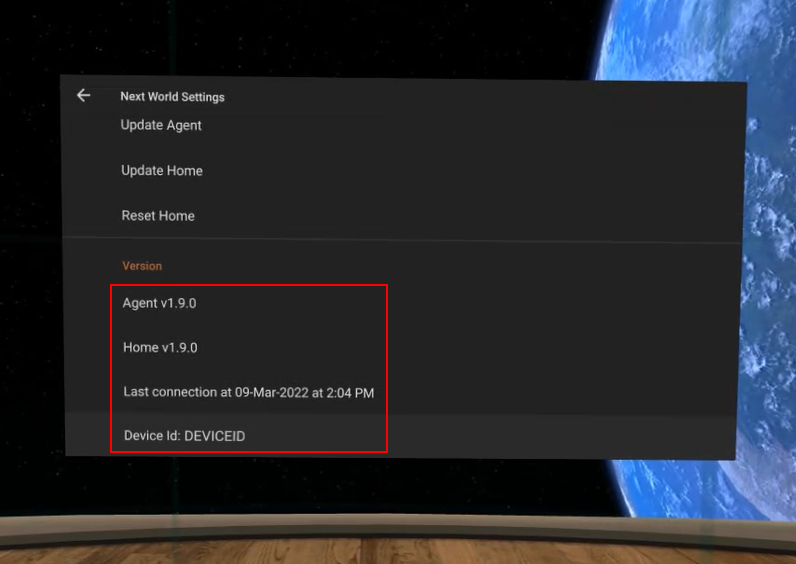](https://docs.nwxr.app/uploads/images/gallery/2023-04/6Dzimage.png) If you have been instructed to send this information to Next World Support, then you can send all the information in a single click! All you have to do is click where you see **Last connection**. You only need to click it once. [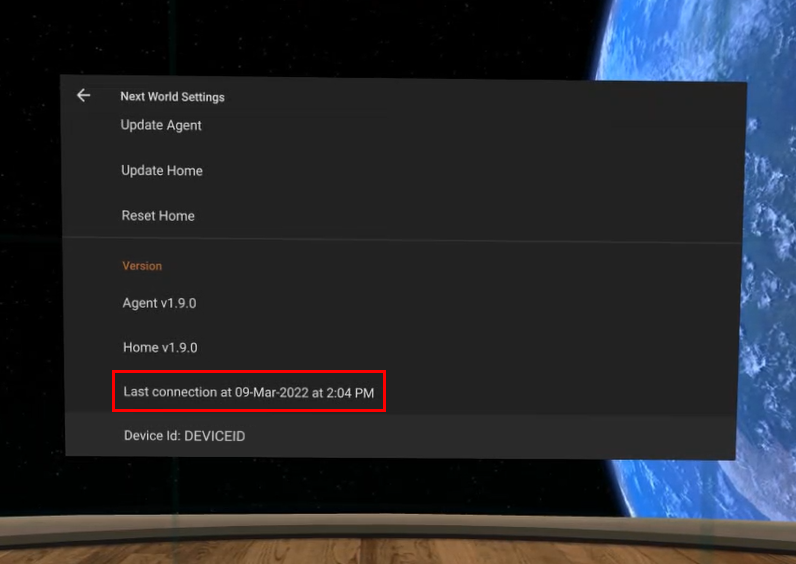](https://docs.nwxr.app/uploads/images/gallery/2023-04/gXdimage.png) The below message will show up, which is verification that the information has been sent through to Next World Support. Contact us to get help with your connection issues. [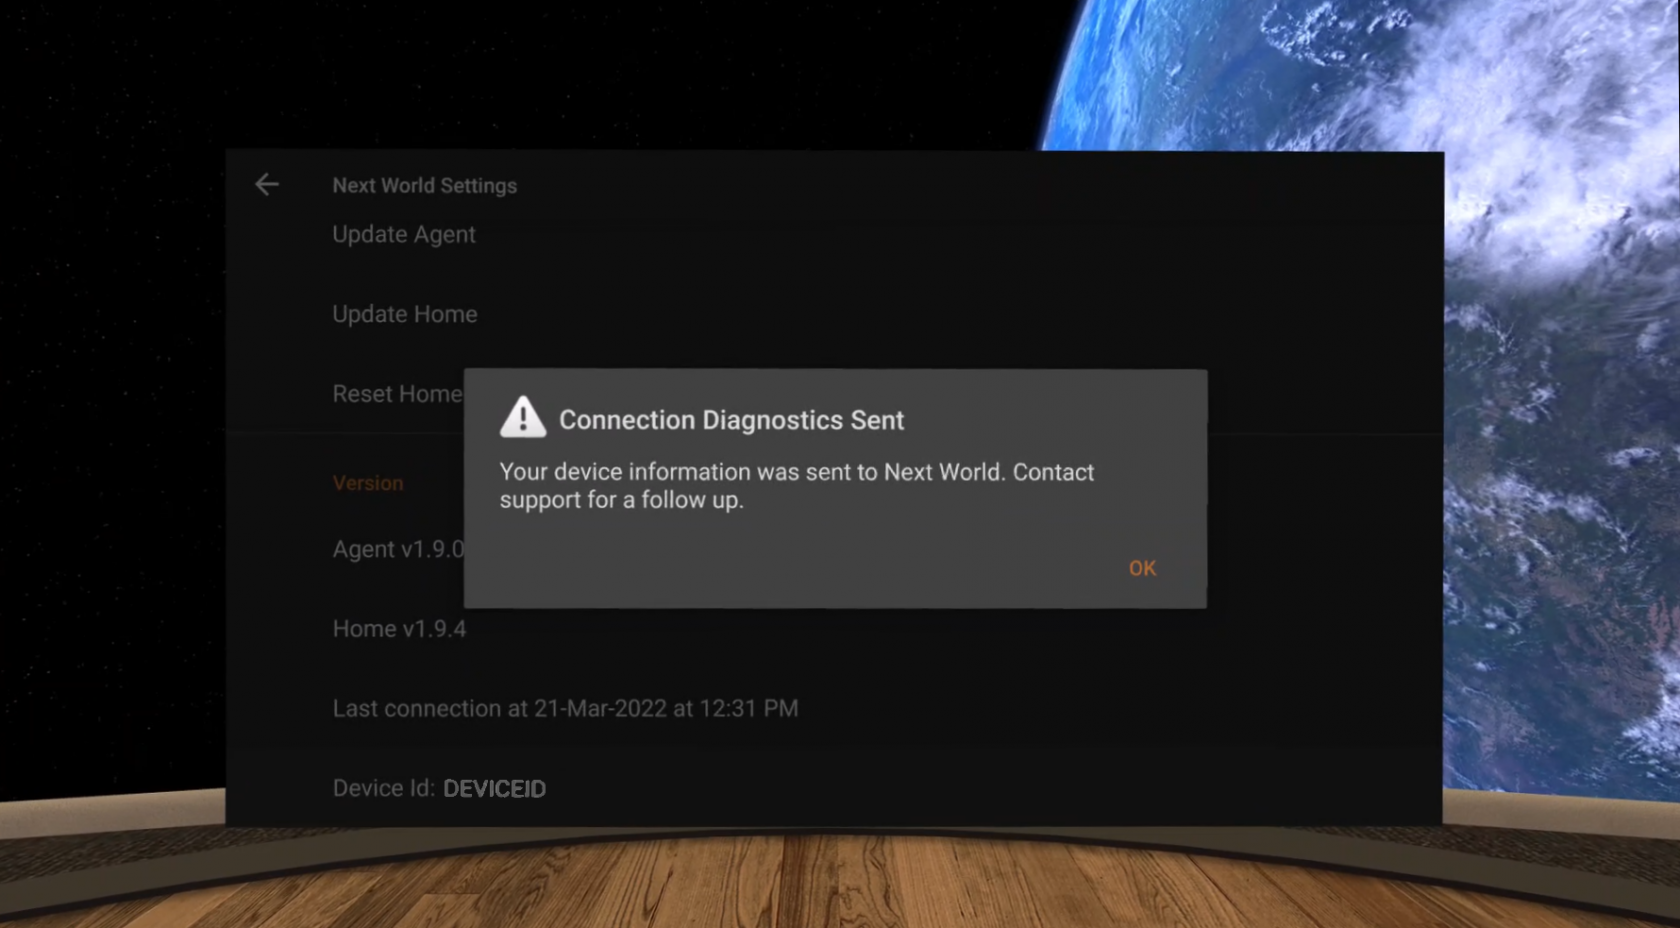](https://docs.nwxr.app/uploads/images/gallery/2023-04/jVoimage.png) # How to find insights from the training undertaken on your headset If you or your trainees have undertaken training on a headset, you'll likely want to view insights and course reporting from within the **Next World Platform Portal**. #### Head to the Next World Platform Portal To access the Portal, point your browser to [http://nwxr.app](http://nwxr.app), for information [read the following article.](https://docs.nwxr.app/books/next-world-support/page/how-to-access-the-next-world-platform-portal "How to access the Next World Platform Portal") From here, you'll want to look at the **Training Insights** page, available in the menu to the left. [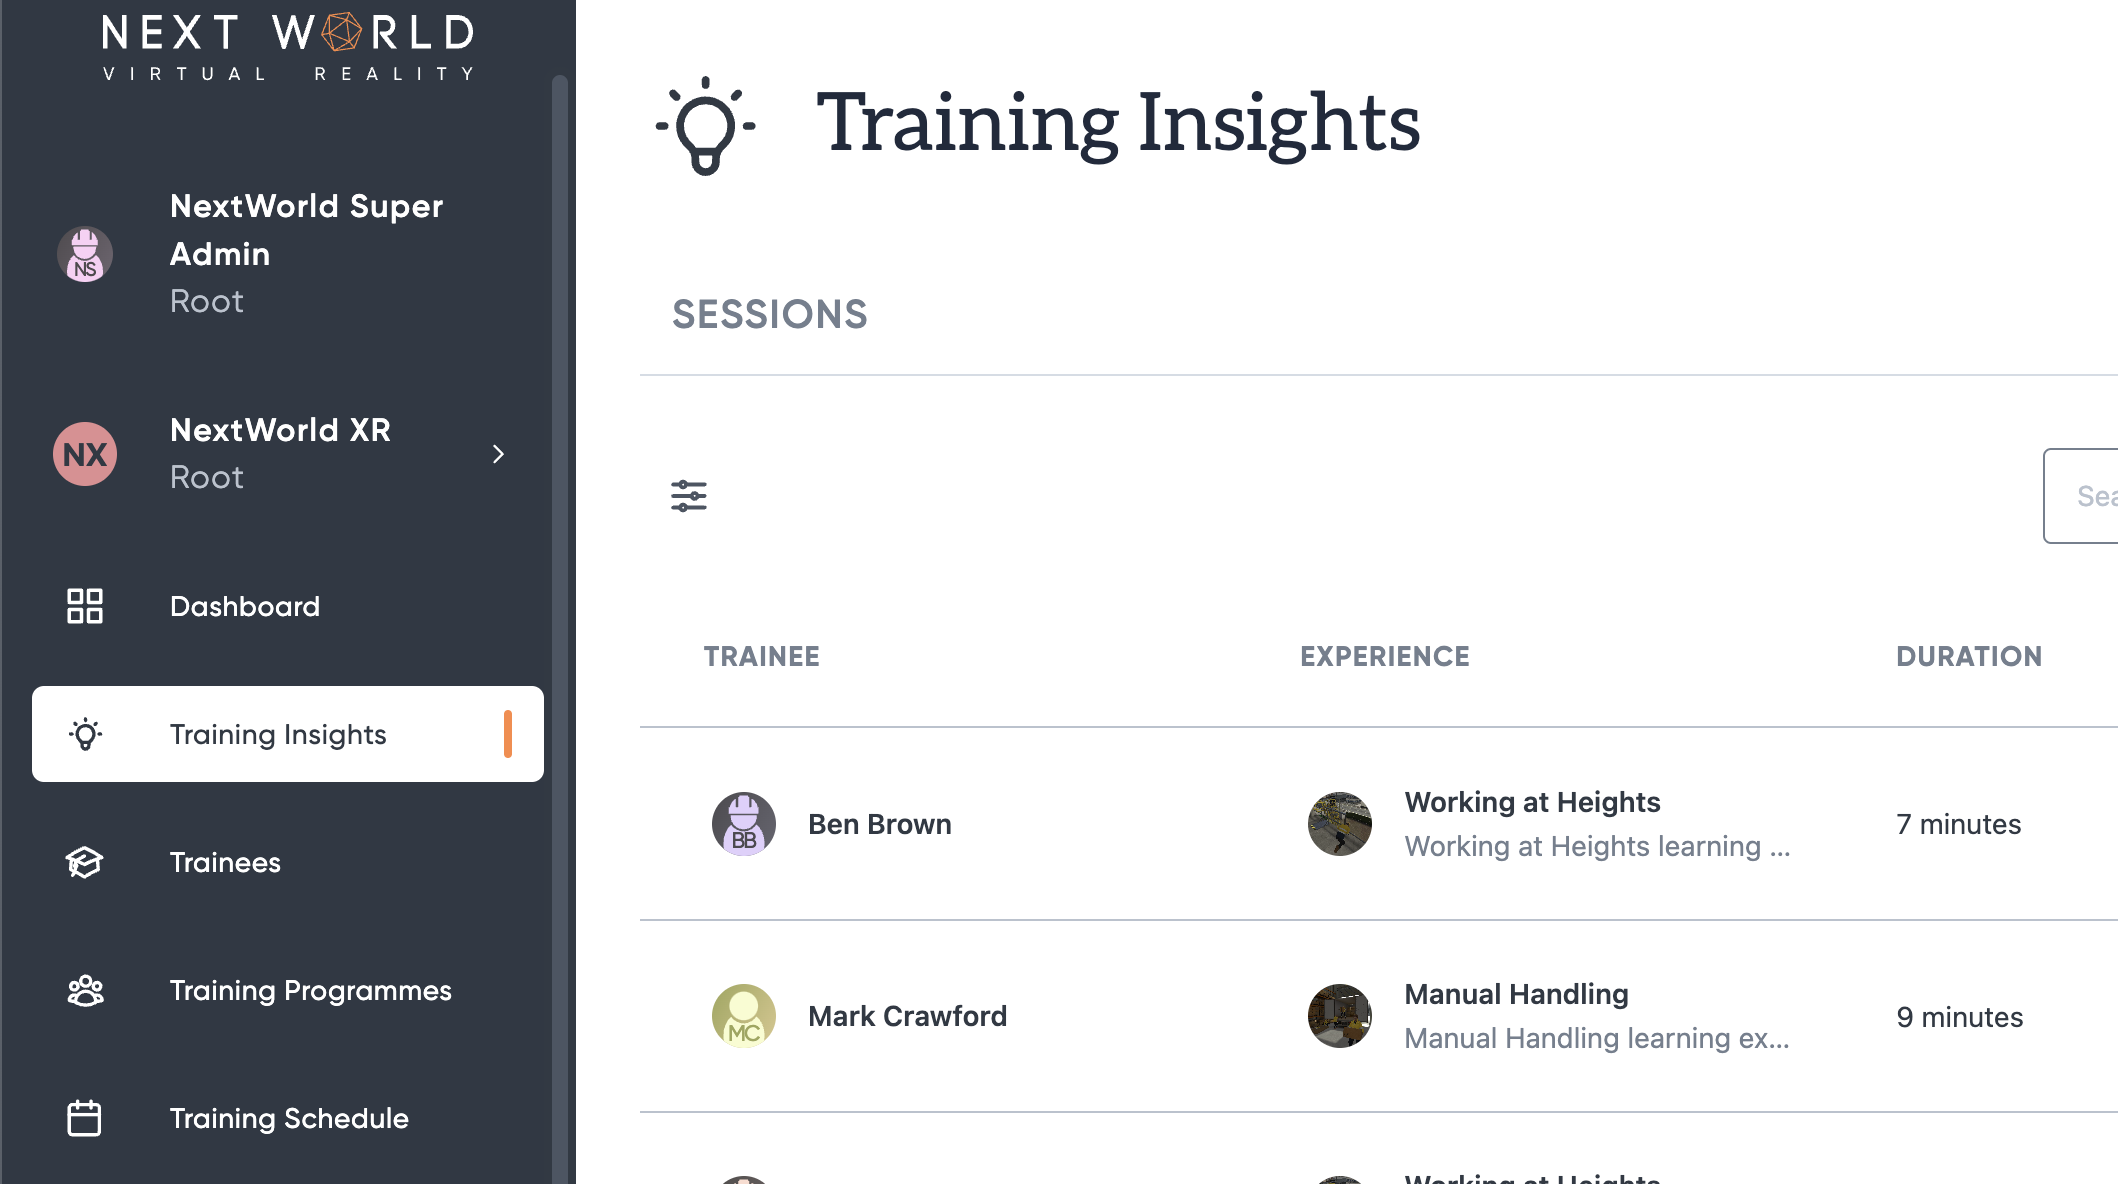](https://docs.nwxr.app/uploads/images/gallery/2023-05/Lqpimage.png) Here there's a list of recent sessions from all of the devices across your division. Click a session in order to view training data. [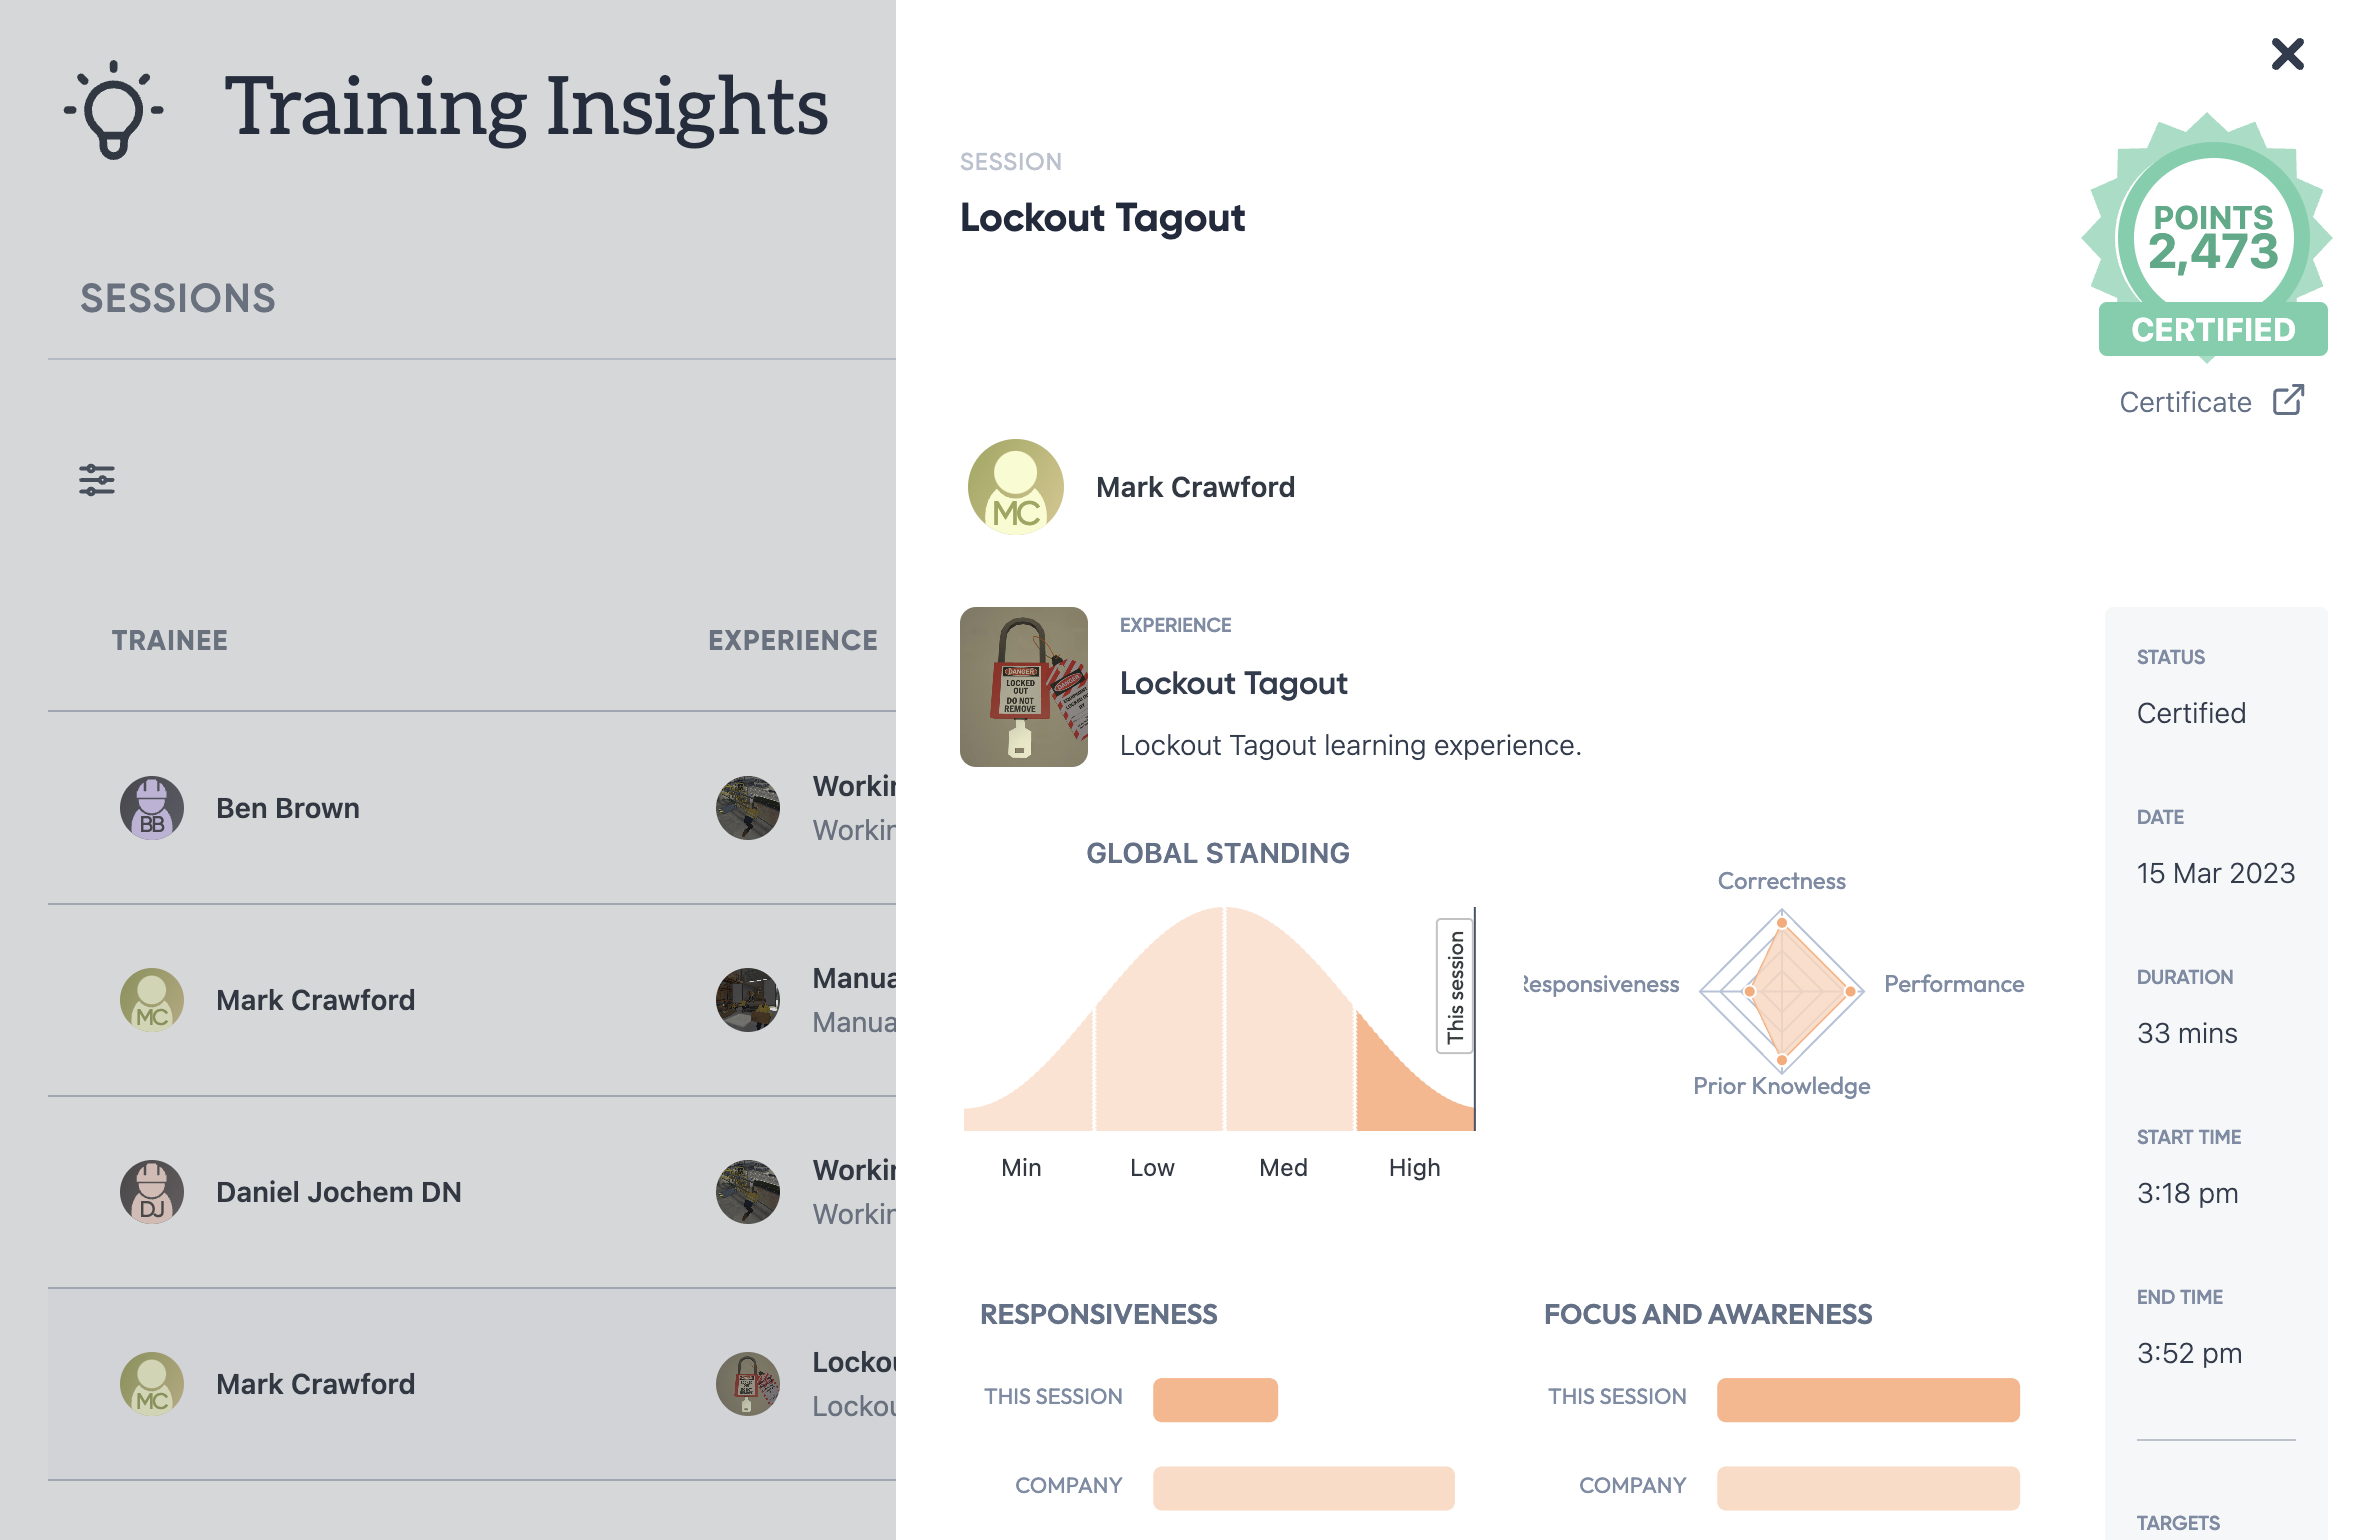](https://docs.nwxr.app/uploads/images/gallery/2023-05/xHXimage.png) #### If you can't find your session If you can't find your session, check subdivisions using the [filters on the sessions table.](https://docs.nwxr.app/books/next-world-support/page/using-filters-in-the-platform-portal-to-control-tables "Using filters in the Platform Portal to control tables") # Reinstall Next World Home Sometimes there may be issues that occur such as a corrupted download of an experience, in which case Next World Home needs to be reset. This article walks you through how to uninstall and reinstall Home.Note: While you will not lose user or headset data, you will be required to re-download all of the experiences if you follow these steps.
#### Go to the Agent If you are logged into Next World Home, access the Home settings by clicking on the **Settings** button. [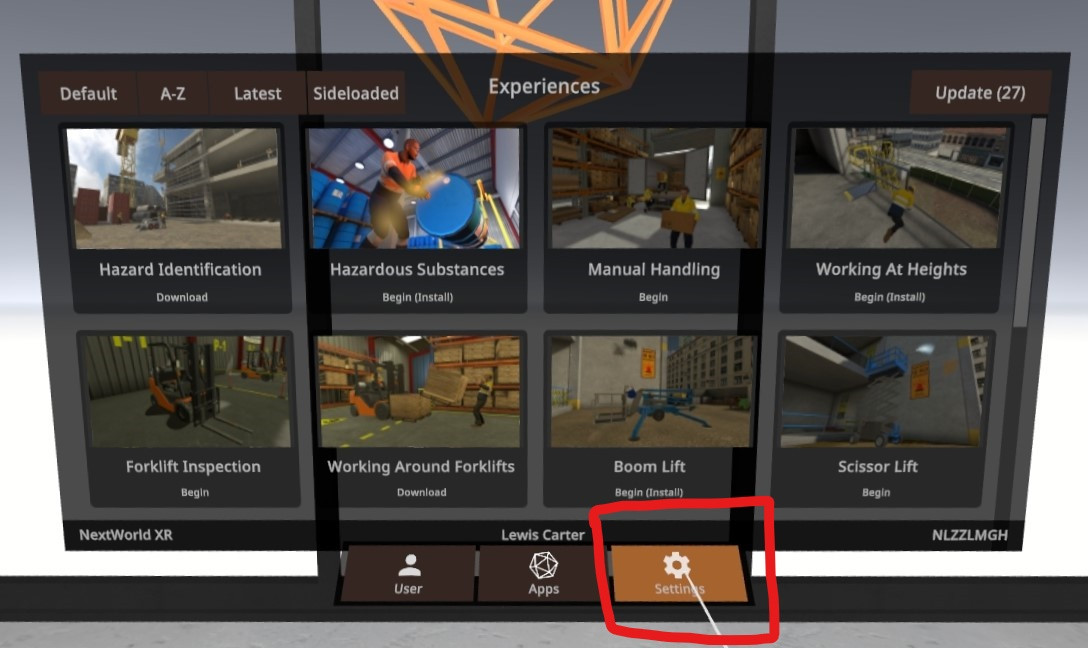](https://docs.nwxr.app/uploads/images/gallery/2023-04/inkedscreenshot-com-nextworld-nextworldmenu-2023-04-28-09-21-18-054-802-cropped.jpg) From this screen, select **Agent**. [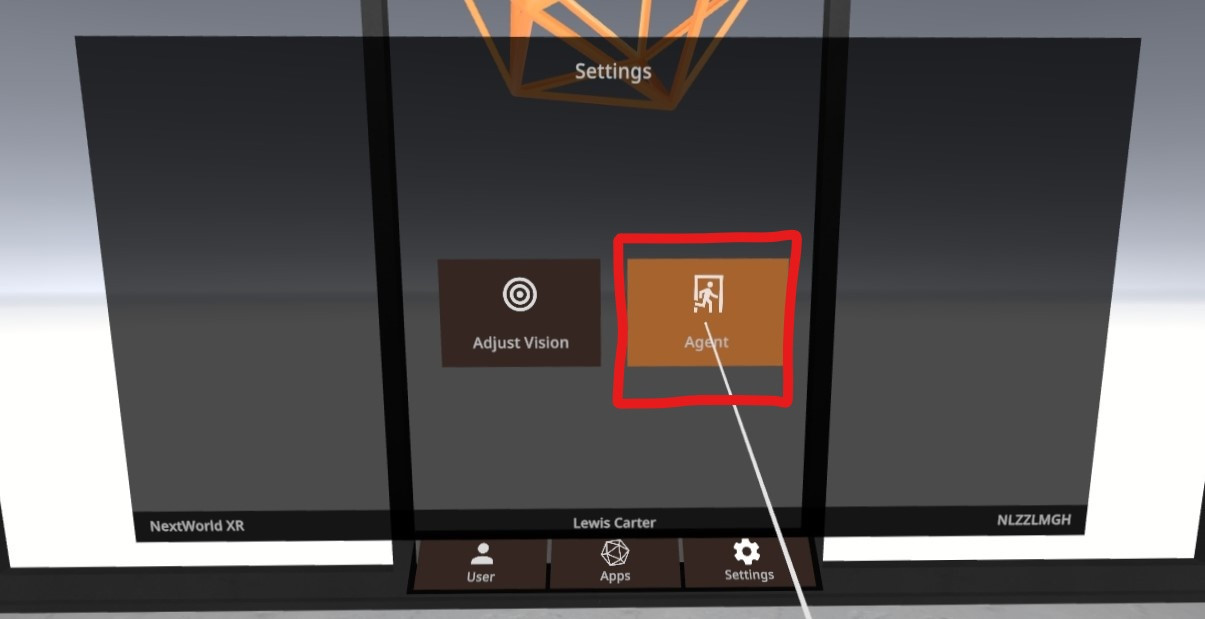](https://docs.nwxr.app/uploads/images/gallery/2023-04/inkedscreenshot-com-nextworld-nextworldmenu-2023-04-28-09-20-54-685-575-cropped.jpg) #### Reset/Uninstall Home From Next World Agent, press the **Settings** button in the bottom-right corner. [](https://docs.nwxr.app/uploads/images/gallery/2023-04/tkyimage.png) This will take you to the Agent Settings screen. Find **Reset Home**, and select it. [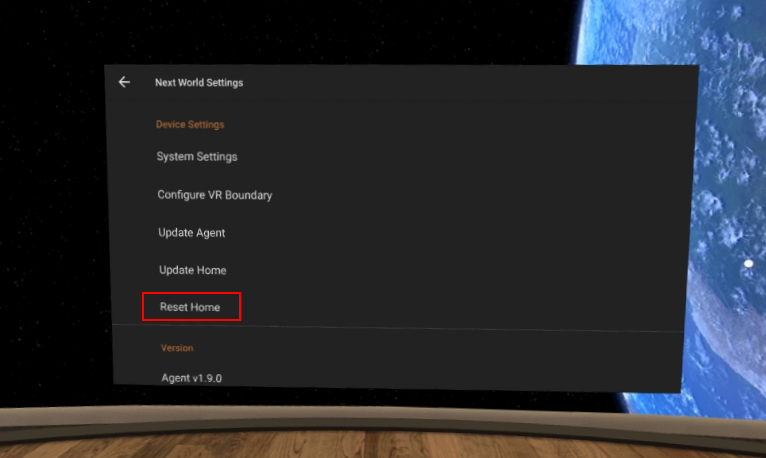](https://docs.nwxr.app/uploads/images/gallery/2023-04/fXSimage.png) You will be asked to confirm you want to uninstall this app. Select **Ok**. [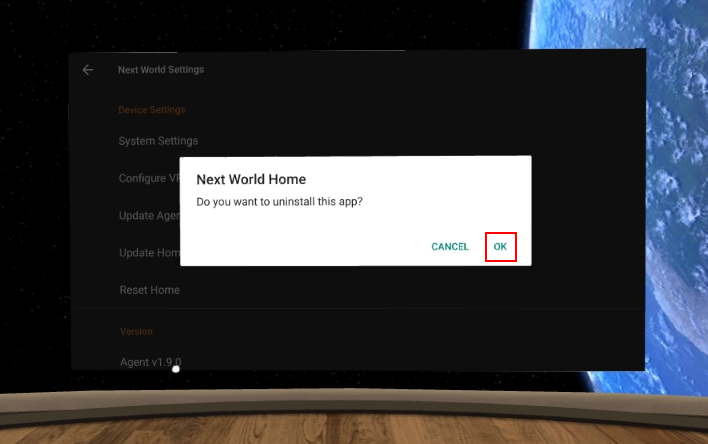](https://docs.nwxr.app/uploads/images/gallery/2023-04/R86image.png) Return to the Next World Agent's main screen by clicking on the back button in the top-left. [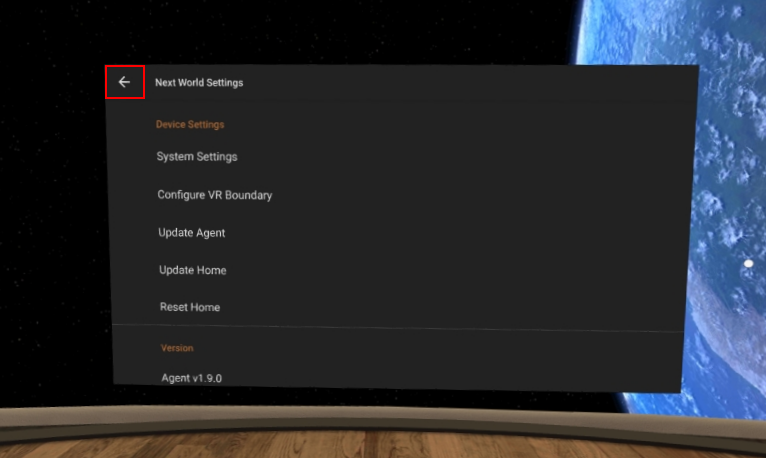](https://docs.nwxr.app/uploads/images/gallery/2023-04/gVjimage.png) #### Install Home You will now be able to install Home again. Click on the **Install Home** button and follow the prompts on screen. [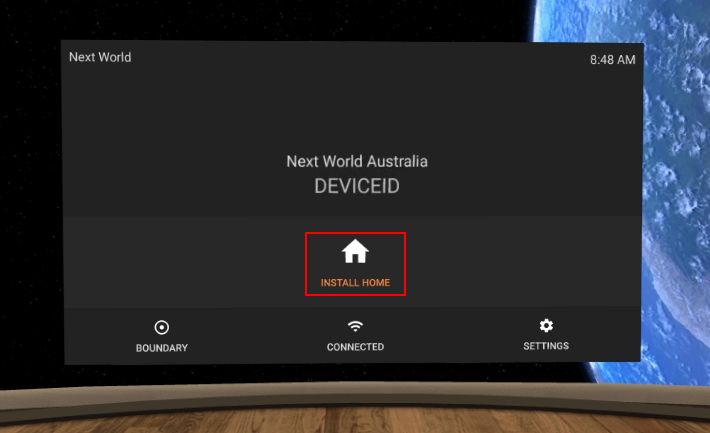](https://docs.nwxr.app/uploads/images/gallery/2023-04/NE6image.png) # Headset tracking doesn't move along with you All Next World experiences give you a full movement experience, where you can not just use your hands in virtual reality but lean forward, backwards, stand-up, and reach down to fully experience the training. Occasionally, an update may disable this functionality. Here is how to turn it back on to get the most out of your training. #### Pico Headsets Click on the **Settings** button in Next World Agent within the Pico headset. [](https://docs.nwxr.app/uploads/images/gallery/2023-04/ye6image.png) Click on **System Settings**. [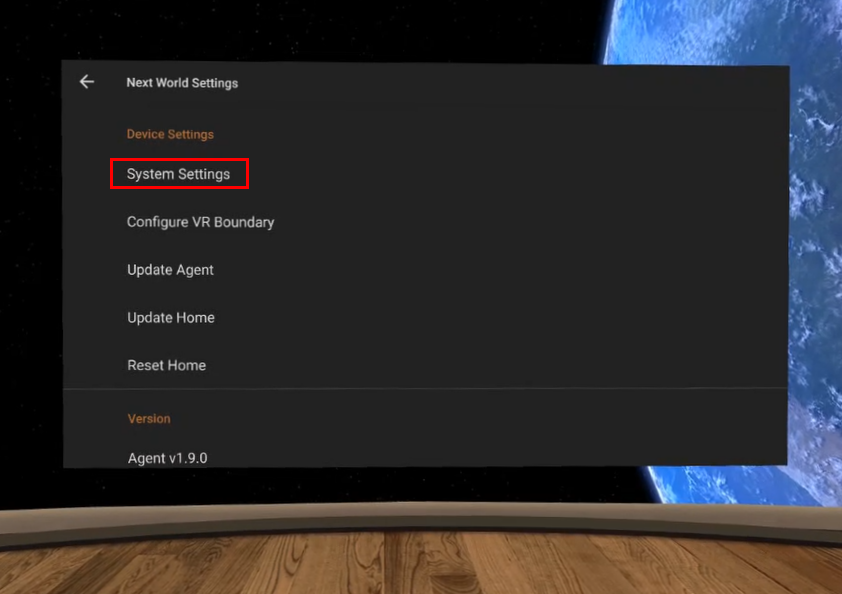](https://docs.nwxr.app/uploads/images/gallery/2023-04/R9Cimage.png) Go to **General** and make sure **Movement Tracking** is turned on. [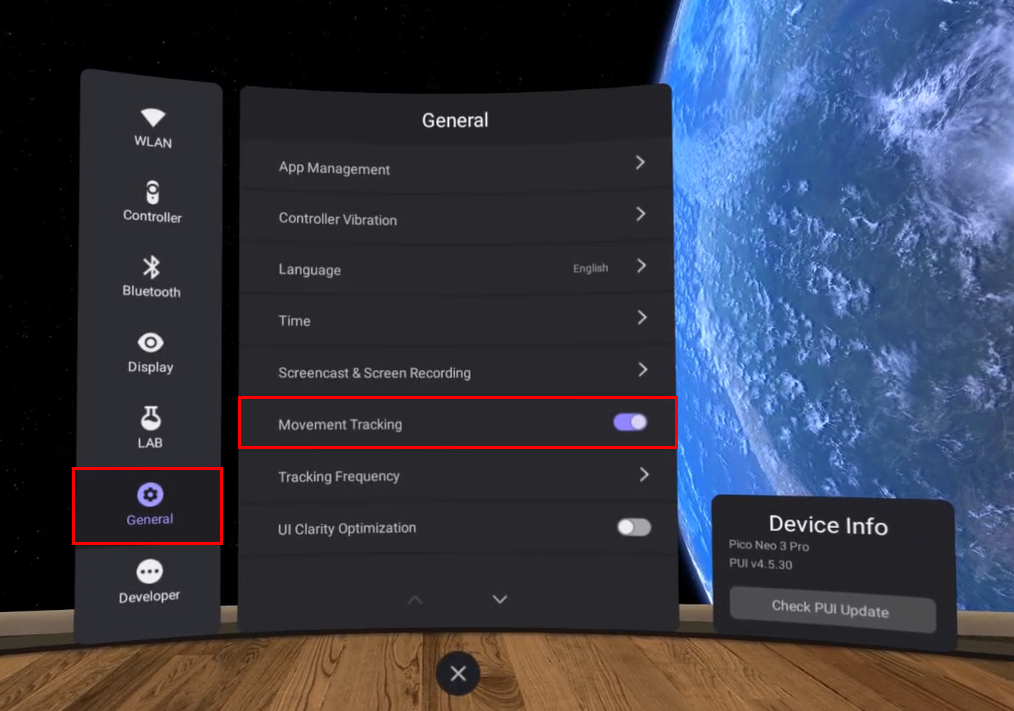](https://docs.nwxr.app/uploads/images/gallery/2023-04/LcQimage.png) If this does not solve your tracking issue, please contact [Next World Support.](mailto:support@nextworldxr.com) # How to setup your controllers If this is the first time your headset is being used, or you are having issues with your controllers, the following is a list of steps and checks you can do to help identify the problem. #### Check for Battery Tags It could be that the tag for the controller's battery has not been removed which would mean the current from the battery is not able to flow. The left side of the left controller or the right side of the right controller can be removed by sliding it (with a little bit of force) towards the bottom of the controller. Check if there is a small white tag on one end of one of the batteries and if so, remove it. #### Test for Dead Batteries If this is not the case, the issue could simply be that the batteries have run out. If you have two spare AA batteries available, you could try replacing the batteries. #### Re-bind the Controller to the headset If this still does not solve the issue, then you may need to bind the controller to the headset again. Follow the instructions below to un-bind and re-bind a controller. Press the **Settings** button on Next World Agent. [](https://docs.nwxr.app/uploads/images/gallery/2023-04/hT5image.png) Press the **System Settings** button. [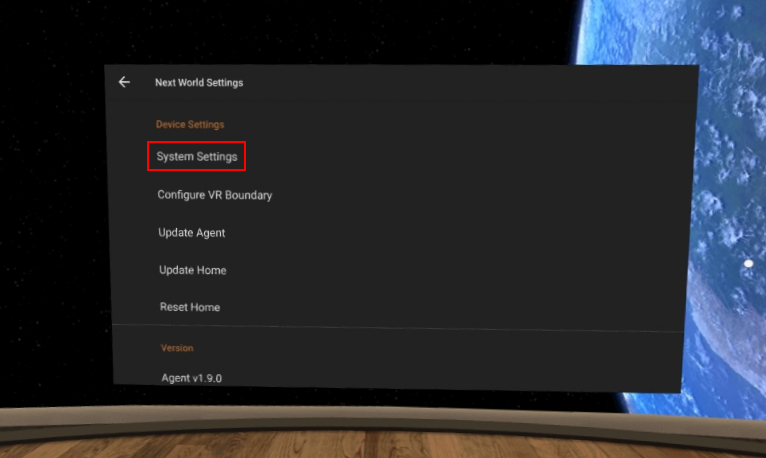](https://docs.nwxr.app/uploads/images/gallery/2023-04/WsDimage.png) Go to **Controller** and then press either **Unbind the left controller** if you are having issues with your left controller or **Unbind the right controller** if it is the right controller that is having issues. [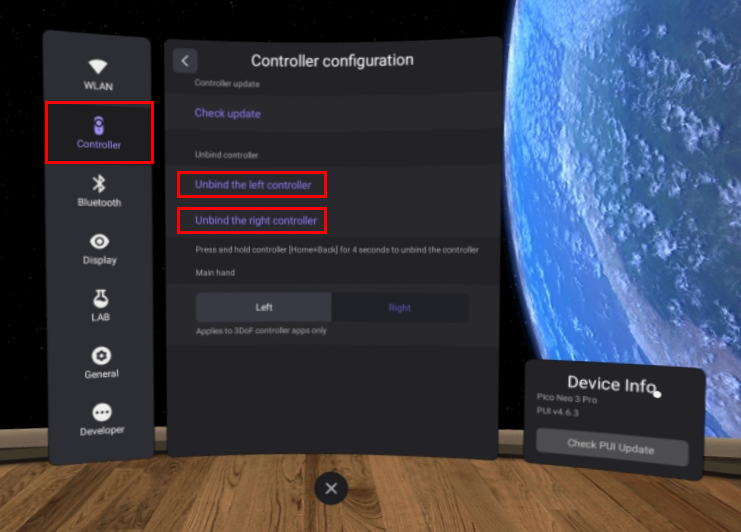](https://docs.nwxr.app/uploads/images/gallery/2023-04/1E6image.png) Now press **Add controller** for the controller you unbound and follow the instructions displayed in green to re-bind your controller. [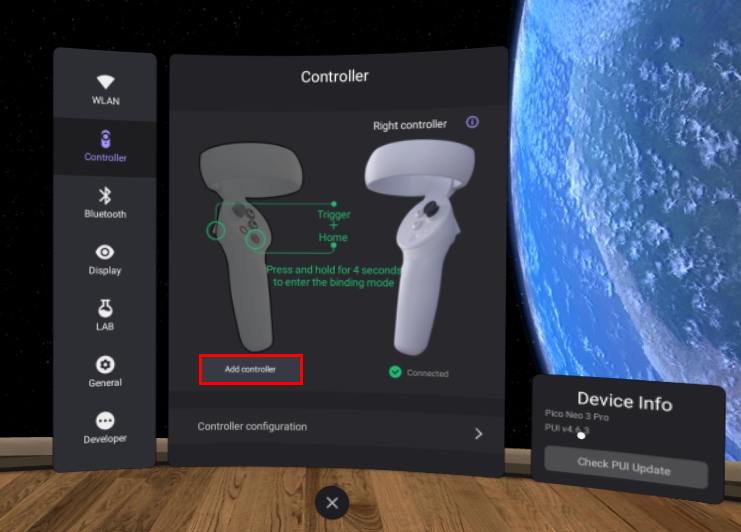](https://docs.nwxr.app/uploads/images/gallery/2023-04/C7qimage.png) Both controllers should now be working, with **Connected** appearing on screen below each of the controllers. [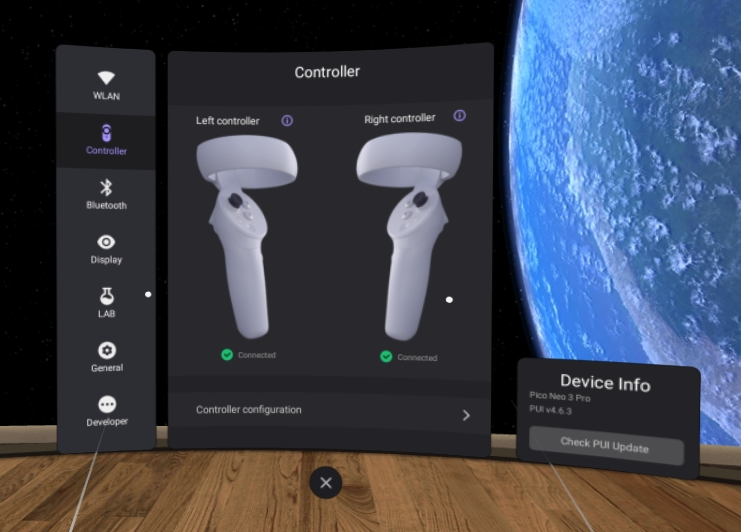](https://docs.nwxr.app/uploads/images/gallery/2023-04/7iHimage.png) If none of these troubleshooting steps solved the issue you are having with the controller, please send [Next World Support ](mailto:support@nextworldxr.com)an email stating you have tried all the possibilities in this article, and we will assist you further. # How to Access Other VR Applications #### How to Access Non-Next World Applications The Next World software natively runs in kiosk-mode, meaning it only allows one application (Next World Home) to run. However, if you need to access other Apps installed on your device, you can do so by following the below steps: 1. From the main agent screen, select the **Settings** button on the bottom right to go to Next World Agent's settings 2. Scroll down and select **System Apps** 3. Click on **Appmanager** and select "yes" to launch. This will show you all of the currently installed Apps on your device To go back to the Next World Agent, select **Back** or **Exit** on the bottom navigation buttons until your reach the home screen. # Screencasting to an Android Device Completely Offline The below steps will walk you through how to set up a hotspot on your Android device so that you can screencast your Pico to your Android device completely offline. ##### Step 1. Turn off mobile data 1. Open the "Settings" app on your Android device. You can usually find it in the app drawer or by swiping down and tapping the gear-shaped Settings icon in the notification shade. 2. In the Settings app, look for the "Network & internet" or "Connections" section (the name might vary depending on your device’s manufacturer and Android version). 3. Within this section, you should see "Mobile data”, "Data usage", or similar options. Tap on it to access the mobile data settings. 4. On the mobile data settings page, you'll see a toggle switch or checkbox to enable or disable mobile data. Tap on the switch or uncheck the box to turn off mobile data. 5. A confirmation dialog may appear. Tap "OK" or "Disable" to confirm the action. ##### Step 2. Turn on the hotspot 1. Within the "Network & internet" or "Connections" section, look for the "Hotspot & tethering" or "Mobile hotspot & tethering" option, and tap on it. 2. You should see a toggle switch or an option labeled "Mobile Hotspot," "Portable Hotspot," or "Tethering." Tap on the toggle switch or the option to turn on the hotspot.**Do not** **turn off** (or **disable**) the **Wi-Fi/WLAN** because **Hotspot** needs the **Wi-Fi/WLAN** to work.
##### Step 3. Connect your VR Headset to the Mobile Hotspot of your Android device 1. Within Next World Agent, go to its settings and press on the first option (“Configure Connection”). 2. Select the mobile hotspot of your Android device ##### Step 4. Screen cast to your browser 1. Press the Pico button on your controller to open the Pico menu in your headset. 2. Press the “Screencast” Icon on the left. 3. Choose the “Cast to Browser” option in the middle. 4. Type the Screencast web address shown on your headset to your mobile device’s web browser. 5. Click the “Start Screencast” button on your mobile device’s web browser. 6. A dialog will open in your headset requesting permission to allow Screencast. Select the “Allow” button. ##### All set. Your headset will now screencast to your Android device completely disconnected from the internet. # Screencasting to an Apple Device Completely Offline The below steps will walk you through how to set up a hotspot on your Apple device so that you can screencast your Pico to your Apple device completely offline. ##### Step 1. Turn off mobile data 1. Unlock your iOS device and find the "Settings" app on the home screen. The Settings app icon looks like a gear. 2. In the Settings app, scroll down and look for the "Cellular" or "Mobile Data" option. The name may vary depending on your iOS version and region. 3. You'll see a toggle switch next to "Cellular Data" or "Mobile Data." Tap on the toggle switch to turn off mobile data. When the toggle switch is in the off position, it will be grayed out. 4. A pop-up message may appear to confirm that you want to turn off mobile data. Tap "Turn Off" to confirm. ##### Step 2. Turn on the hotspot 1. In the Cellular or Mobile Data settings, you'll see an option called "Personal Hotspot" or "Mobile Hotspot." Tap on it to access the Personal Hotspot settings. 2. On the Personal Hotspot screen, you'll see a toggle switch next to "Personal Hotspot" or "Allow Others to Join". Tap on the toggle switch to turn on the hotspot. The switch should turn green or show "On" when the hotspot is active.**Do not** **turn off** (or **disable**) the **Wi-Fi** because **Hotspot** needs the **Wi-Fi** to work.
##### Step 3. Connect your VR Headset to the Mobile Hotspot of your Apple device 1. Within Next World Agent, go to its settings and press on the first option (“Configure Connection”). 2. Select the mobile hotspot of your Apple device ##### Step 4. Screen cast to your browser 1. Press the Pico button on your controller to open the Pico menu in your headset. 2. Press the “Screencast” Icon on the left. 3. Choose the “Cast to Browser” option in the middle. 4. Type the Screencast web address shown on your headset to your mobile device’s web browser. 5. Click the “Start Screencast” button on your mobile device’s web browser. 6. A dialog will open in your headset requesting permission to allow Screencast. Select the “Allow” button. ##### All set. Your headset will now screencast to your Apple device completely disconnected from the internet. # Screencasting to a Windows Device Completely Offline The below steps will walk you through how to set up a hotspot on your Windows device so that you can screencast your Pico to your Windows device completely offline. ##### Step 1. Turn on Mobile Hotspot 1. Press the "Windows + I" keys on your keyboard to open the Settings app. 2. In the Settings window, select "Network & Internet" from the available options. 3. On the left pane, choose "Mobile hotspot." 4. In the Mobile hotspot section, toggle the switch to turn on "Share my Internet connection with other devices." ##### Step 2. Disconnect From Wi-Fi Network 1. Look at the bottom-right corner of your screen, where you'll find the system tray and the network icon (it looks like Wi-Fi signal bars or a computer monitor with wireless signals). 2. Click on the network icon once. A list of available Wi-Fi networks should appear. 3. From the list, locate and click on the Wi-Fi network to which you are currently connected. It will have a checkmark or say "Connected" next to it. 4. Click on the "Disconnect" button for the selected network. This will disconnect your computer from the Wi-Fi network. 5. Uncheck “Connect Automatically” to keep your computer not connected to any Wi-Fi network. 6. Try opening a website on your browser to confirm that your computer doesn’t have the internet.**Do not** **turn off** or **disable** the **Wi-Fi adapter** because **Hotspot** needs the **Wi-Fi adaptor** to work.
##### Step 3. Connect your VR Headset to the Mobile Hotspot of your Windows device 1. Within Next World Agent, go to its settings and press on the first option (“Configure Connection”). 2. Select the mobile hotspot of your Windows device ##### Step 4. Screen cast to your browser 1. Press the Pico button on your controller to open the Pico menu in your headset. 2. Press the “Screencast” Icon on the left. 3. Choose the “Cast to Browser” option in the middle. 4. Type the Screencast web address shown on your headset to your mobile device’s web browser. 5. Click the “Start Screencast” button on your mobile device’s web browser. 6. A dialog will open in your headset requesting permission to allow Screencast. Select the “Allow” button. ##### All set. Your headset will now screencast to your Windows device completely disconnected from the internet. # How Do I Find My Pico Device's MAC Address *Your IT department may request you to find the MAC address of the Pico you use. In this case, it is reasonably easy to view it to then pass along to your IT department.* 1. Within Next World Agent on the headset, click on the connection button down the bottom.  2. Scroll right down to the bottom of the WLAN settings. You will see an option "Add Network". Click this option.  3. Scroll right down to the bottom and you will see an option called "Wi-Fi preferences". Click this button.  4. Click on "Advanced" and you will see one of the options is "MAC address". Copy it down and send it to the relevant person in your IT department.  # How Do I Find My Meta Device's MAC Address *Your IT department may request you to find the MAC address of the Meta device you use. In this case, it is reasonably easy to view it to then pass along to your IT department.* 1. Within Next World Agent on the headset, click on the connection button down the bottom. [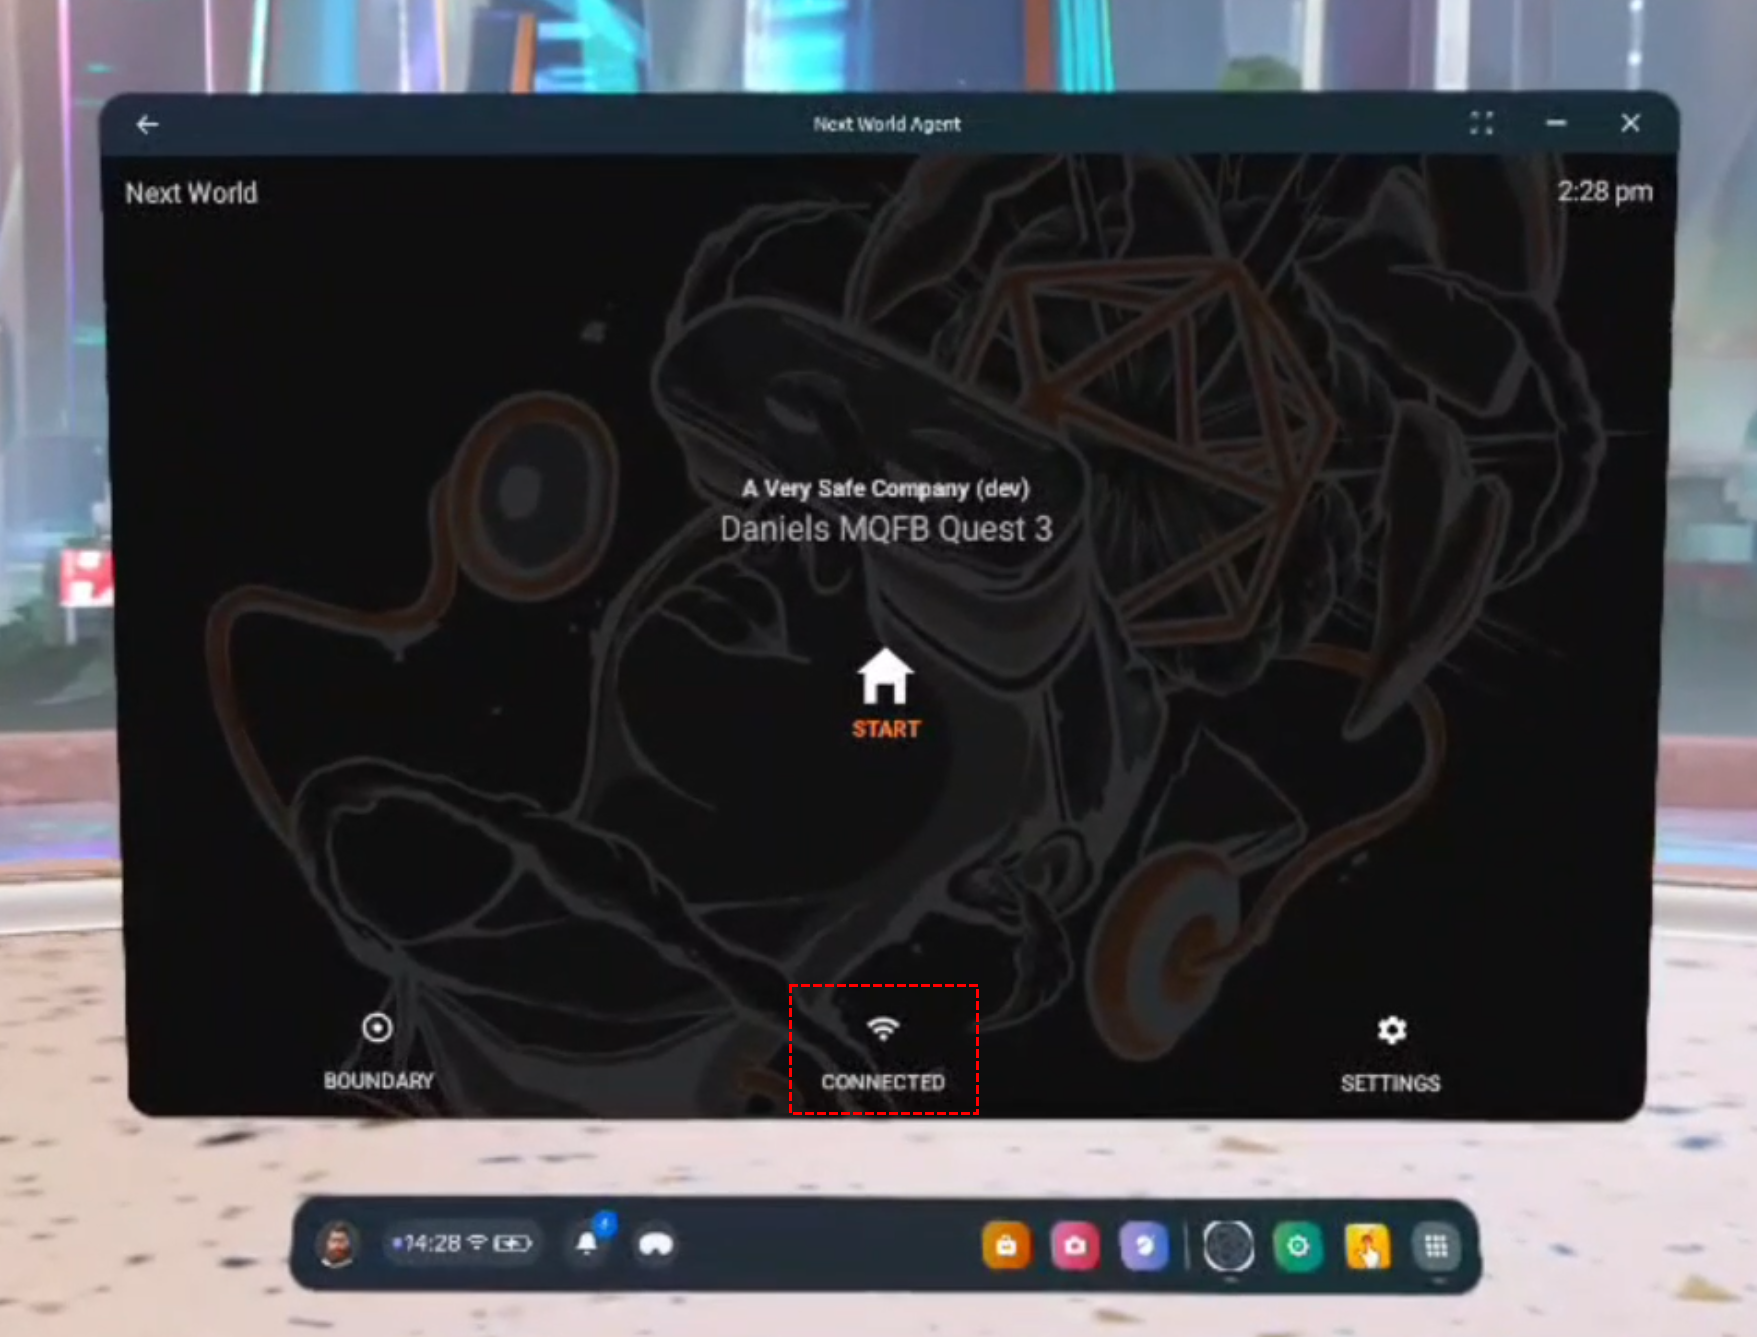](https://docs.nwxr.app/uploads/images/gallery/2025-01/1.png) 2. A list of Wi-Fi connections will appear, click on the one your device is connected to. [](https://docs.nwxr.app/uploads/images/gallery/2025-01/2.png) 3. Scroll down until you see an option titled 'Privacy'. If it says **Use randomised MAC (default)** then continue to step 4, otherwise if it says **Use device MAC** then skip to step 5. [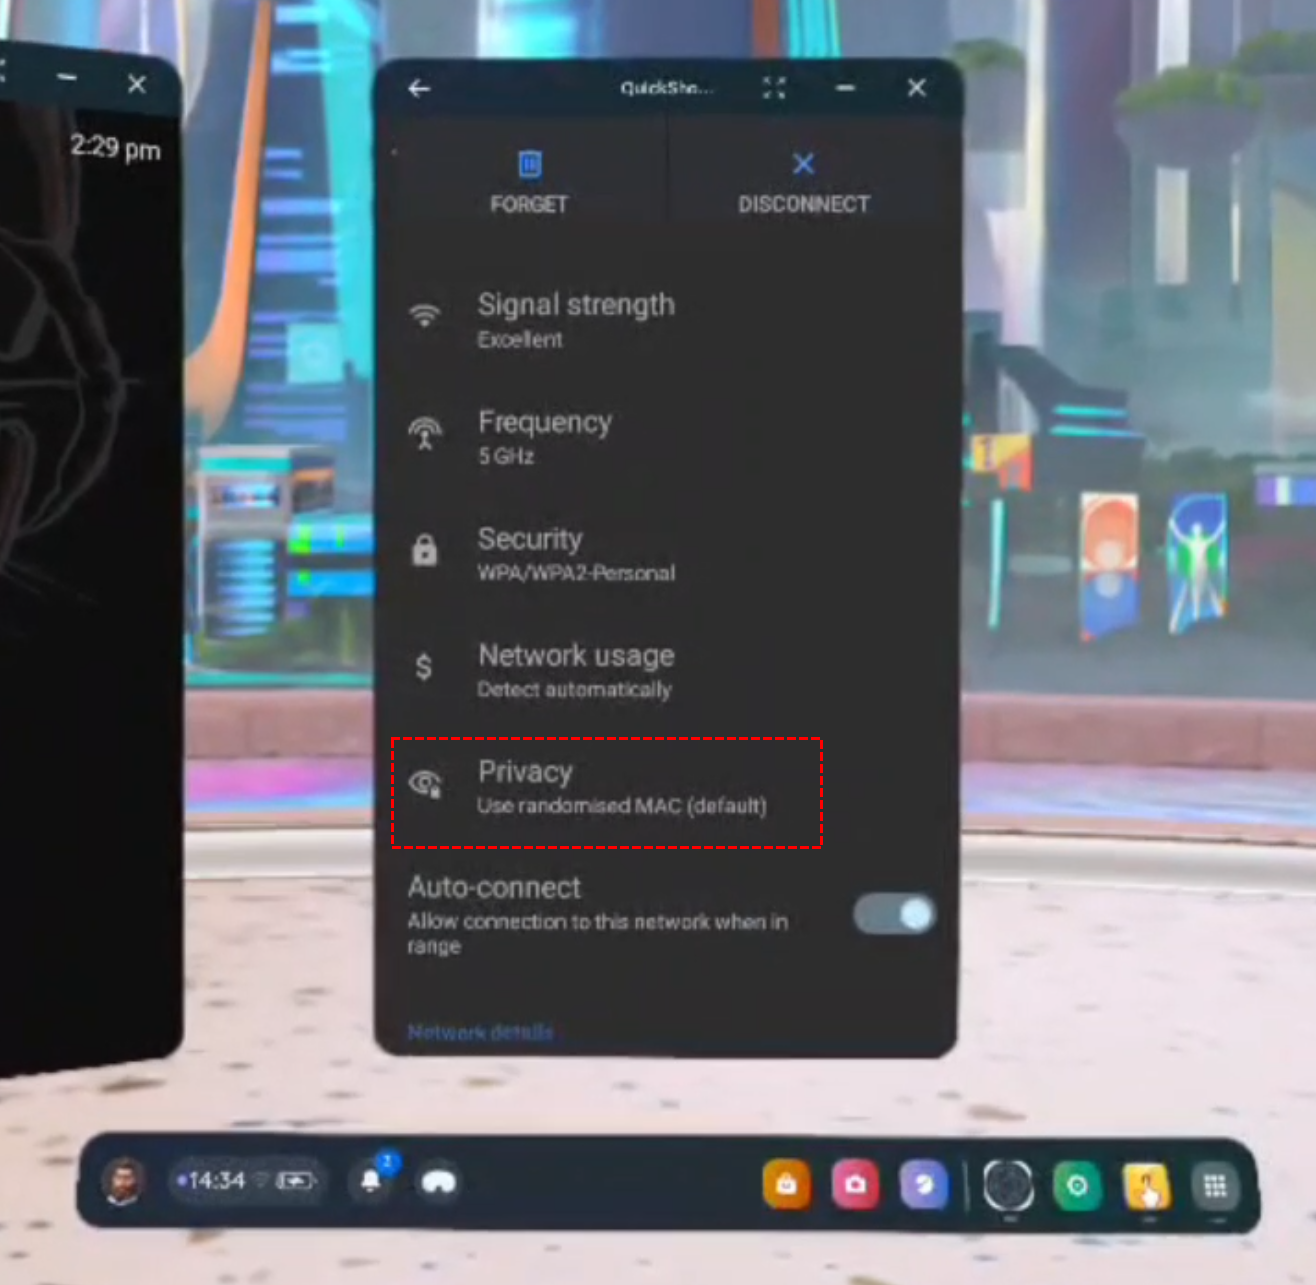](https://docs.nwxr.app/uploads/images/gallery/2025-01/3.png) 4. Clicking on the **Privacy** option highlighted above, a small menu will appear as shown below. Select **Use device MAC**. [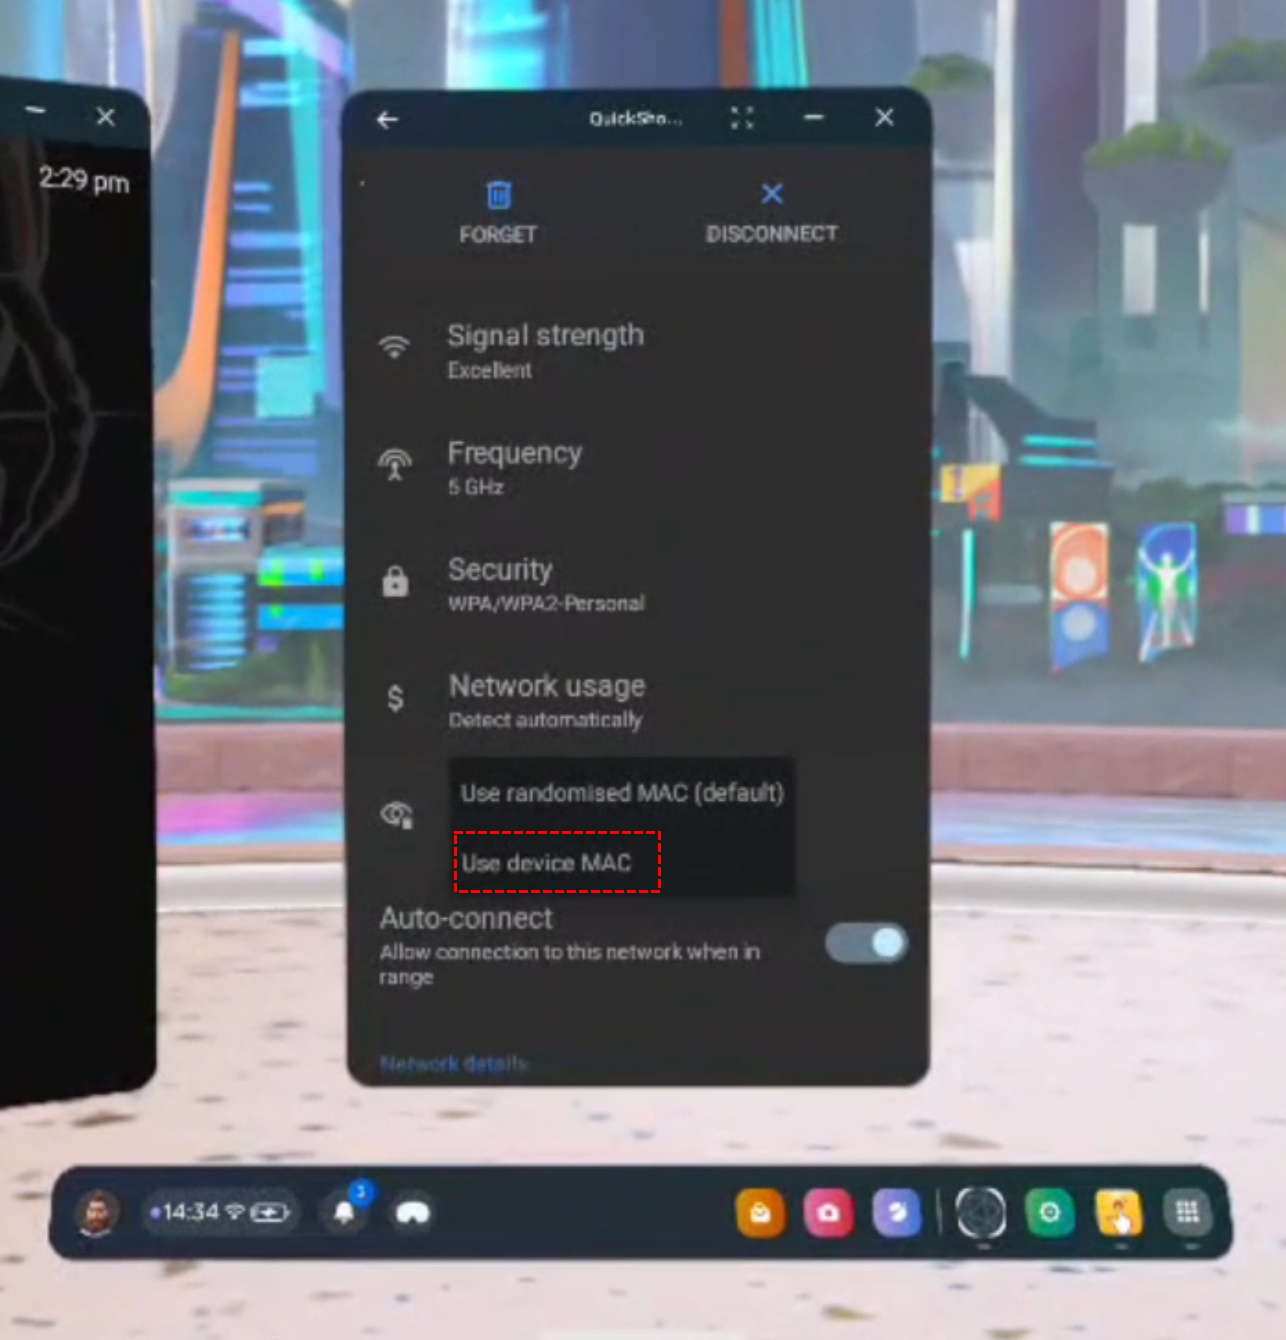](https://docs.nwxr.app/uploads/images/gallery/2025-01/4.png)[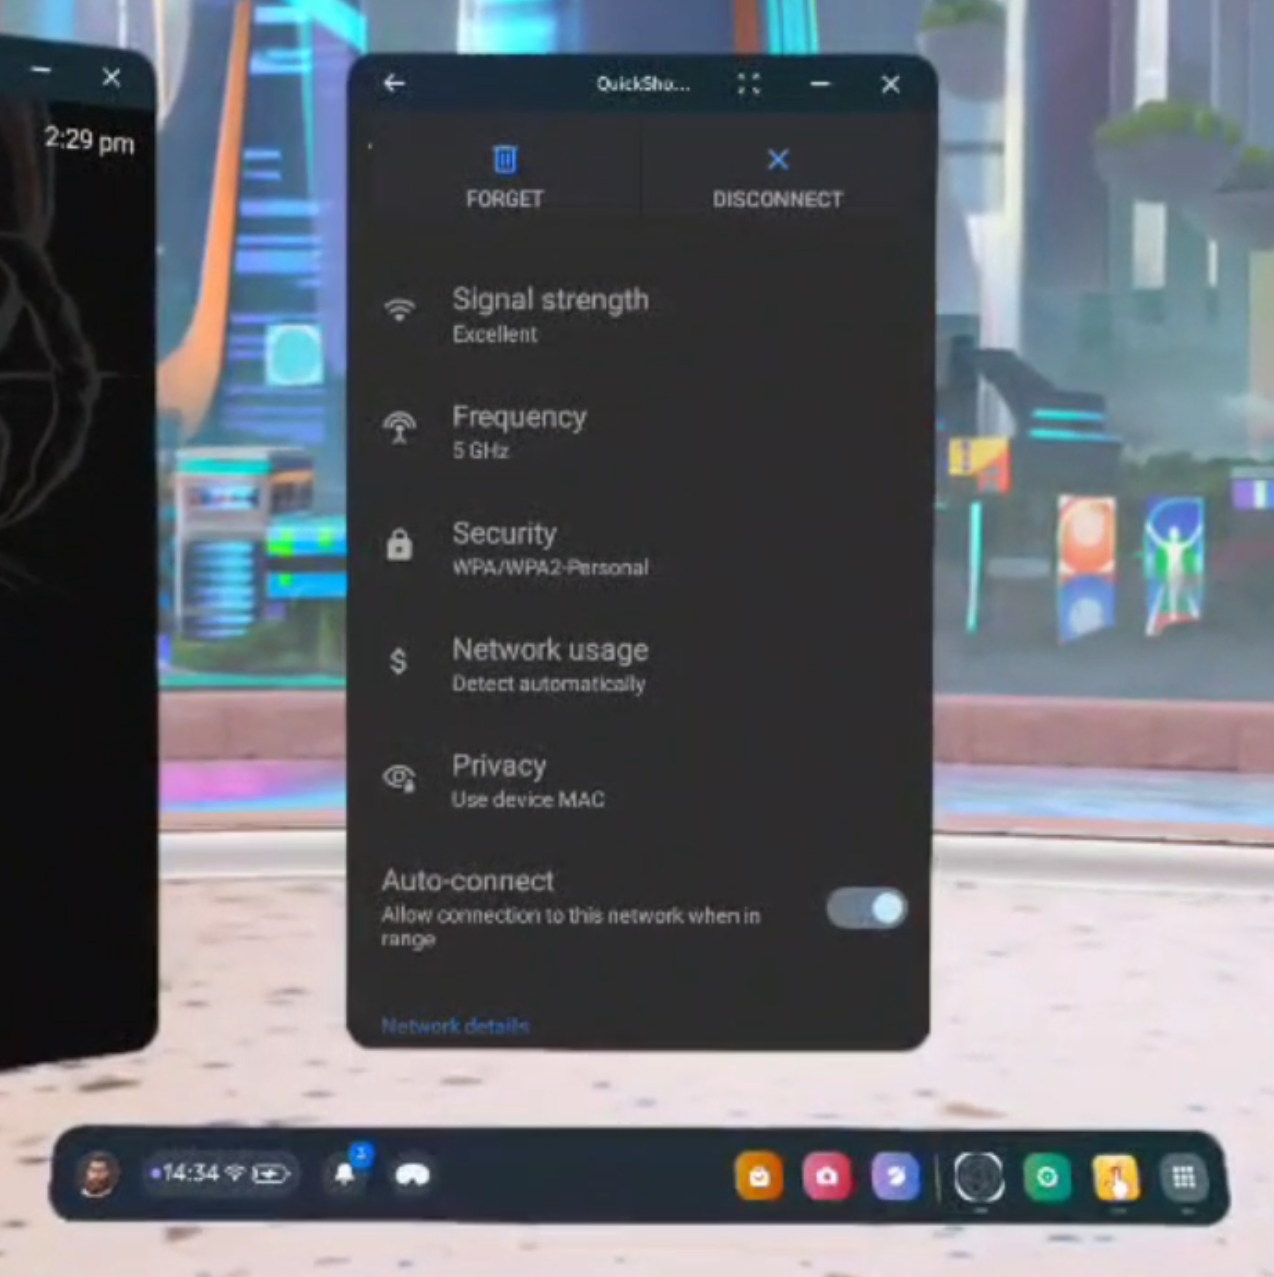](https://docs.nwxr.app/uploads/images/gallery/2025-01/5.png) 5. Now scroll down until you see an option that says **Device MAC address**. on the line below the title you will see a MAC address, for example in the below image the device's MAC address is **c0:dd:8a:3f:1a:40**. [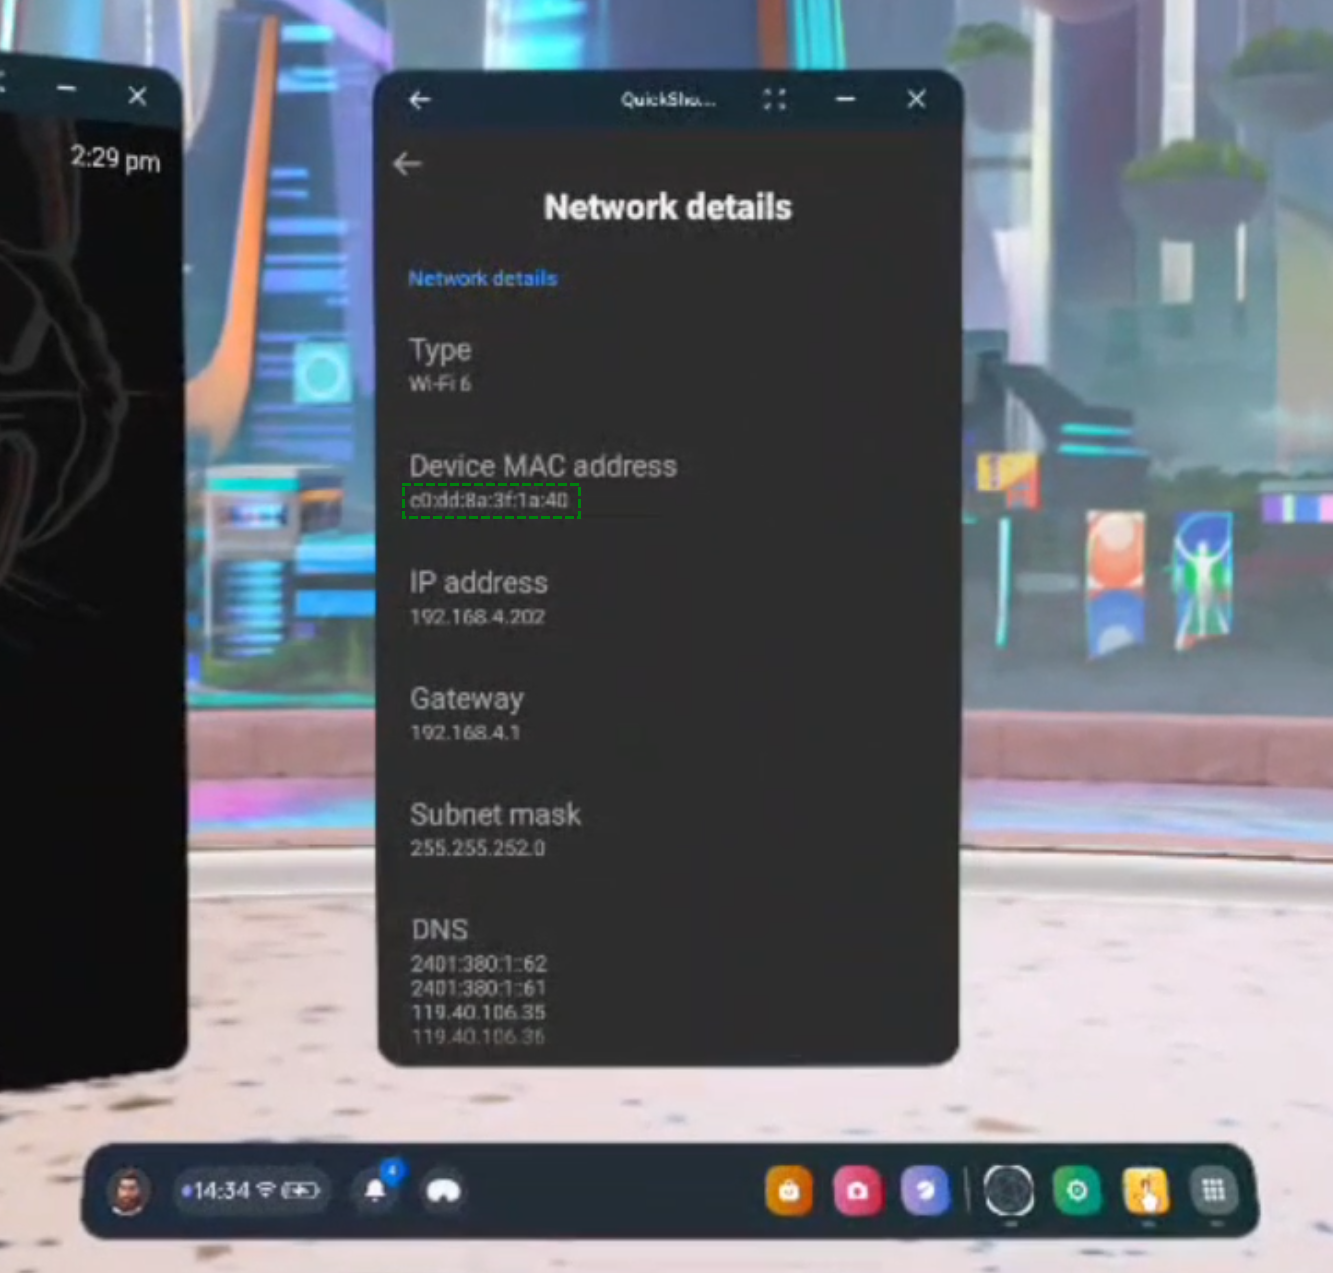](https://docs.nwxr.app/uploads/images/gallery/2025-01/6.png) Success! Take note of your device's MAC address to send to the relevant people. # Release Notes Notes describing the features in each Next World version at the time of release. # v2.6.5: Demo Mode In this release, we've added a Demo Mode to our LMS and our VR application so that people of the community can get a taste for what Next World has to offer before signing up with us, a way to try-before-you-buy! #### Platform/LMS - Demo Mode - you can now view a version of the LMS without having signed up! The LMS will show demo data and acts as a sandbox to play around with all features and get a taste of what Next World has to offer before you buy - Improvements including: - Requests to generate a CSV over a certain size will be emailed instead of downloaded - You can see the scores of various data points for each session in your request in the Sessions CSV - The Session Insights view now shows how many questions were answered/correct out of how many were available - Various bugfixes #### Agent/Home - Demo Mode - you can now download and install our Next World Agent application on your device and be able to get a taste for what Next World has to offer without needing to sign up! You can play our Slips, Trips and Falls experience in-full as part of the demo, and can also try out a demo experience from our Soft Skills partner Bodyswaps! [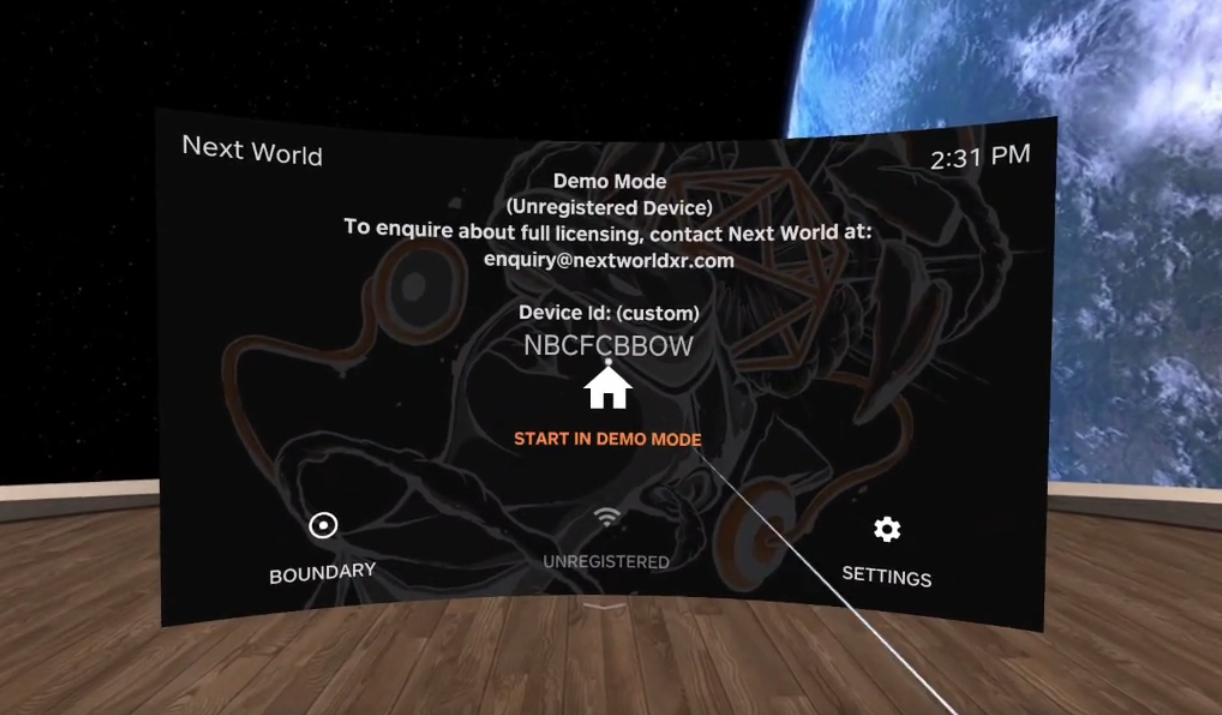](https://docs.nwxr.app/uploads/images/gallery/2024-07/2-6-5-article-1st.png)[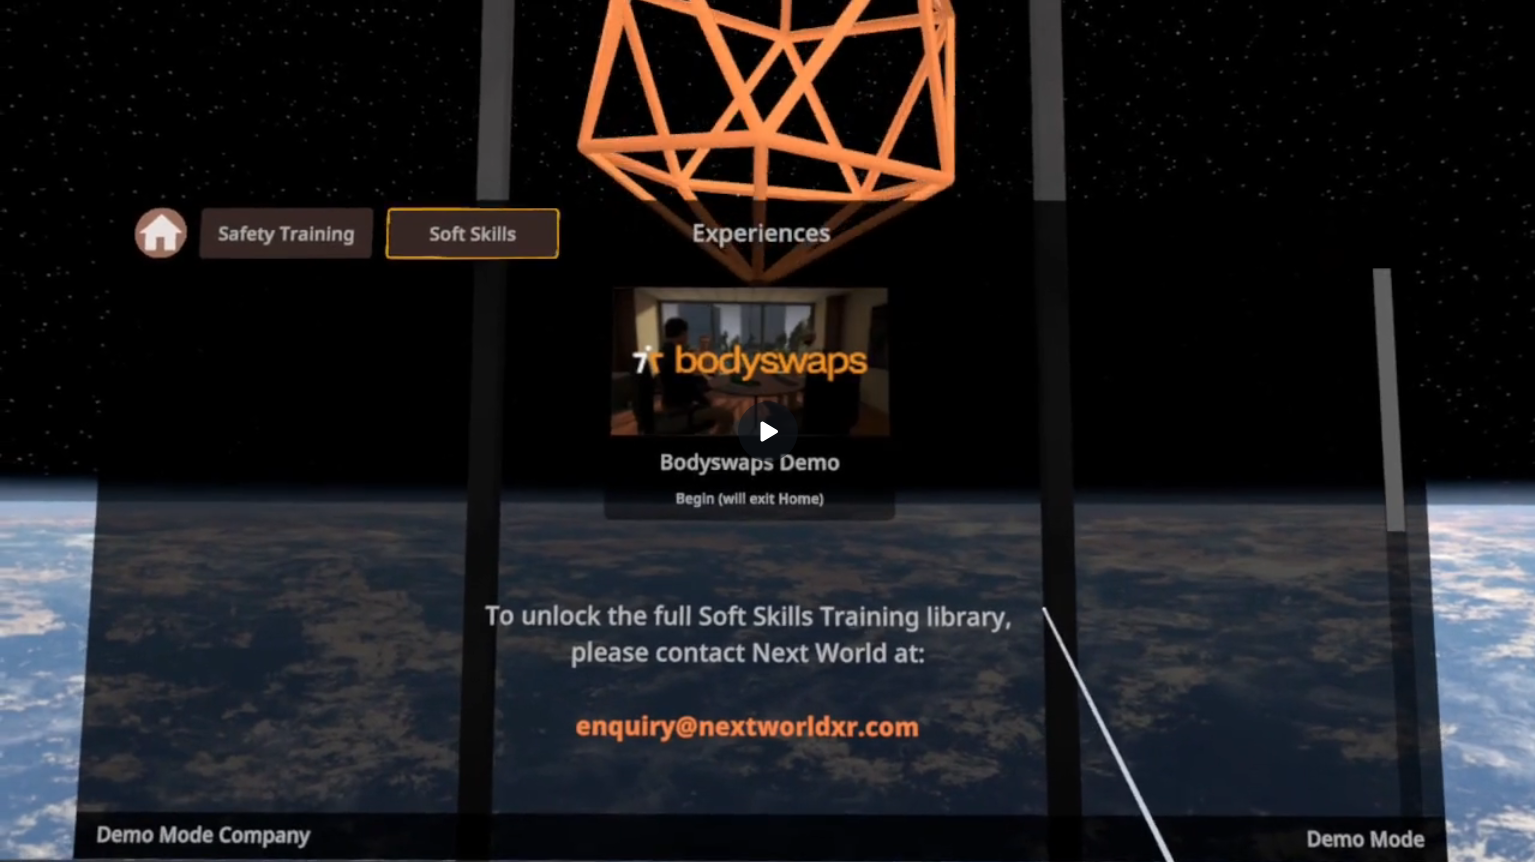](https://docs.nwxr.app/uploads/images/gallery/2024-07/2-6-5-article-2nd.png)[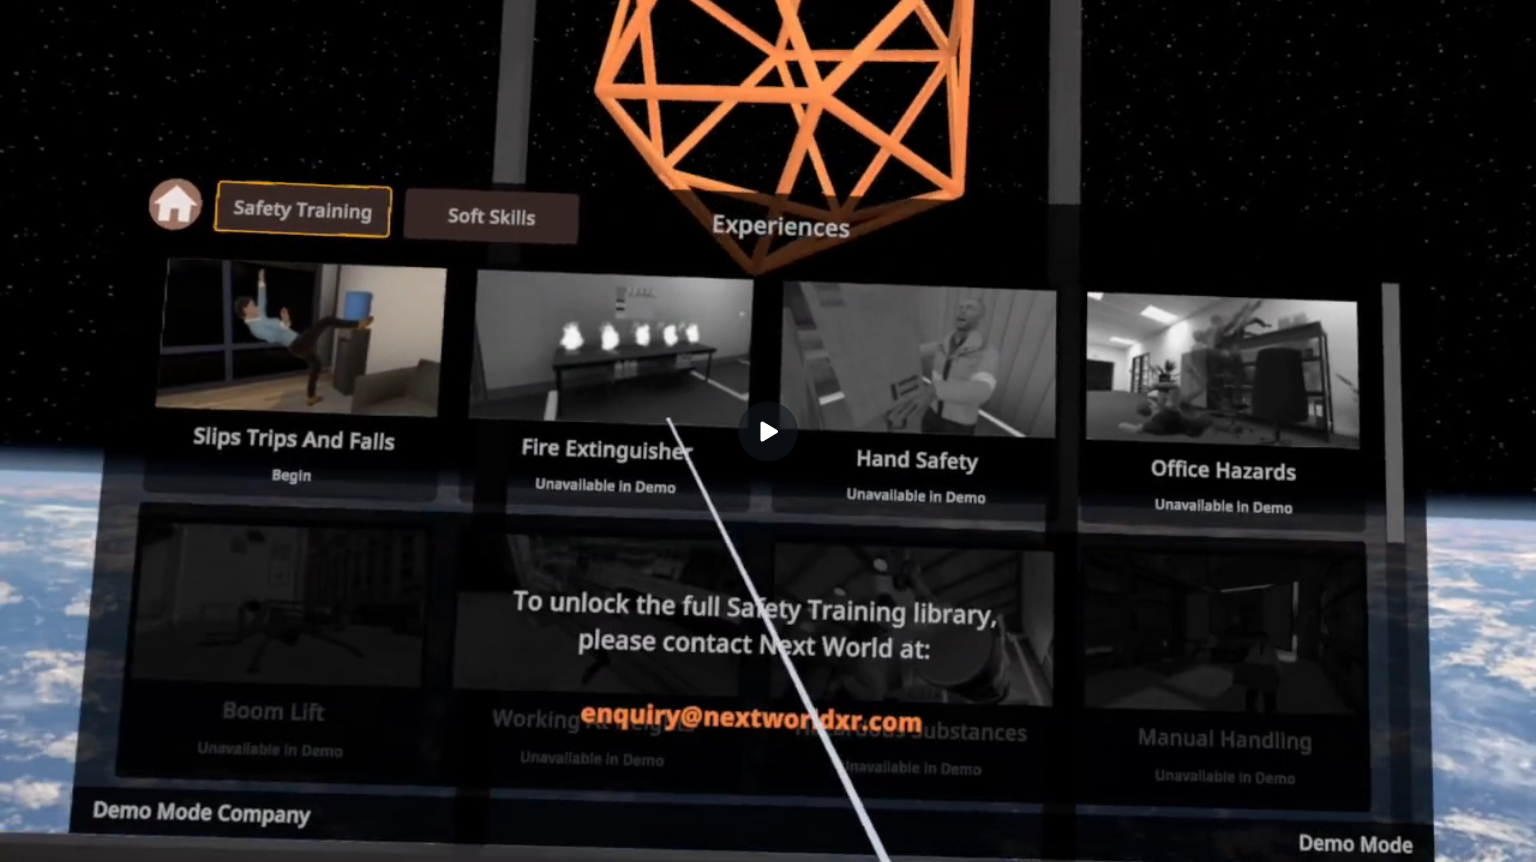](https://docs.nwxr.app/uploads/images/gallery/2024-07/2-6-5-article-3rd.png) A Heck of a lot more is happening behind the scenes too, bringing more functionality and user experience improvements, some of which have been suggested by you! Continue providing us with feedback, letting us know of any issues you experience, and we take all feature suggestions into consideration! Watch this space for more updates soon. That's all for now! # v2.5.8: Soft Skills and Arabic Locale Updated In this release, we've released Soft Skills experiences for our clients to use, the Arabic language for our experiences and applications has been drastically improved, and many bug fixes and improvements have been completed for our LMS. ##### Platform / LMS Many bug fixes and improvements, including with batch user adding and some CSV generation. You can now view experience overviews and course guides without needing to log into the LMS, as long as you have the URL for the experience you wish to view ##### New Soft Skills partner - Bodyswaps! We have partnered with Bodyswaps, a VR Soft Skills provider, to bring you many soft skills training experiences including but not limited to: - Public Speaking - Interview Skills - Communication in the Workplace - Saying No to Sexual Harassment - Microagressions - Biases and Inclusion - Giving Feedback - Acting with Empathy You can enquire about access to these soft skills training courses and more at**Important:** Performing a factory reset will erase all apps, files, and settings from the headset. Ensure any important data is backed up before proceeding. **Note:** The images in this guide are representative only and may not exactly match what you will see in the headset. This is because it’s not possible to record or screenshot the headset display during the factory reset or initial setup process. The visuals provided are intended to give a general idea of what to expect.
--- ## **Section 1: Factory Reset Your Device** 1. **Turn off the headset completely.** - Press and hold the power button until the shutdown menu appears. - Select **Power Off** or hold the button until the device shuts down. 2. **Enter the Android Recovery Menu (Bootloader):** - Press and **hold the Volume Down (-)** button. - While holding Volume Down, press and hold the **Power** button - Continue holding both buttons until the **bootloader menu** appears on the screen. 3. **Navigate to Factory Reset Option:** - Use the **Volume buttons** to scroll through the bootloader options. - Highlight **“Factory Reset”**. - Press the **Power button** to select it. [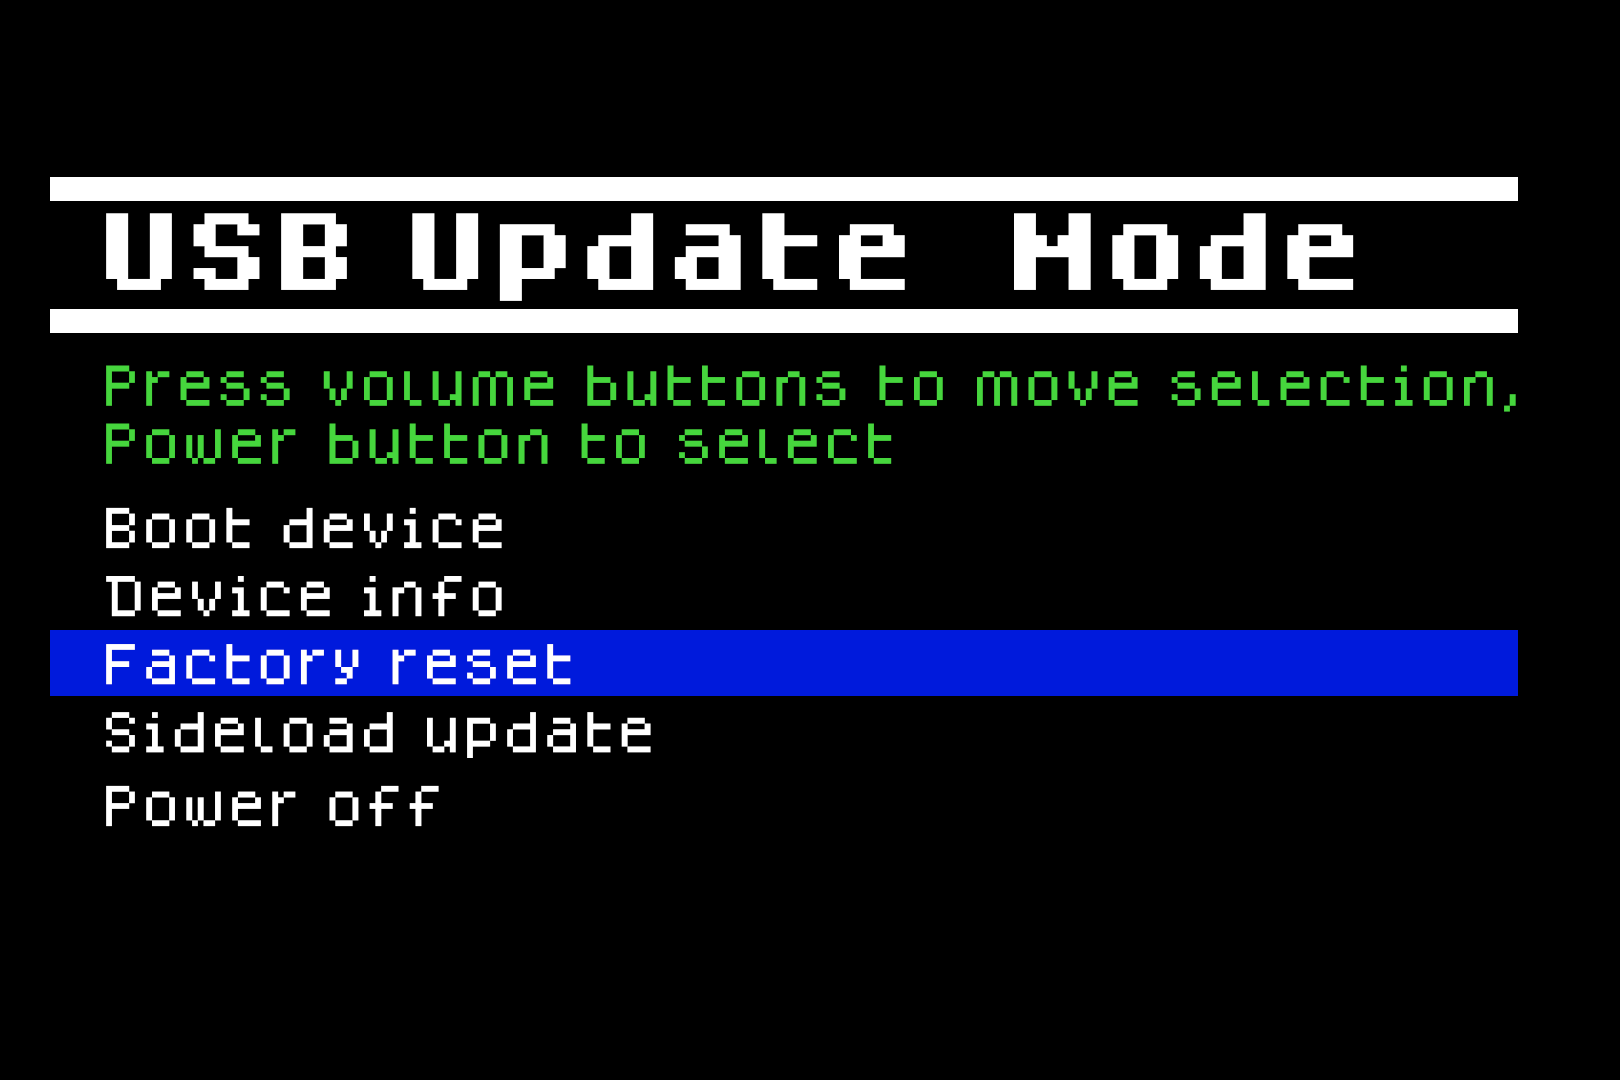](https://docs.nwxr.app/uploads/images/gallery/2025-04/questfactoryresetfrombootloader1.png) 4. **Confirm Factory Reset:** - When prompted with **“Are you sure?”**, highlight **“Yes, erase and factory reset”**. - Press the **Power button** again to confirm. [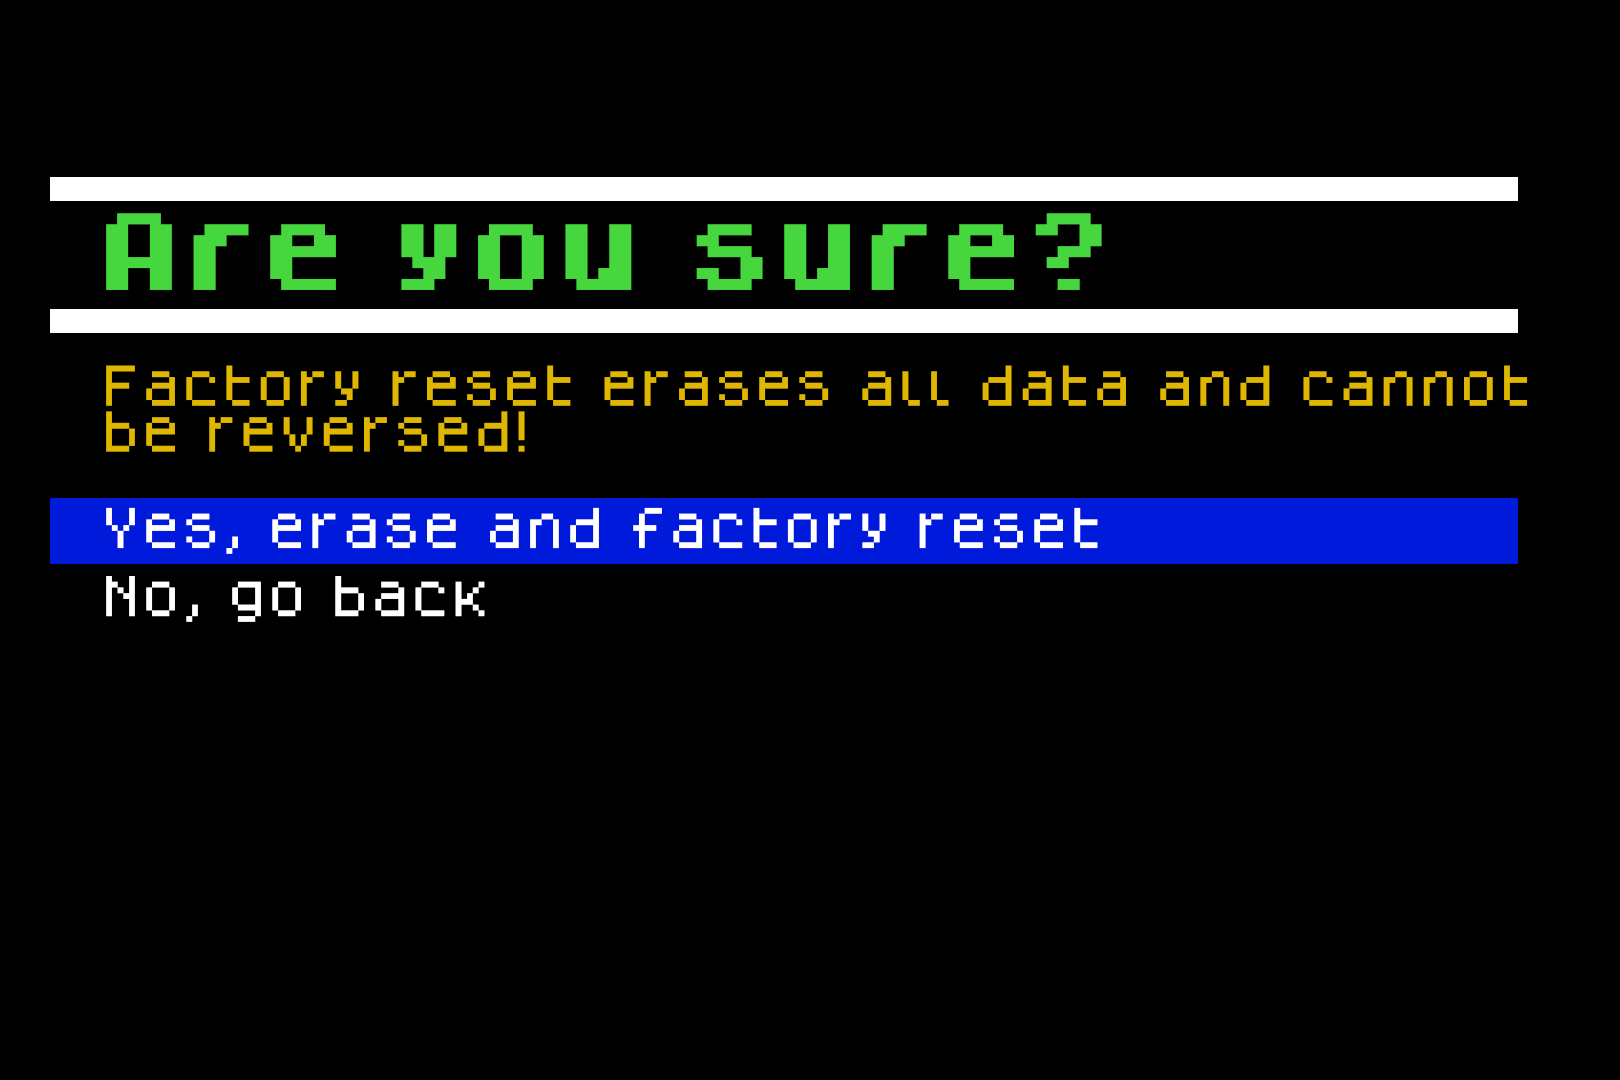](https://docs.nwxr.app/uploads/images/gallery/2025-04/klpquestfactoryresetfrombootloader2.png) 5. **Wait for Device to Reboot:** - The headset will wipe all data and automatically restart. --- ## **Section 2: Initial Device Setup** Once the headset restarts, follow the guided setup process: 6. **Controller Pairing Screen:** - If the headset doesn’t detect controllers, a screen will appear instructing you to **pull the battery tab** from each controller. - If your controllers are already active, this step will be skipped automatically. [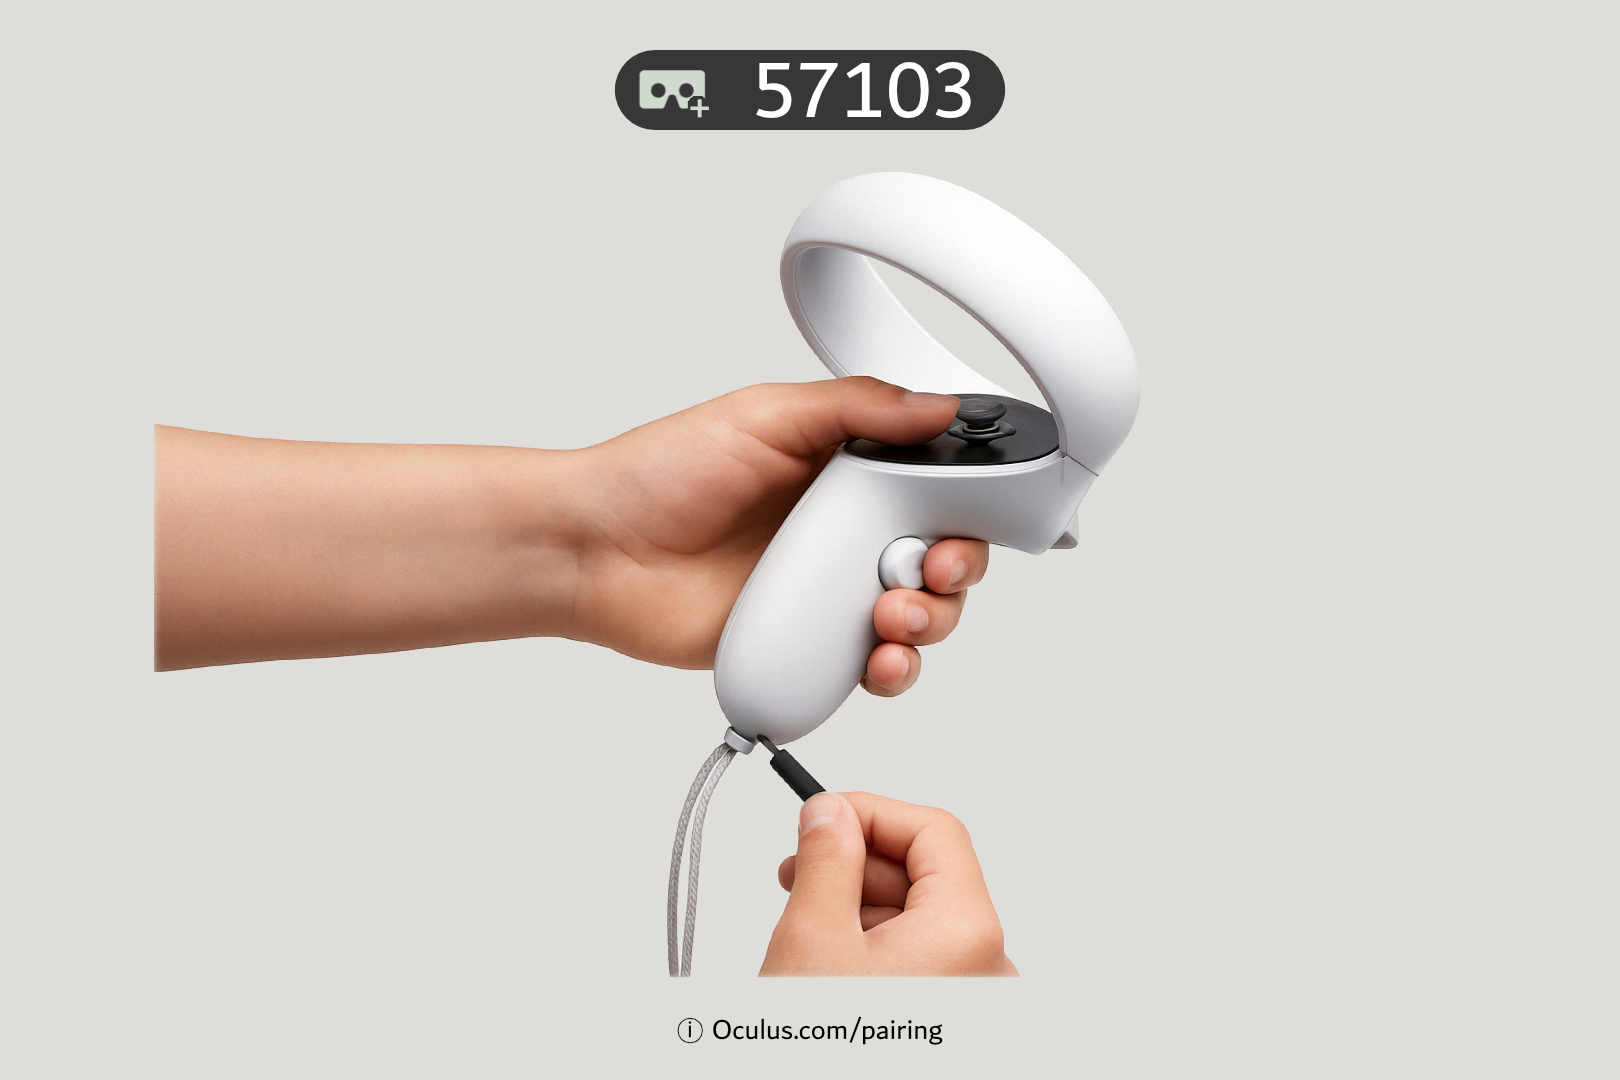](https://docs.nwxr.app/uploads/images/gallery/2025-04/pairingcontrollers1.png) 7. **Start Setup:** - You’ll be prompted to point at a **“Continue”** button. - Use the **trigger button** on the controller to select it. [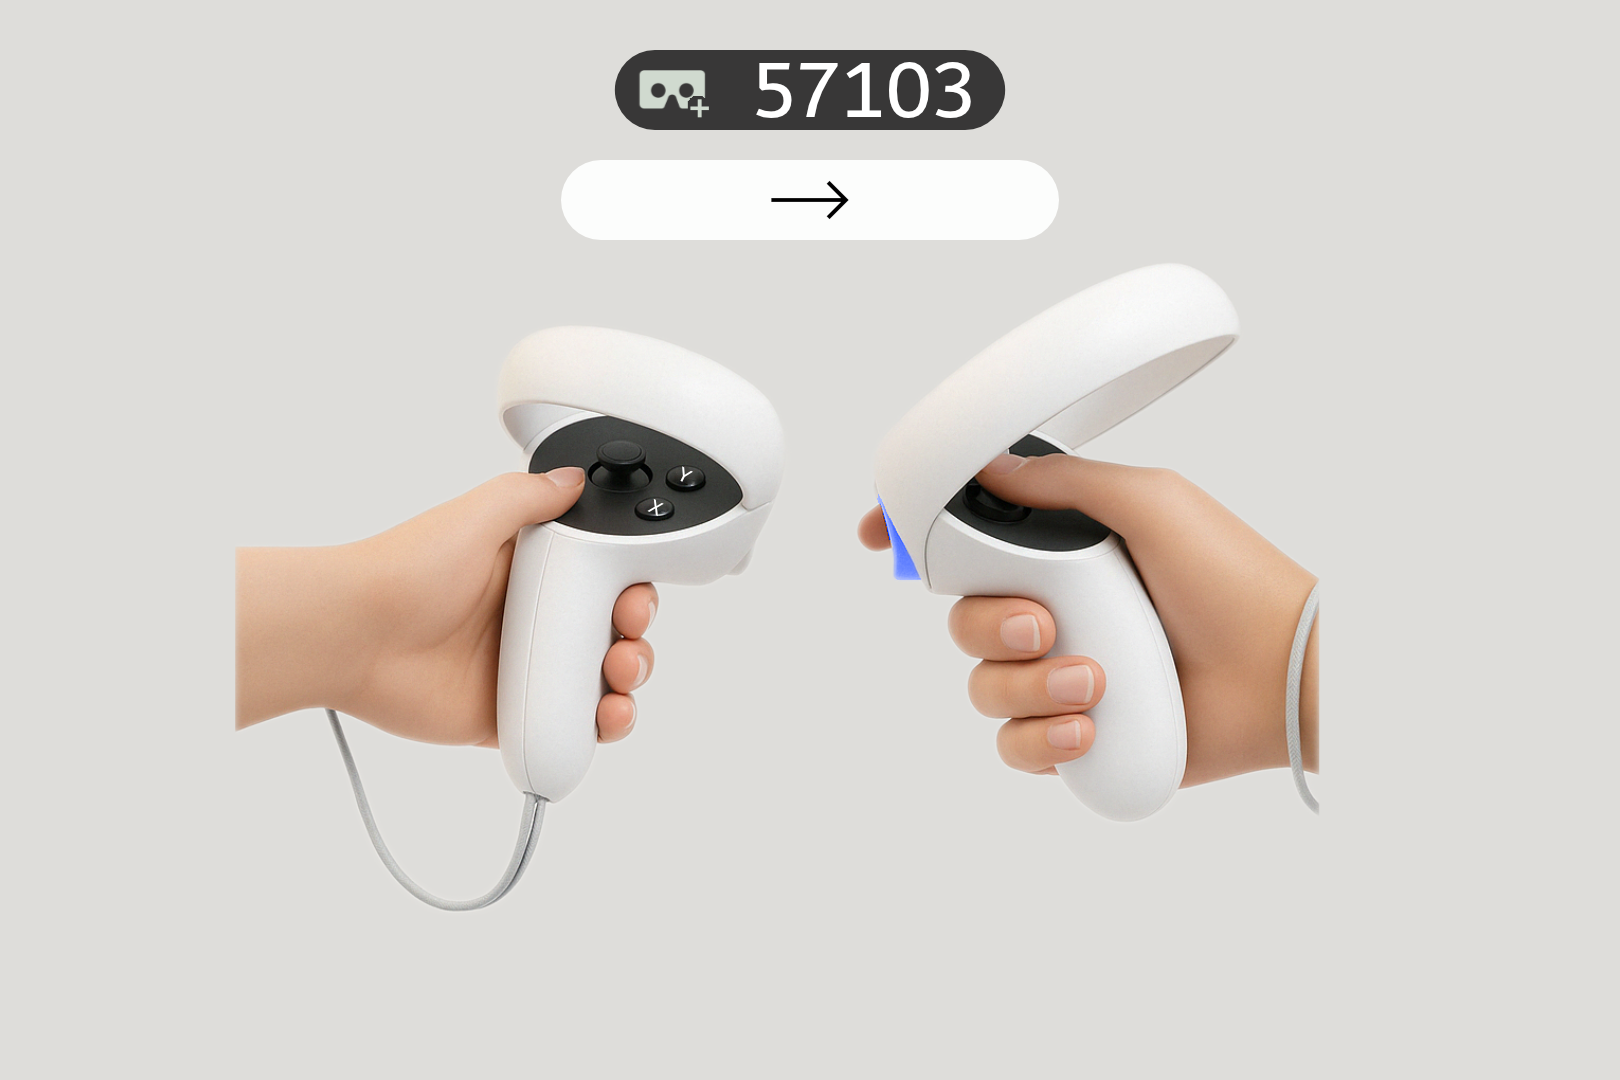](https://docs.nwxr.app/uploads/images/gallery/2025-04/pairingcontrollers2.png) 8. **Language Selection:** - Scroll through the list using the **joystick**. - Point and click on your preferred language. [](https://docs.nwxr.app/uploads/images/gallery/2025-04/selectlanguage.png) 9. **Adjust Headset Fit (Visual Clarity):** - Follow on-screen instructions to properly fit the headset. - Ensure text and visuals are sharp before pressing **Continue**. [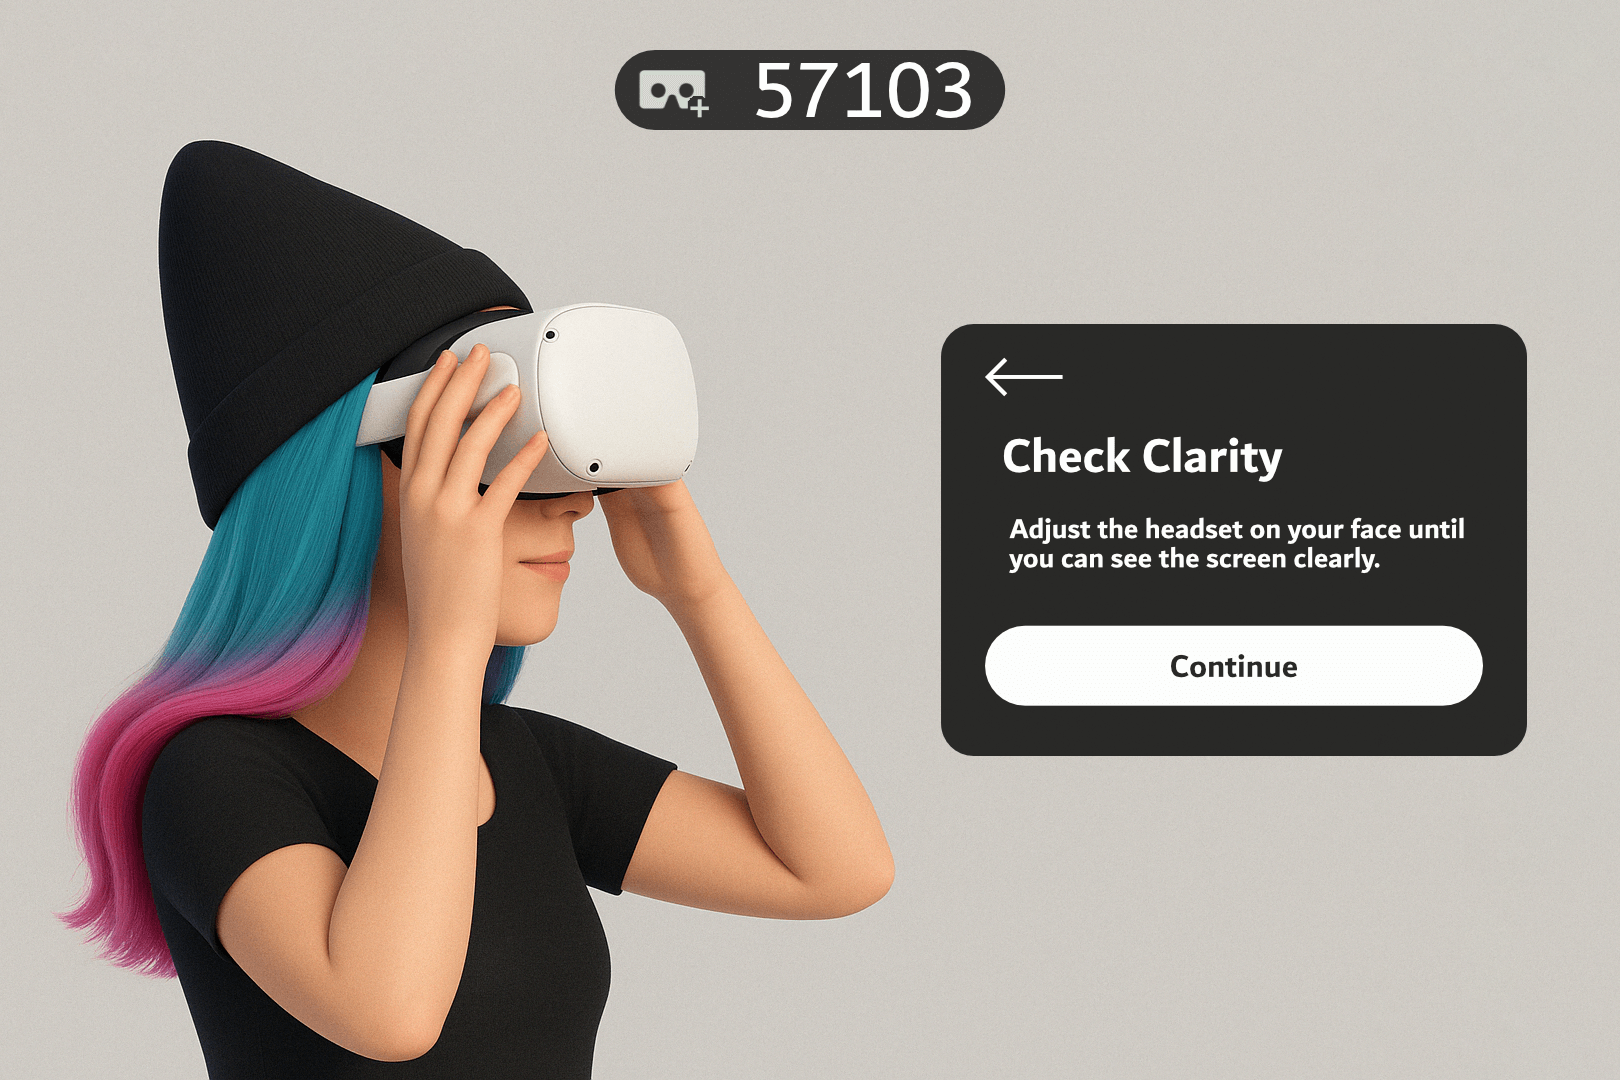](https://docs.nwxr.app/uploads/images/gallery/2025-04/checkforclarity.png) 10. **Set IPD (interpupillary distance):** - Adjust the lenses to match your interpupillary distance. Press **Continue** when ready. [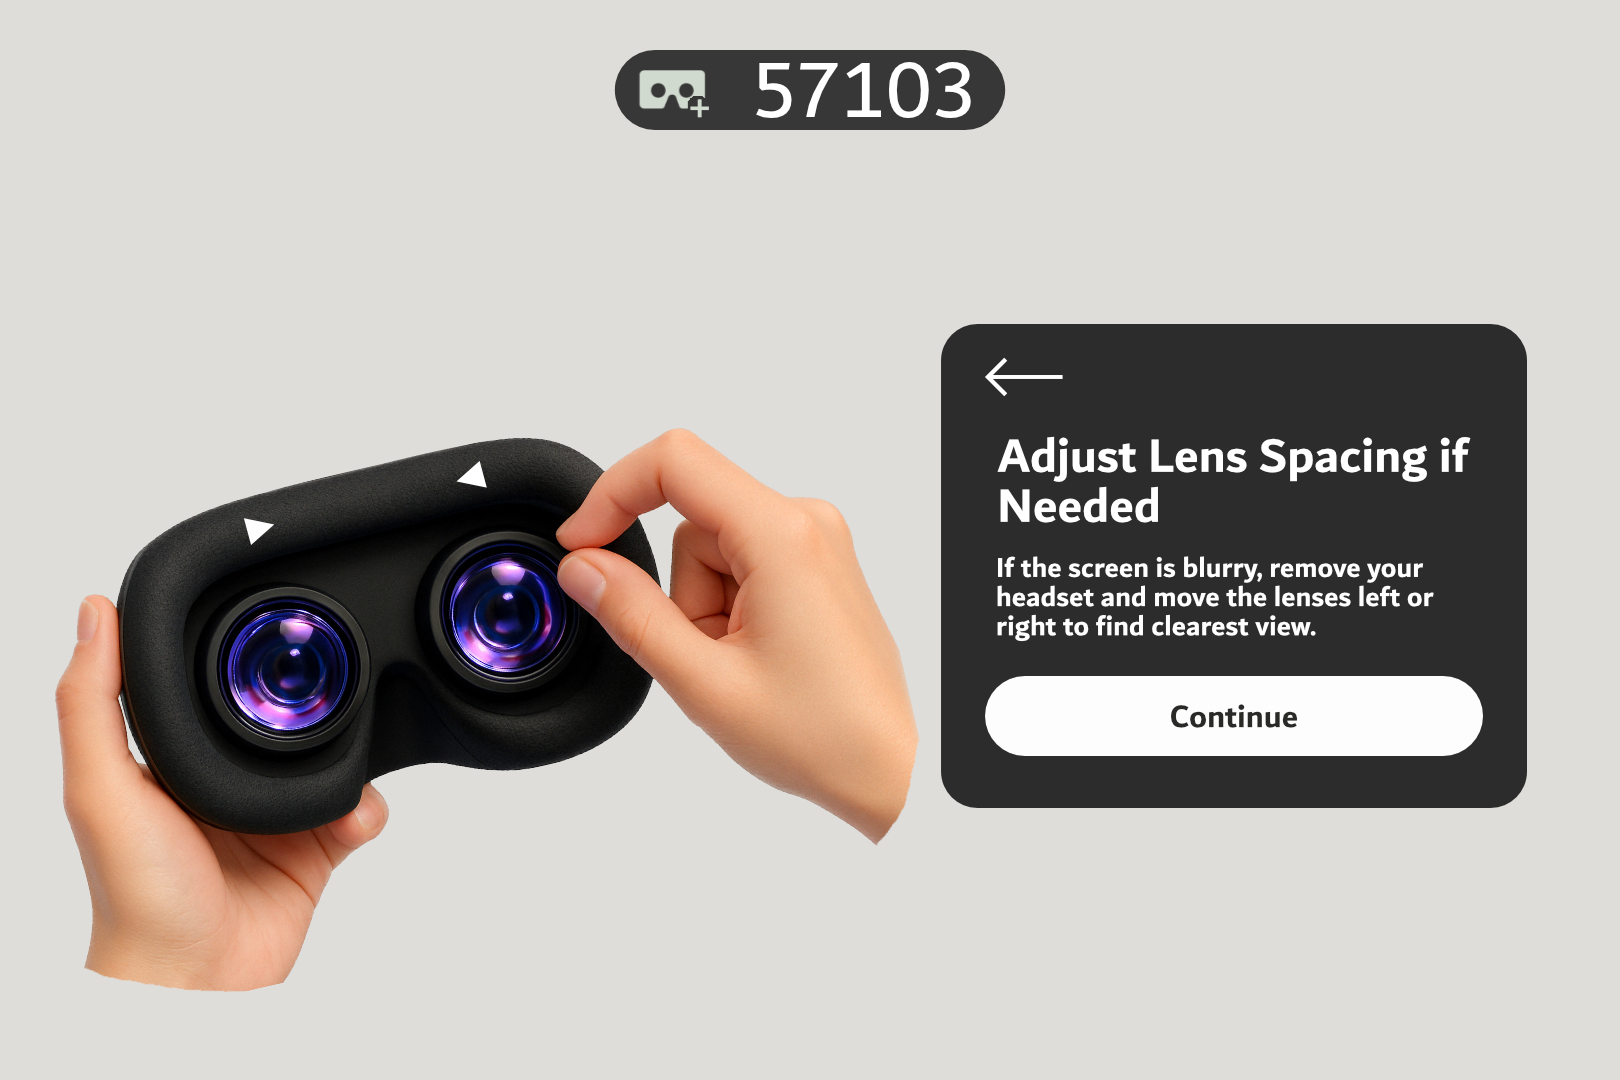](https://docs.nwxr.app/uploads/images/gallery/2025-04/adjustlenses.png) 11. **Seating Position:** - When asked, ensure you're seated in a safe space and press **Continue**. [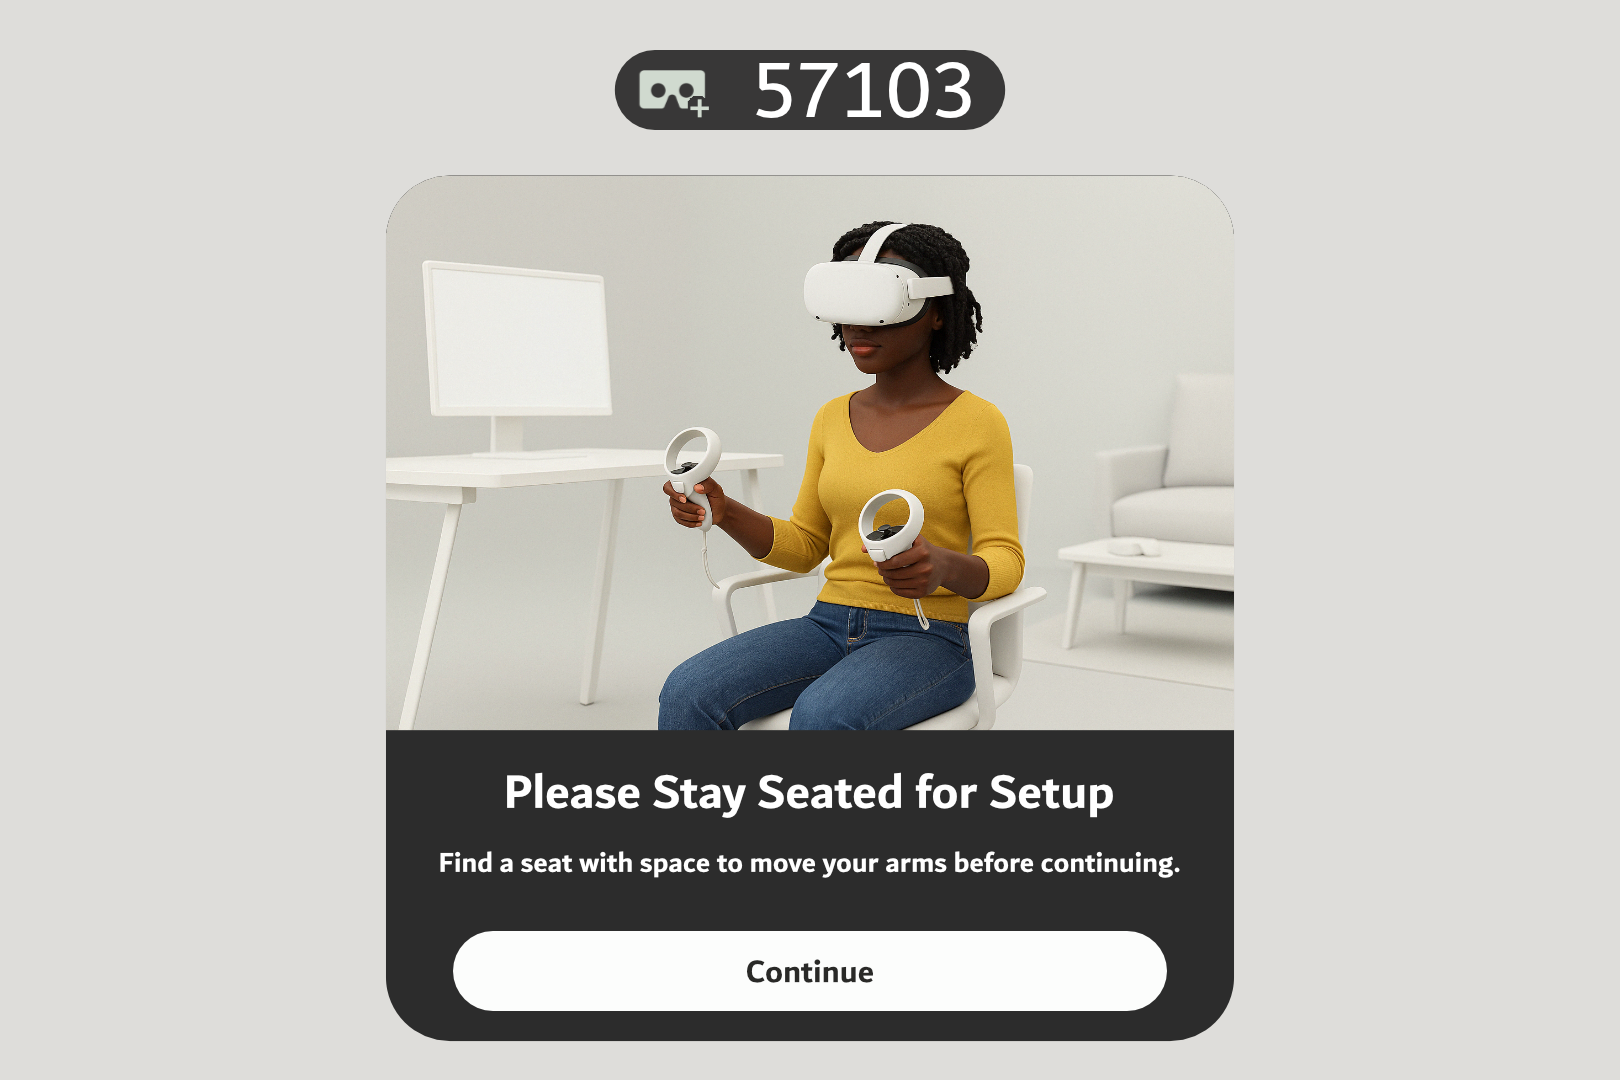](https://docs.nwxr.app/uploads/images/gallery/2025-04/fDrstayseated.png) 12. **Connect to Wi-Fi:** - Use the joystick to scroll through available networks. - Select your network and enter the password using the on-screen keyboard. [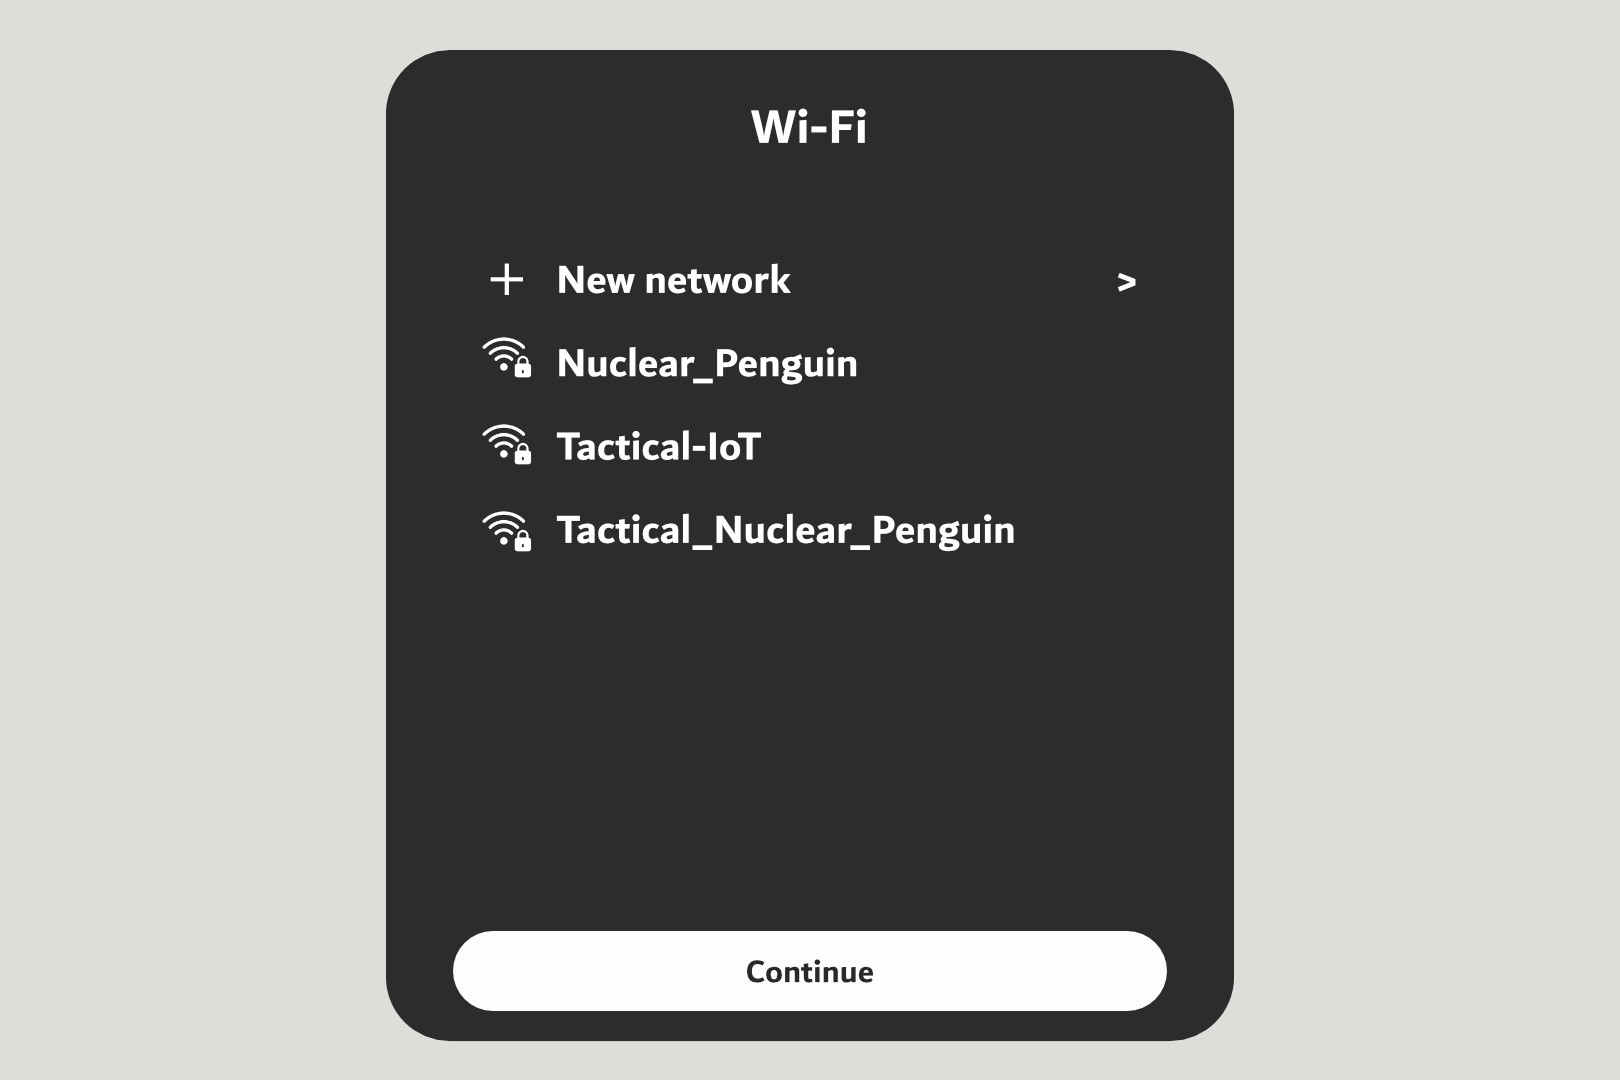](https://docs.nwxr.app/uploads/images/gallery/2025-04/7yQsetupwifi.png) 13. Watch the **safety guideline animation**, covering: - Minimum age requirement (typically 13+). - Use indoors to avoid sun damage to lenses. - Remove obstacles from the play area. - Use appropriate content in safe, supervised environments. [](https://docs.nwxr.app/uploads/images/gallery/2025-04/surroundings.png) 14. **Acknowledge Safety Compliance:** - After watching the video, you’ll be asked to confirm that you understand the safety guidelines. [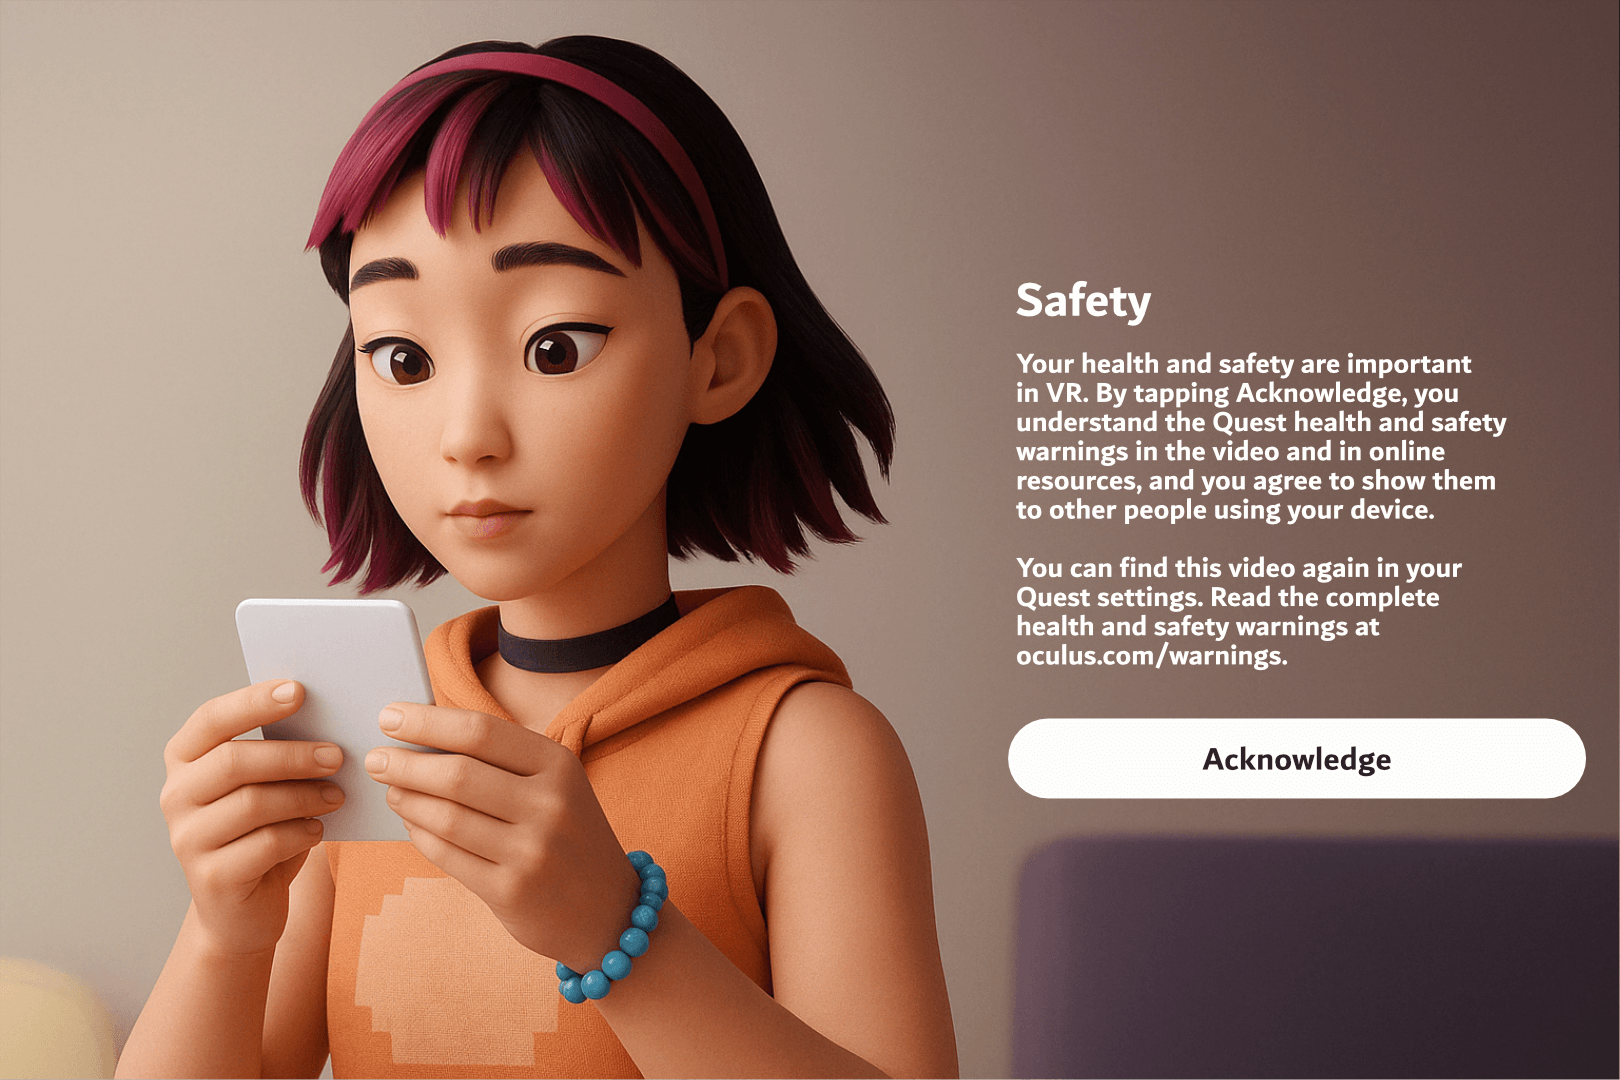](https://docs.nwxr.app/uploads/images/gallery/2025-04/safetyacknowledgement.png) --- ## **Section 3: Enroll the Headset with Horizon Managed Services (HMS)** At this point, do not follow the instructions for pairing with the mobile app. Instead, proceed with enterprise configuration. 15. **Skip Mobile App Pairing – Select Organization Setup:** - On the screen prompting you to connect using the Meta mobile app, click “Connect to your organization” instead. [](https://docs.nwxr.app/uploads/images/gallery/2025-04/step1.png) 16. **Connect to Work/School Account:** - The next screen is titled **“Connect your headset to your work or school”**. - Click **Continue** to proceed. [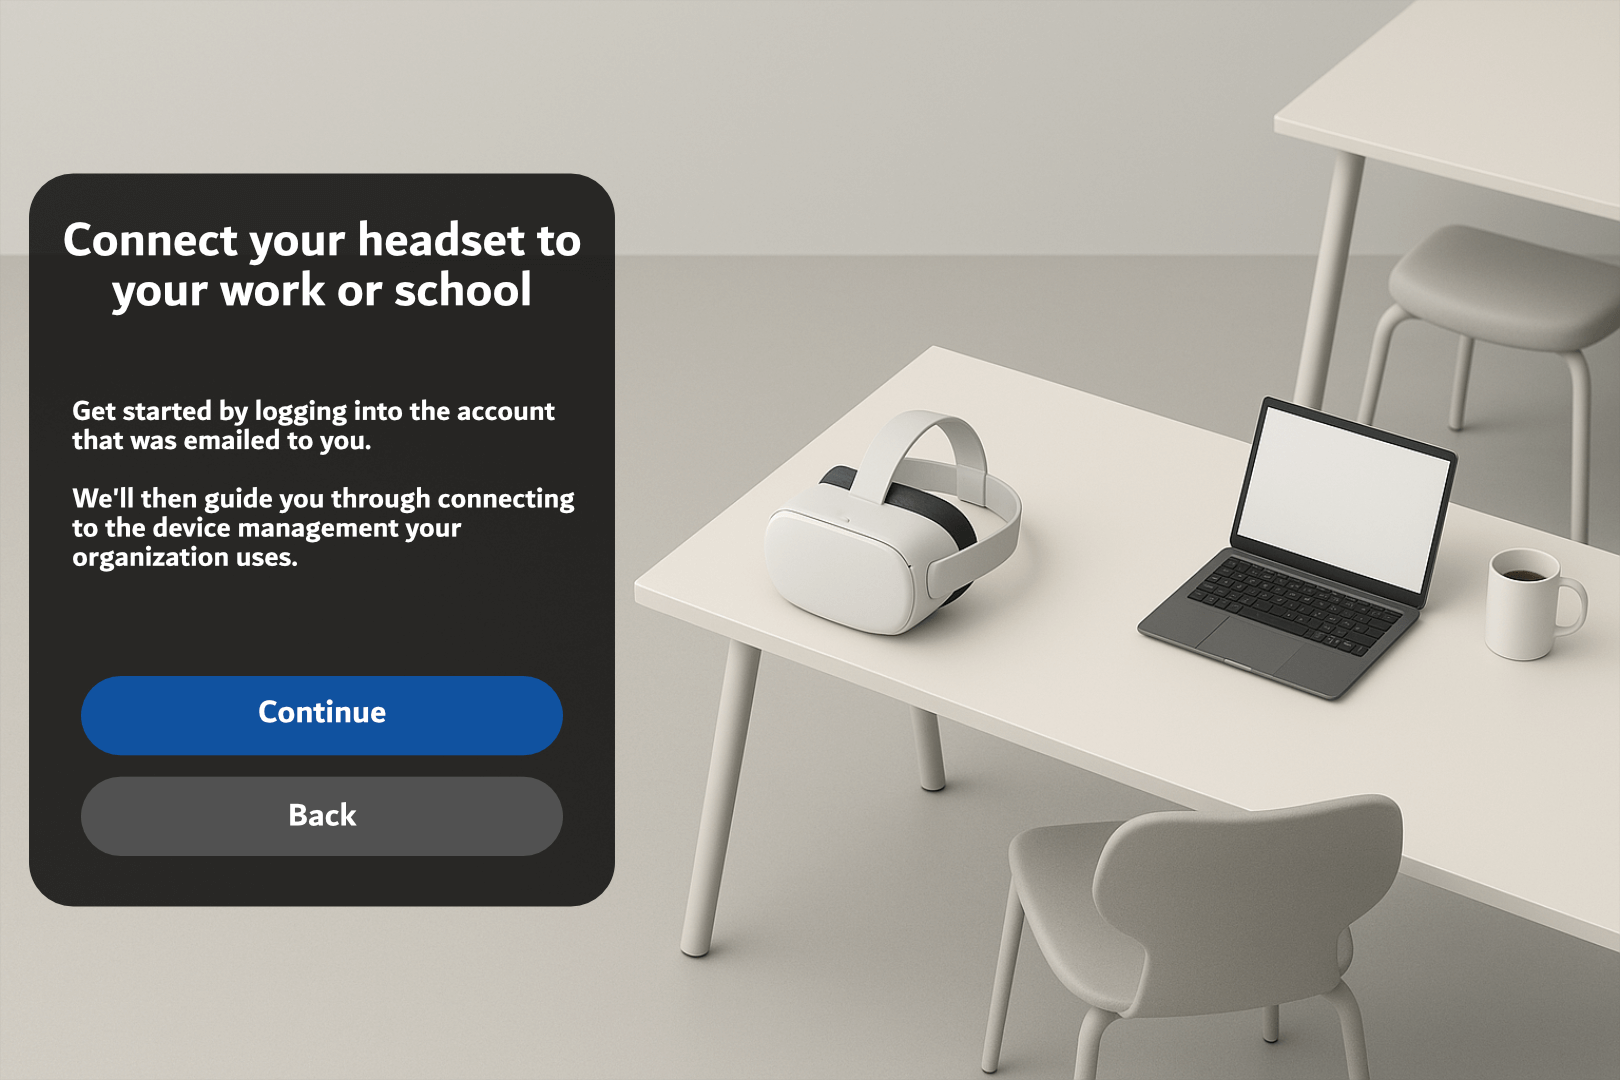](https://docs.nwxr.app/uploads/images/gallery/2025-04/step2.png) 17. **Enroll Using Work Meta Portal:** - The headset will now display a unique **device code**. - On a separate device (PC or smartphone), go to: [**work.meta.com/device**](https://work.meta.com/device) - Log in with your organization's Meta admin credentials. - Enter the device code to enroll the headset under your organization. [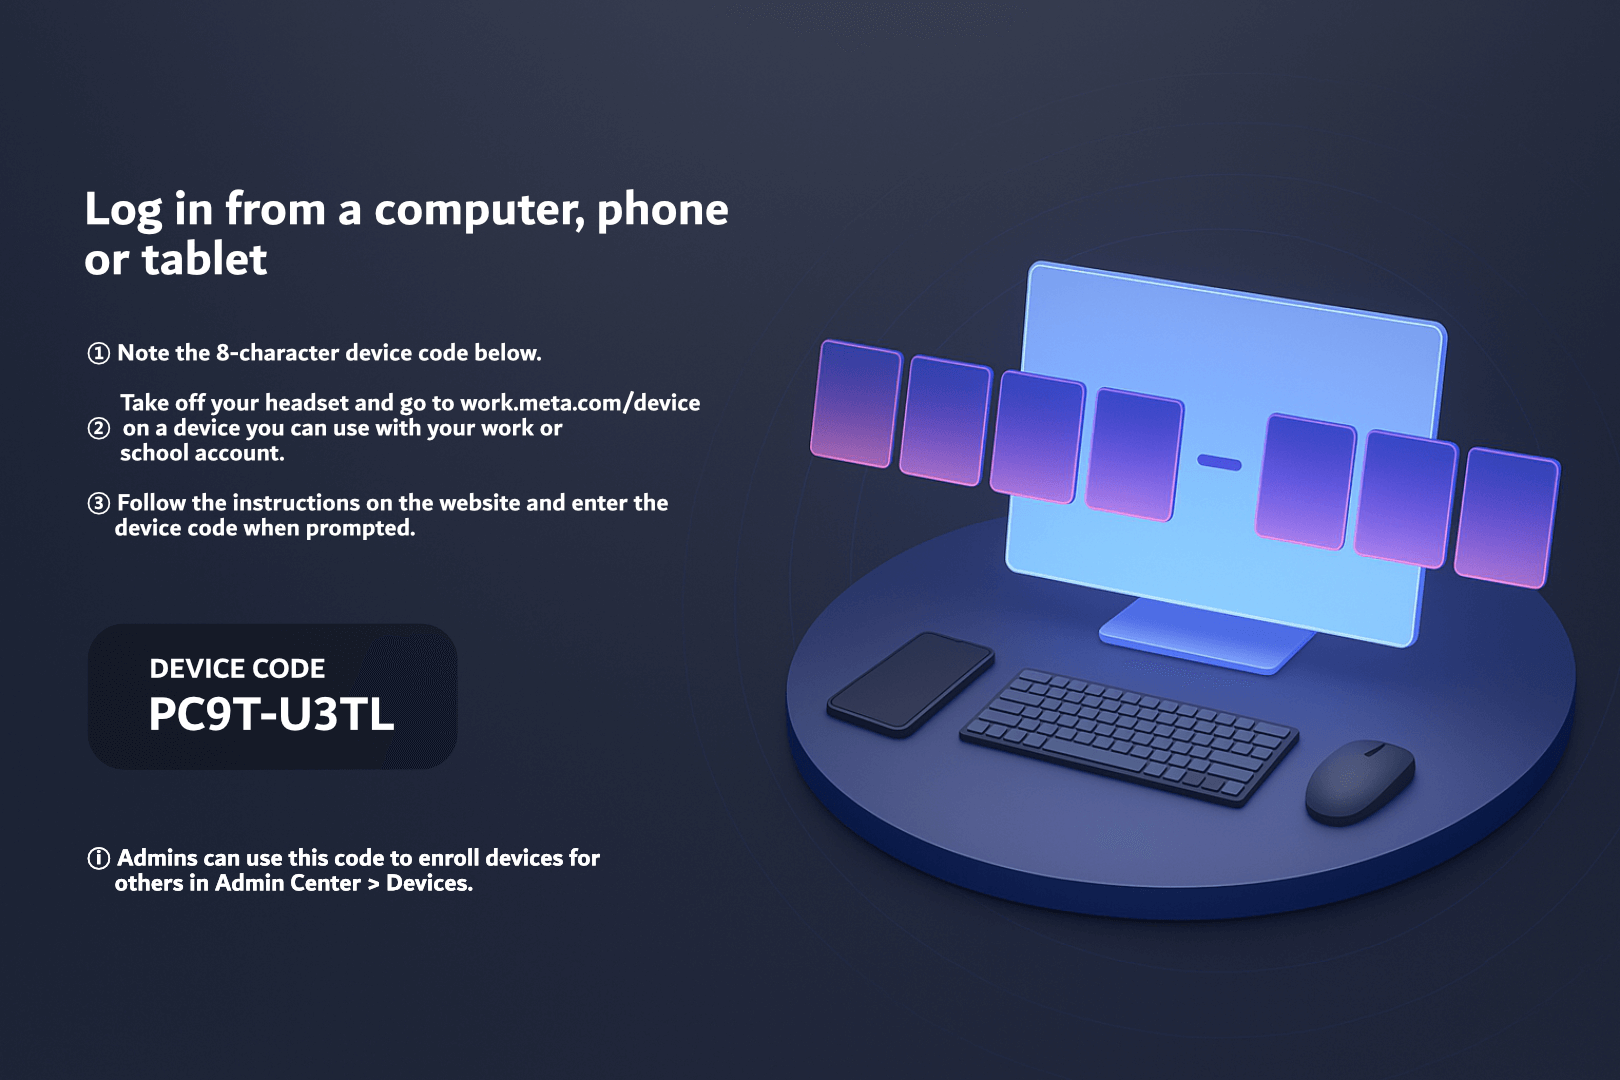](https://docs.nwxr.app/uploads/images/gallery/2025-04/yHqstep3.png) 18. **Enrollment Confirmation:** - You’ll see a **“Linking Account…”** message. - Once successful, a confirmation will appear. [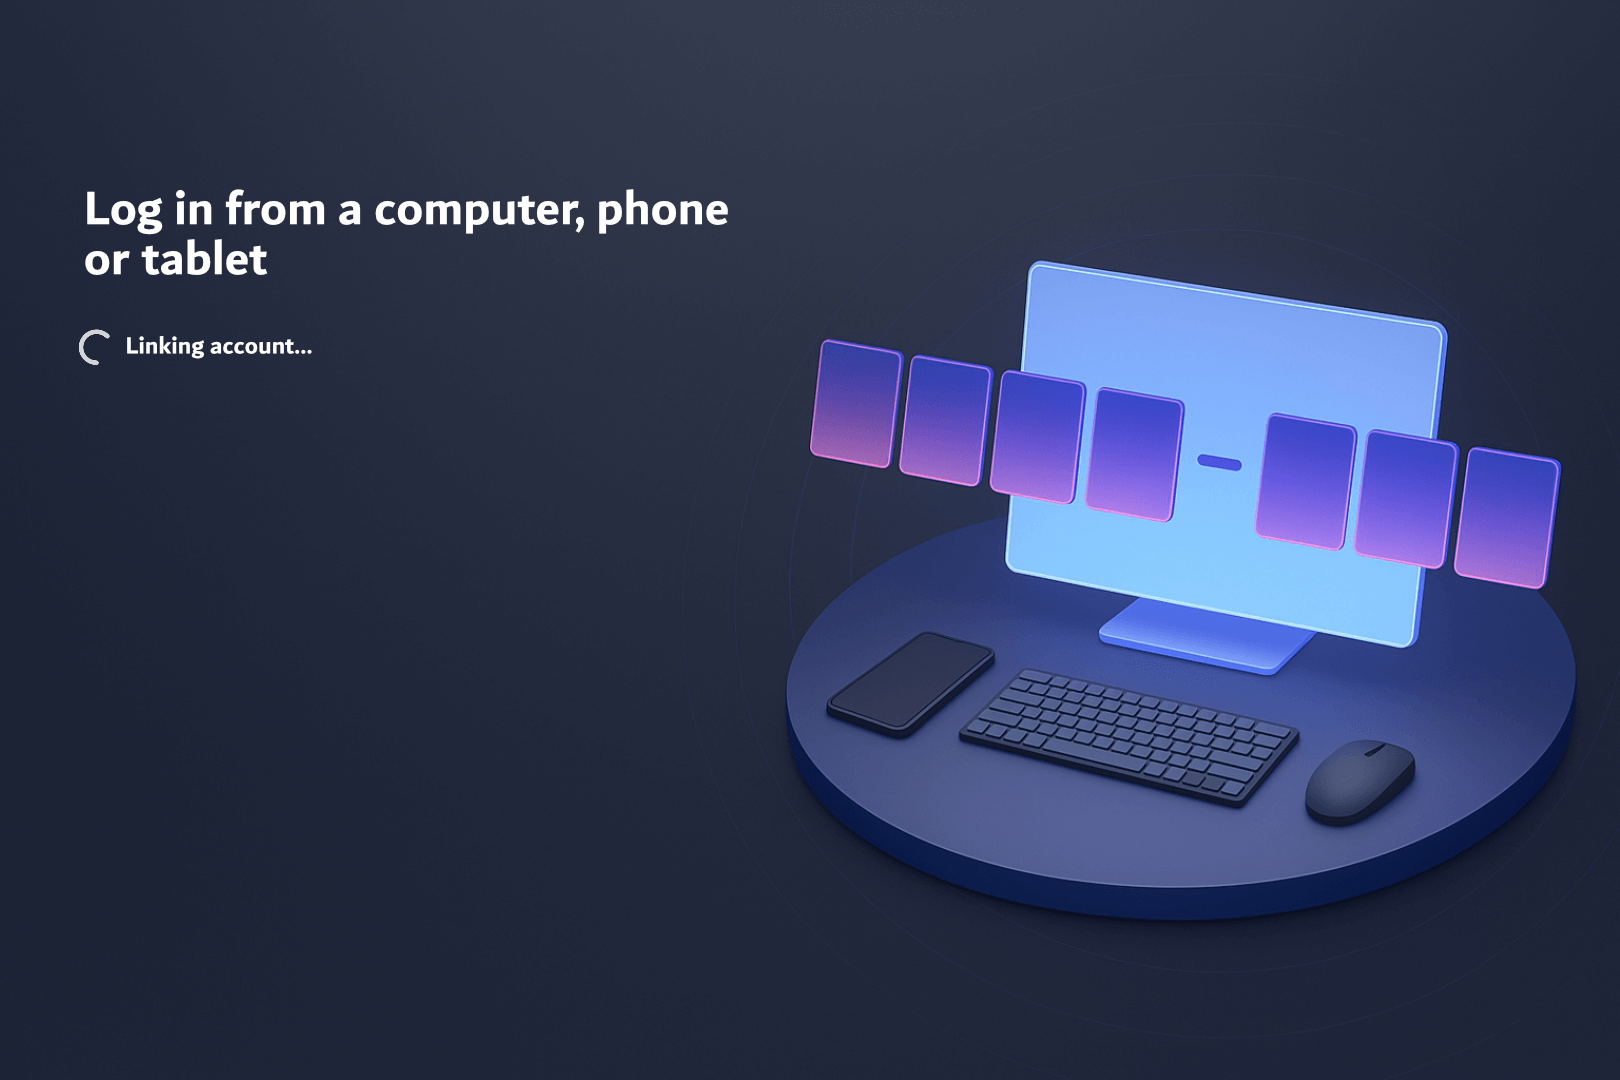](https://docs.nwxr.app/uploads/images/gallery/2025-04/RFpstep4.png) [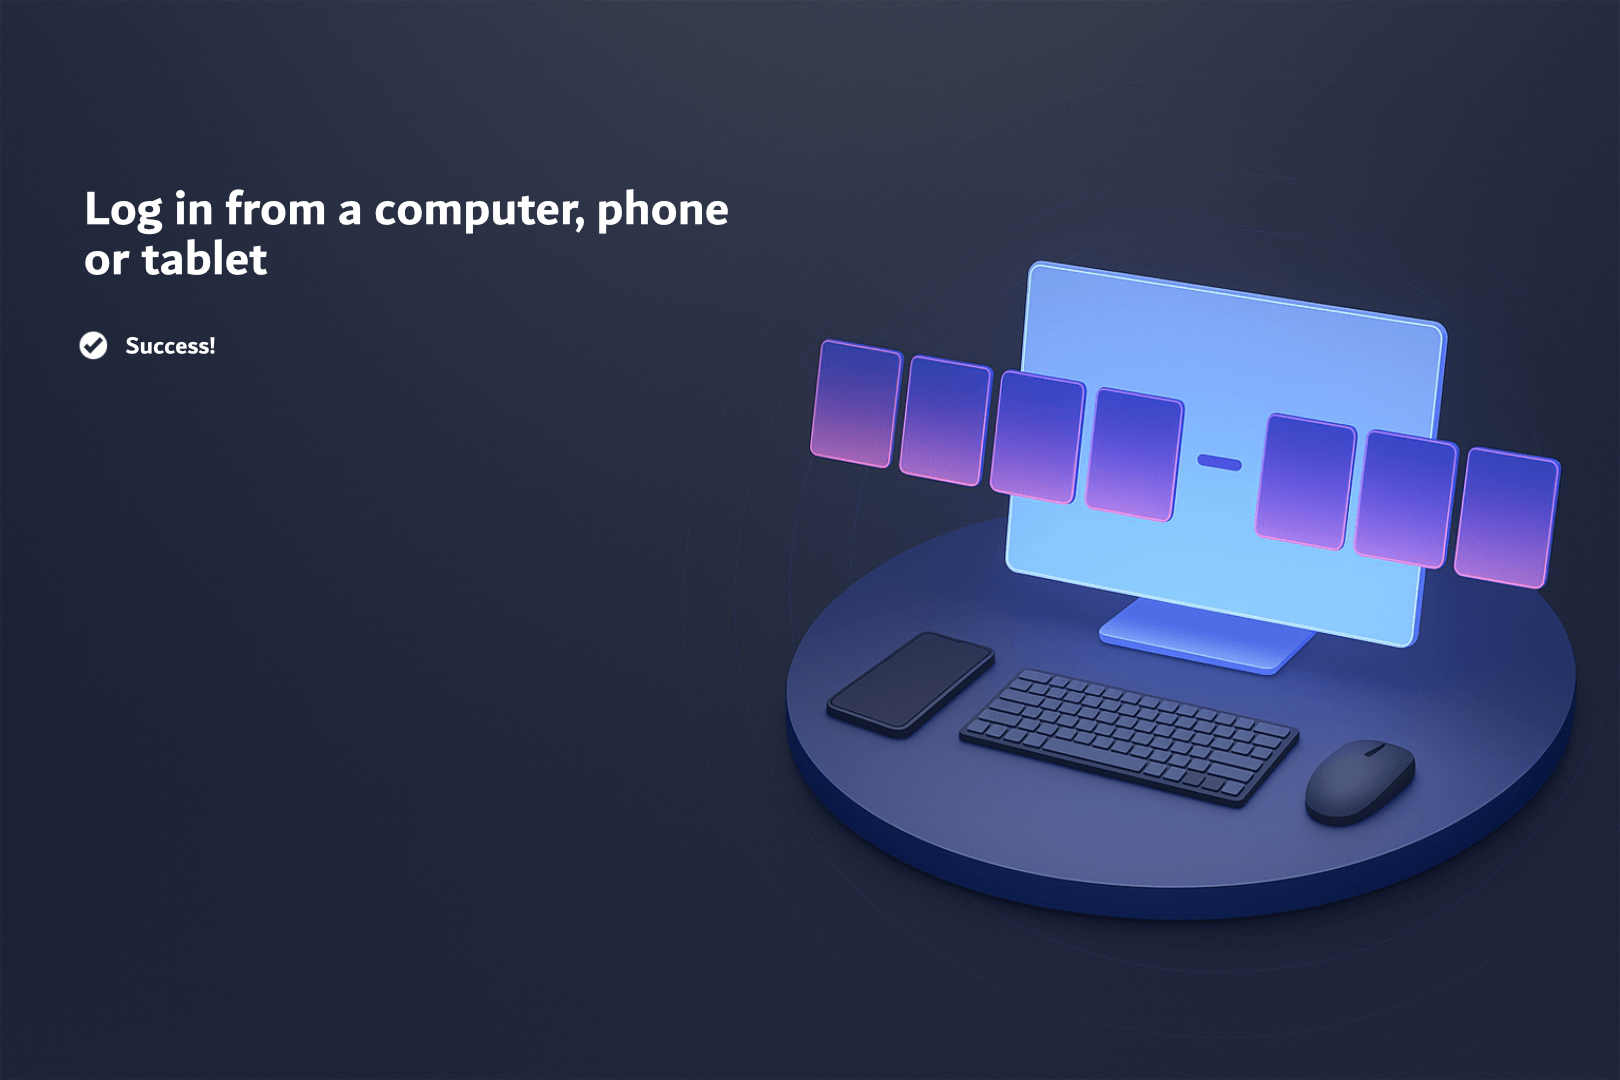](https://docs.nwxr.app/uploads/images/gallery/2025-04/2p4step5.png) 19. **Install Required Components:** - The headset will automatically begin **installing system components**. - This process may take a few minutes. [](https://docs.nwxr.app/uploads/images/gallery/2025-04/step6.png) 20. **Connect to Device Management:** - Press Continue when prompted. [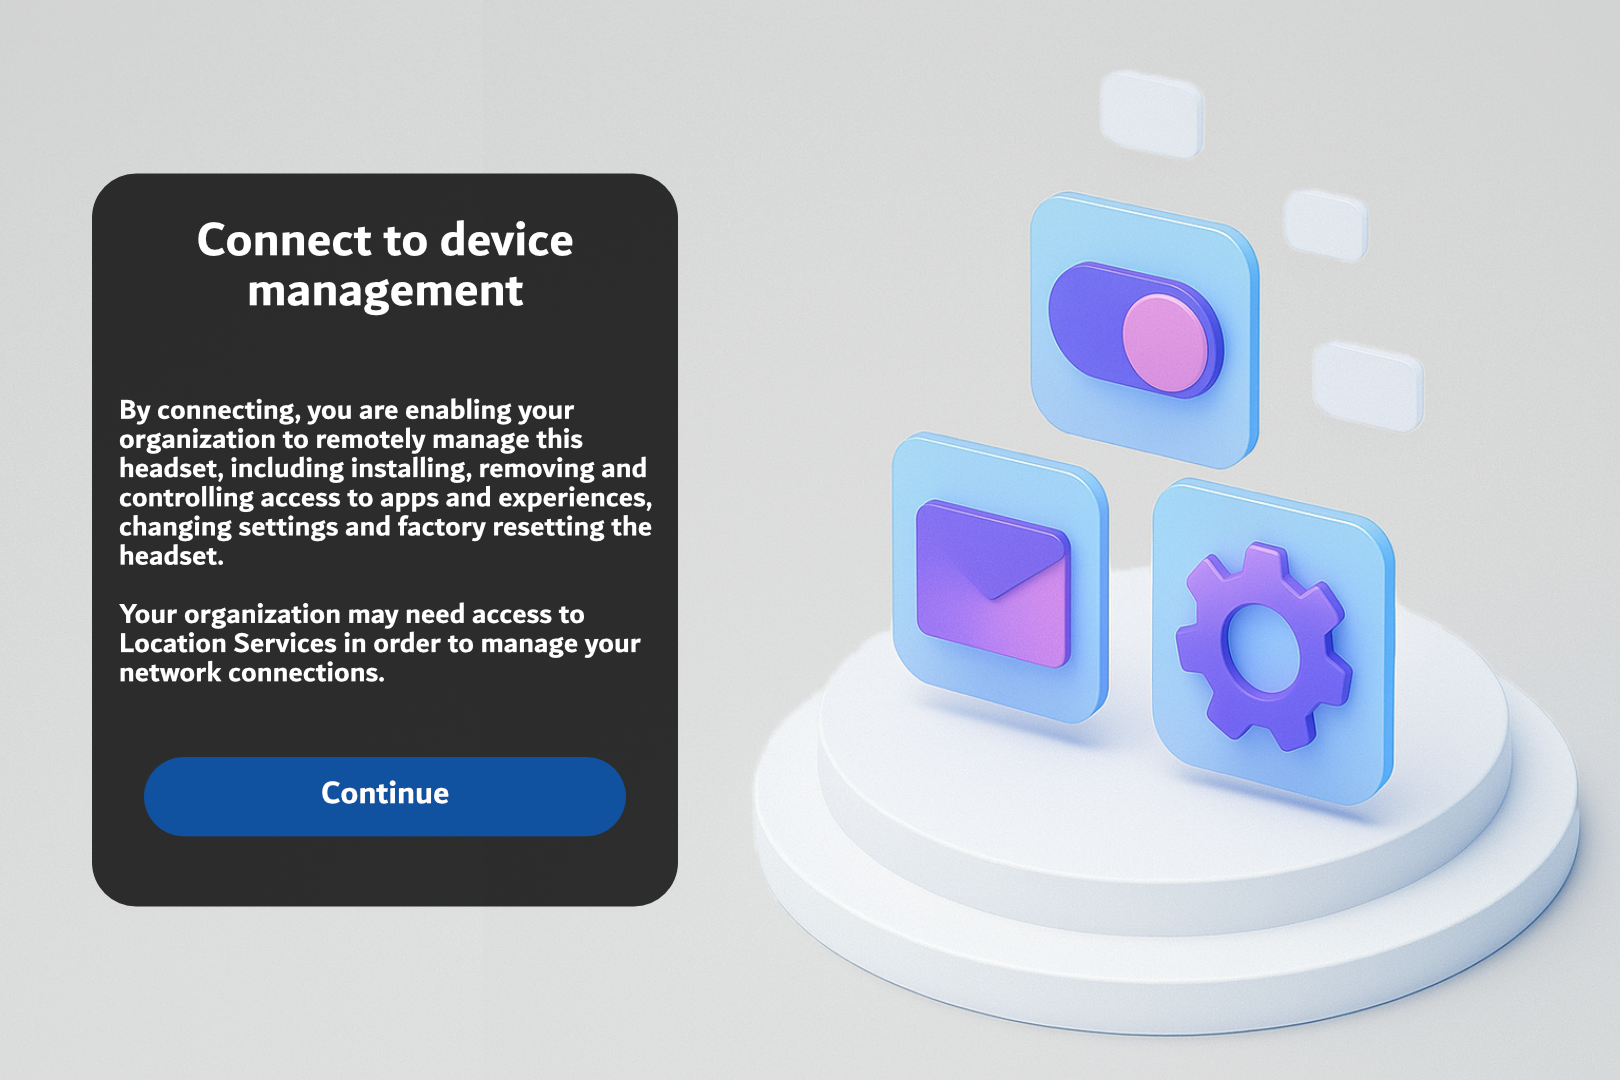](https://docs.nwxr.app/uploads/images/gallery/2025-04/step7.png) 21. **Configure Your Headset:** - Click Continue to allow the system to auto-configure the device. [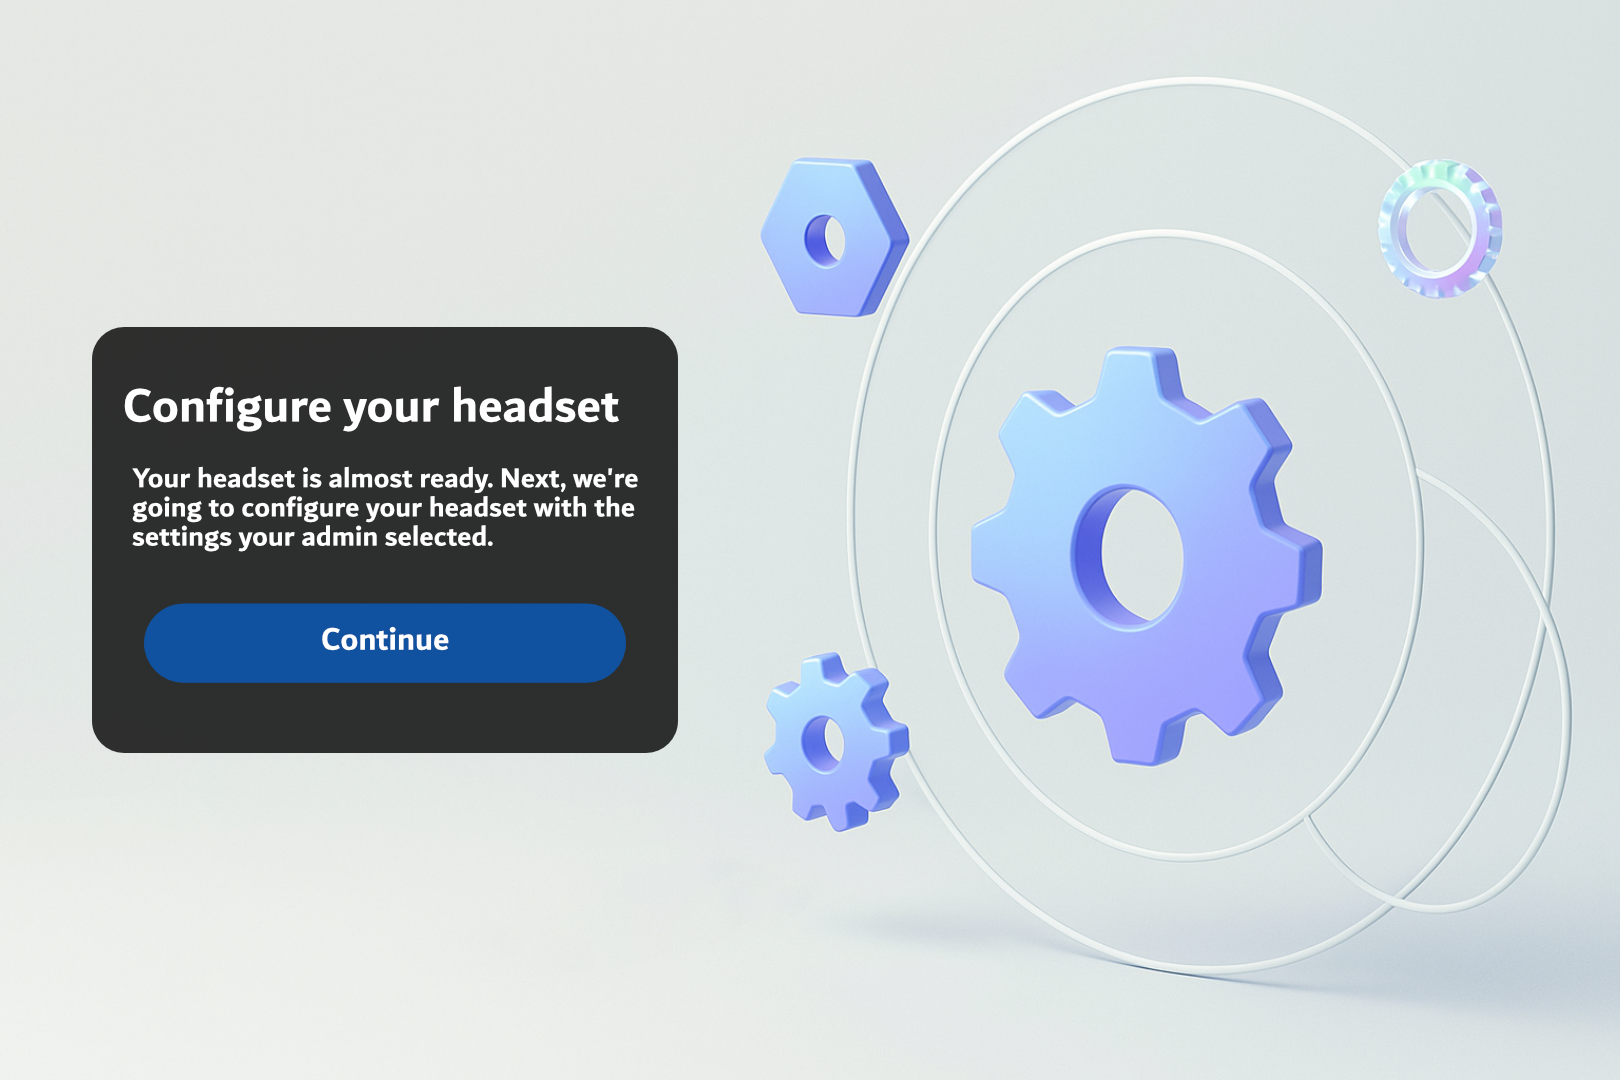](https://docs.nwxr.app/uploads/images/gallery/2025-04/step8.png) 22. **Wait for Configuration to Complete:** - A progress screen will display. Wait until the process completes. [](https://docs.nwxr.app/uploads/images/gallery/2025-04/step9.png) 23. **Headset Configured Confirmation:** - Once done, press Continue on the “Headset Configured” screen. [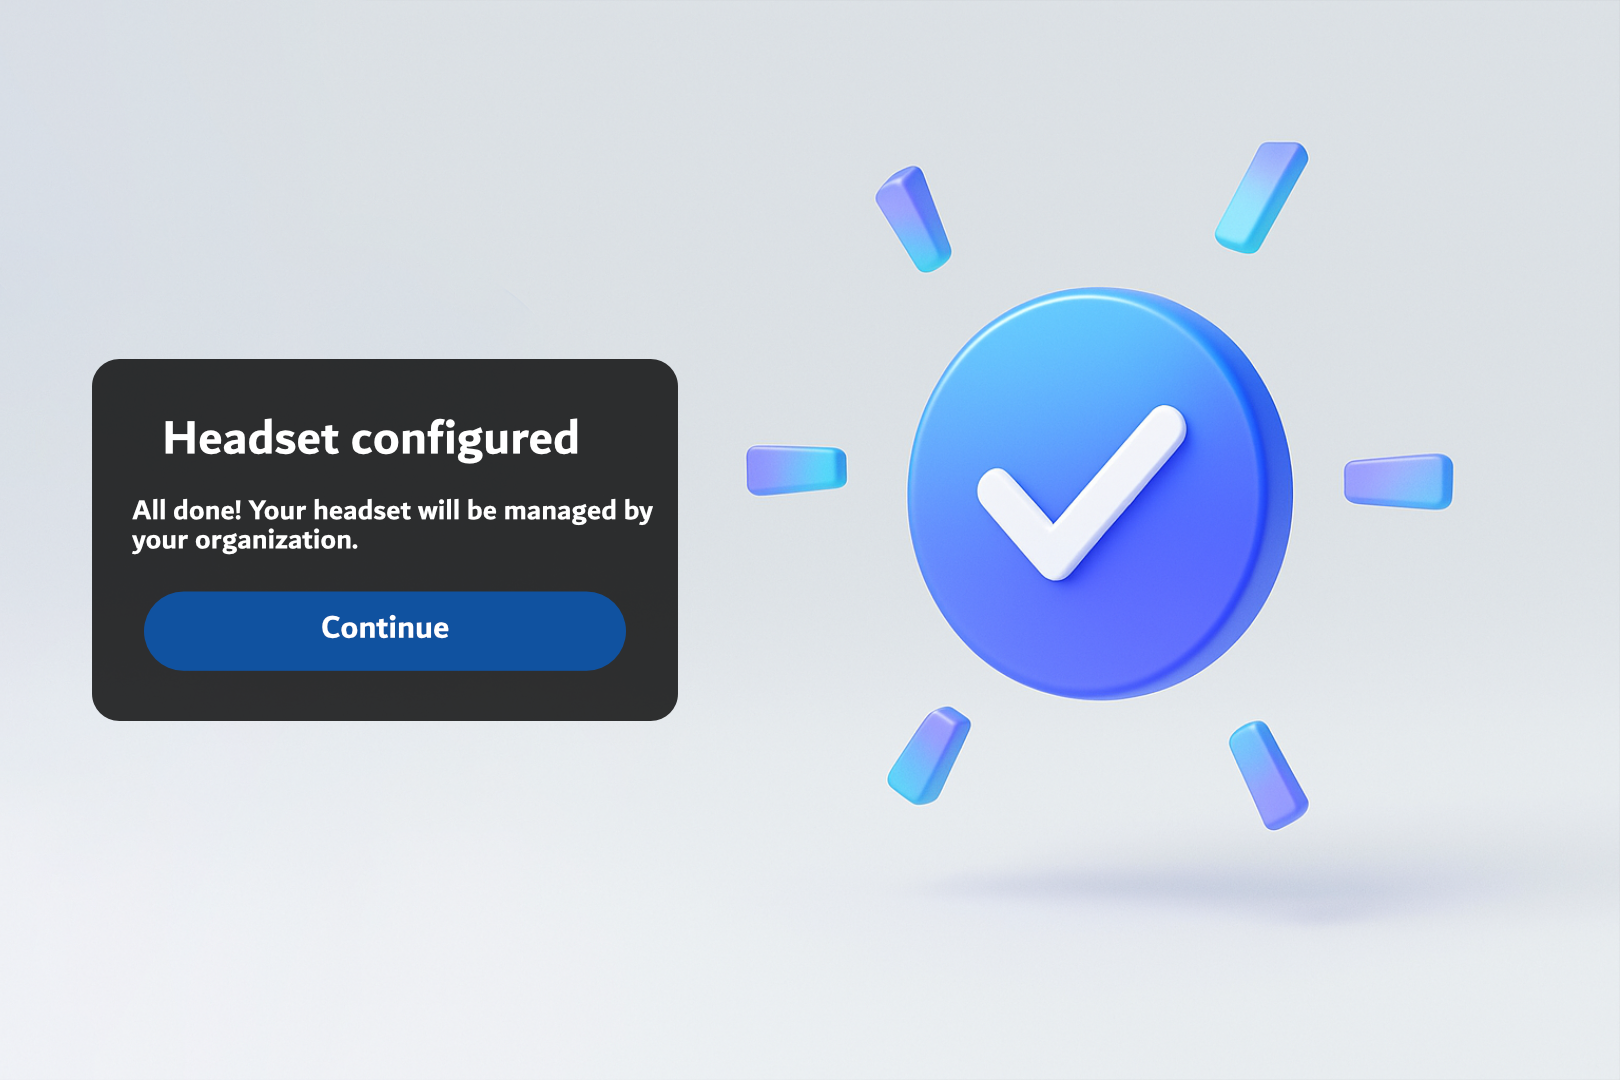](https://docs.nwxr.app/uploads/images/gallery/2025-04/step10.png) 24. **Privacy Notice:** - Read the **“Designed for your privacy”** message and click **Continue**. [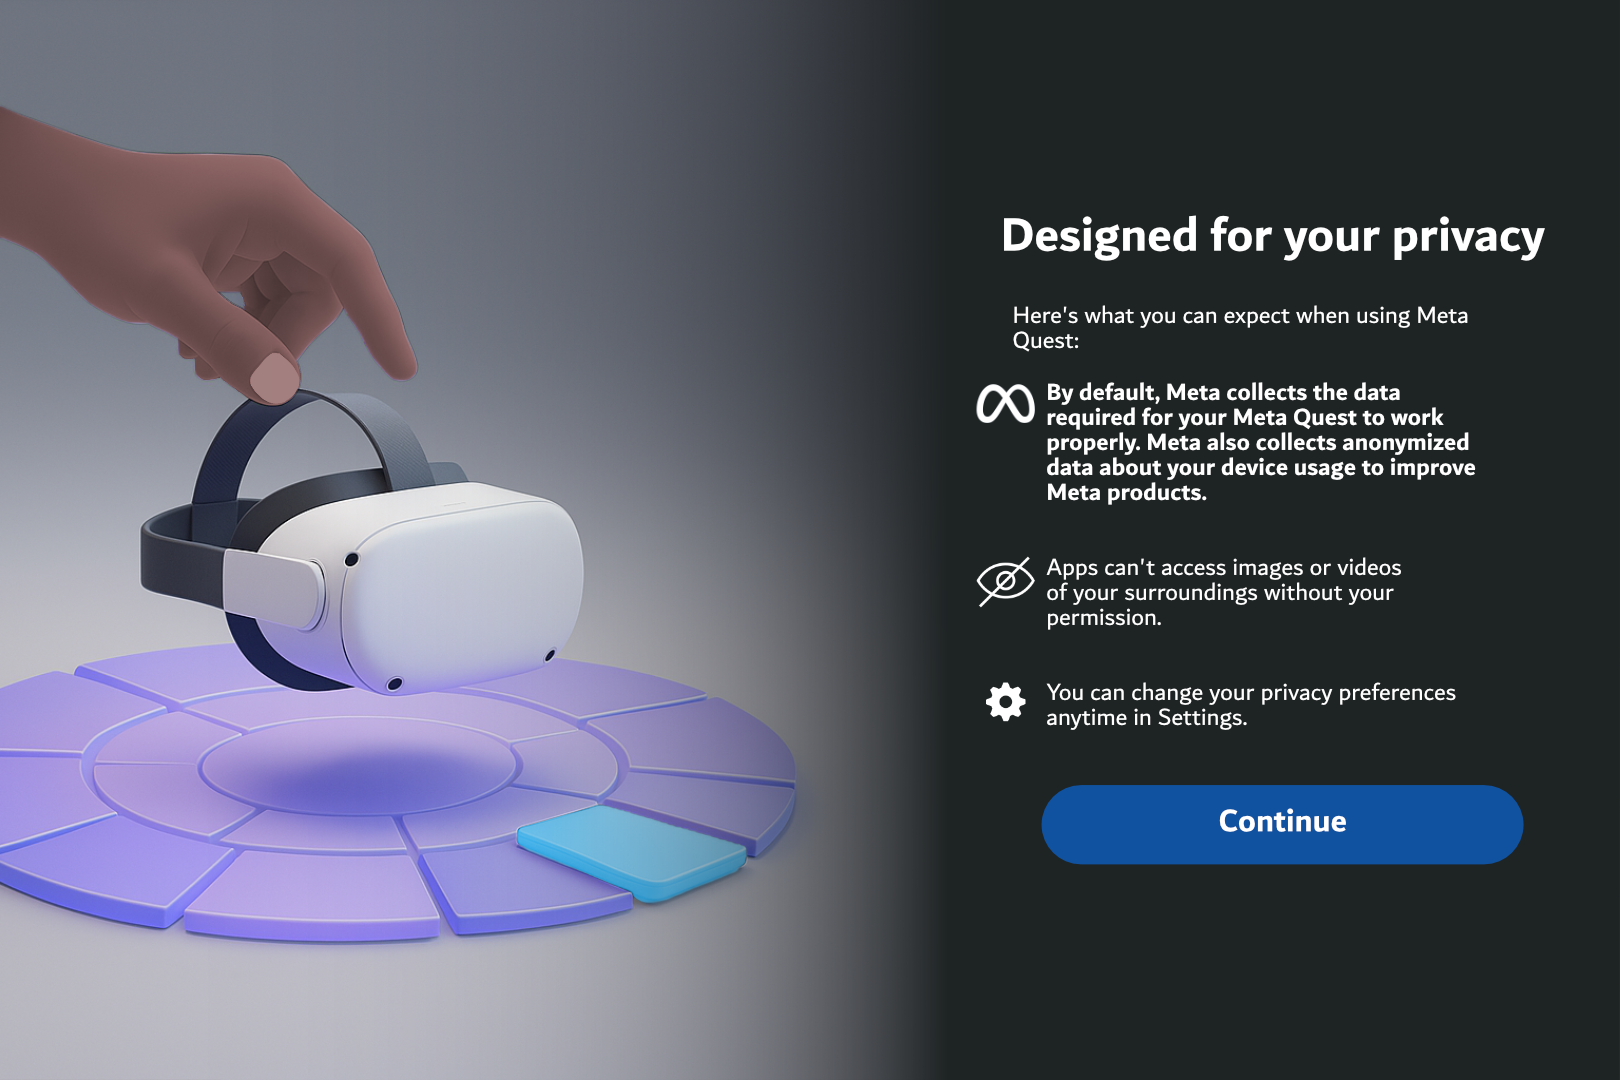](https://docs.nwxr.app/uploads/images/gallery/2025-04/step11.png) 25. **Data Sharing Preferences:** - Choose whether to share anonymized usage data with Meta. - For enterprise devices, we recommend selecting **“Don’t Share”**, but this is optional. [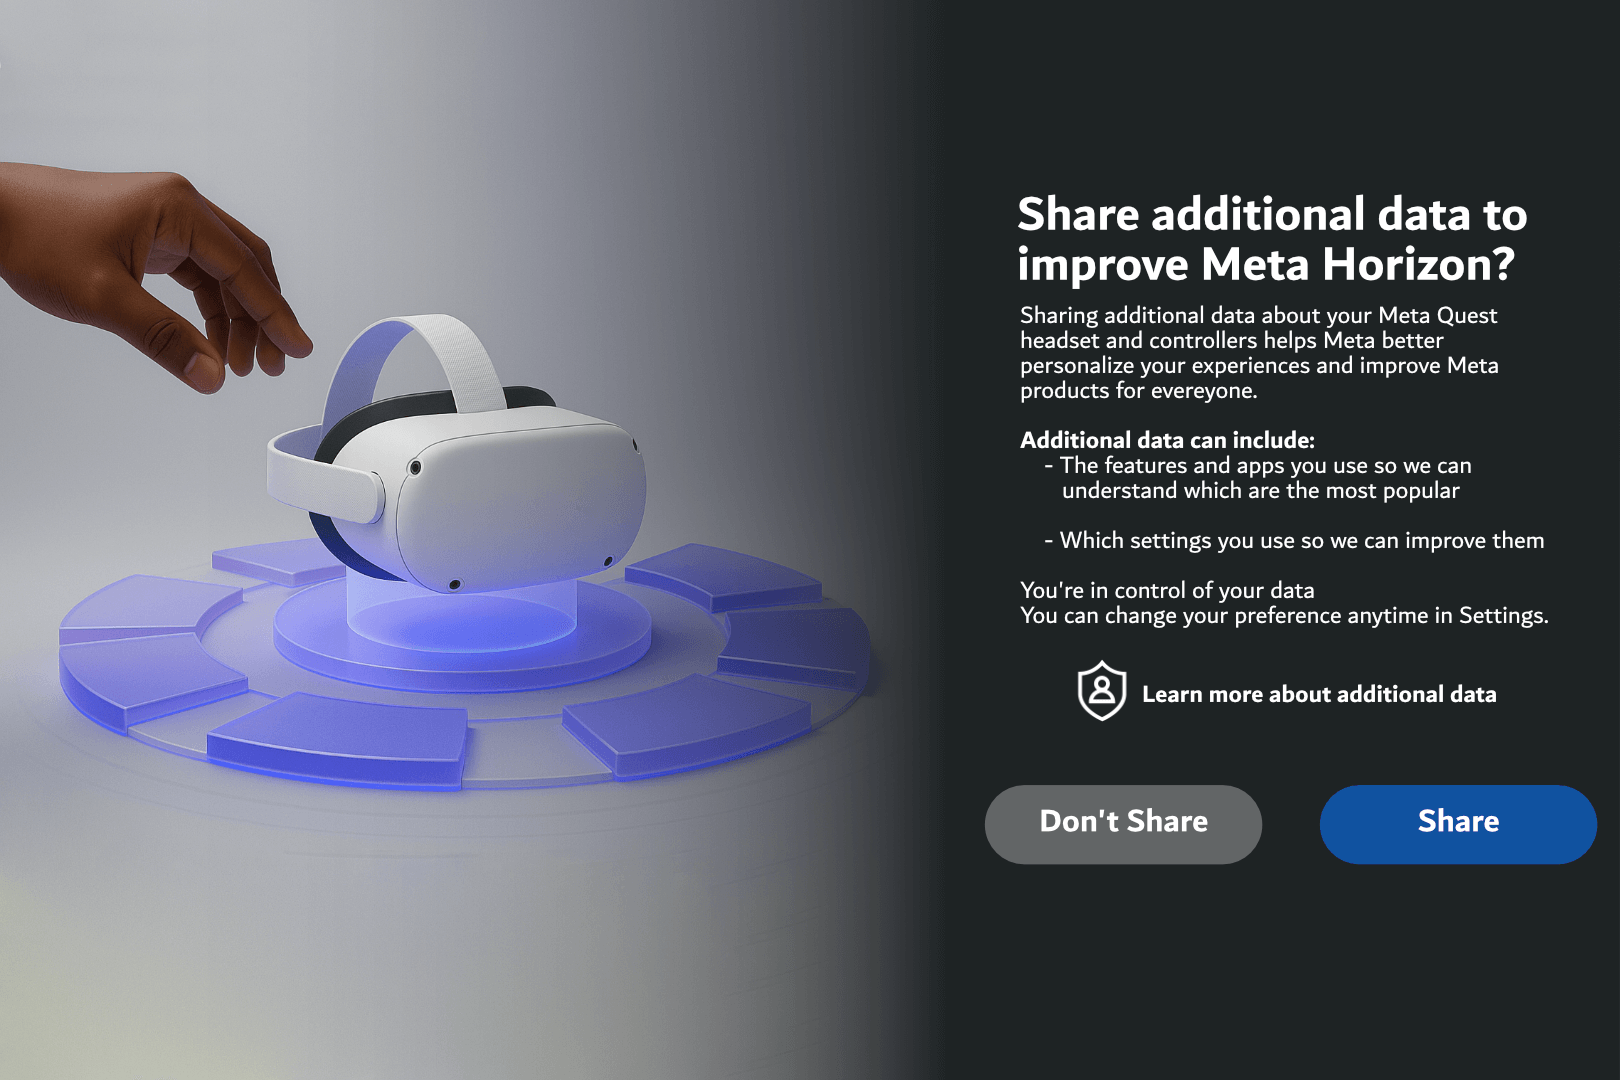](https://docs.nwxr.app/uploads/images/gallery/2025-04/13wstep13.png) 26. **Create a Guardian Boundary:** - Follow on-screen instructions to map your play space. - Choose Stationary Boundary if seated, or Roomscale for standing/walking setups. [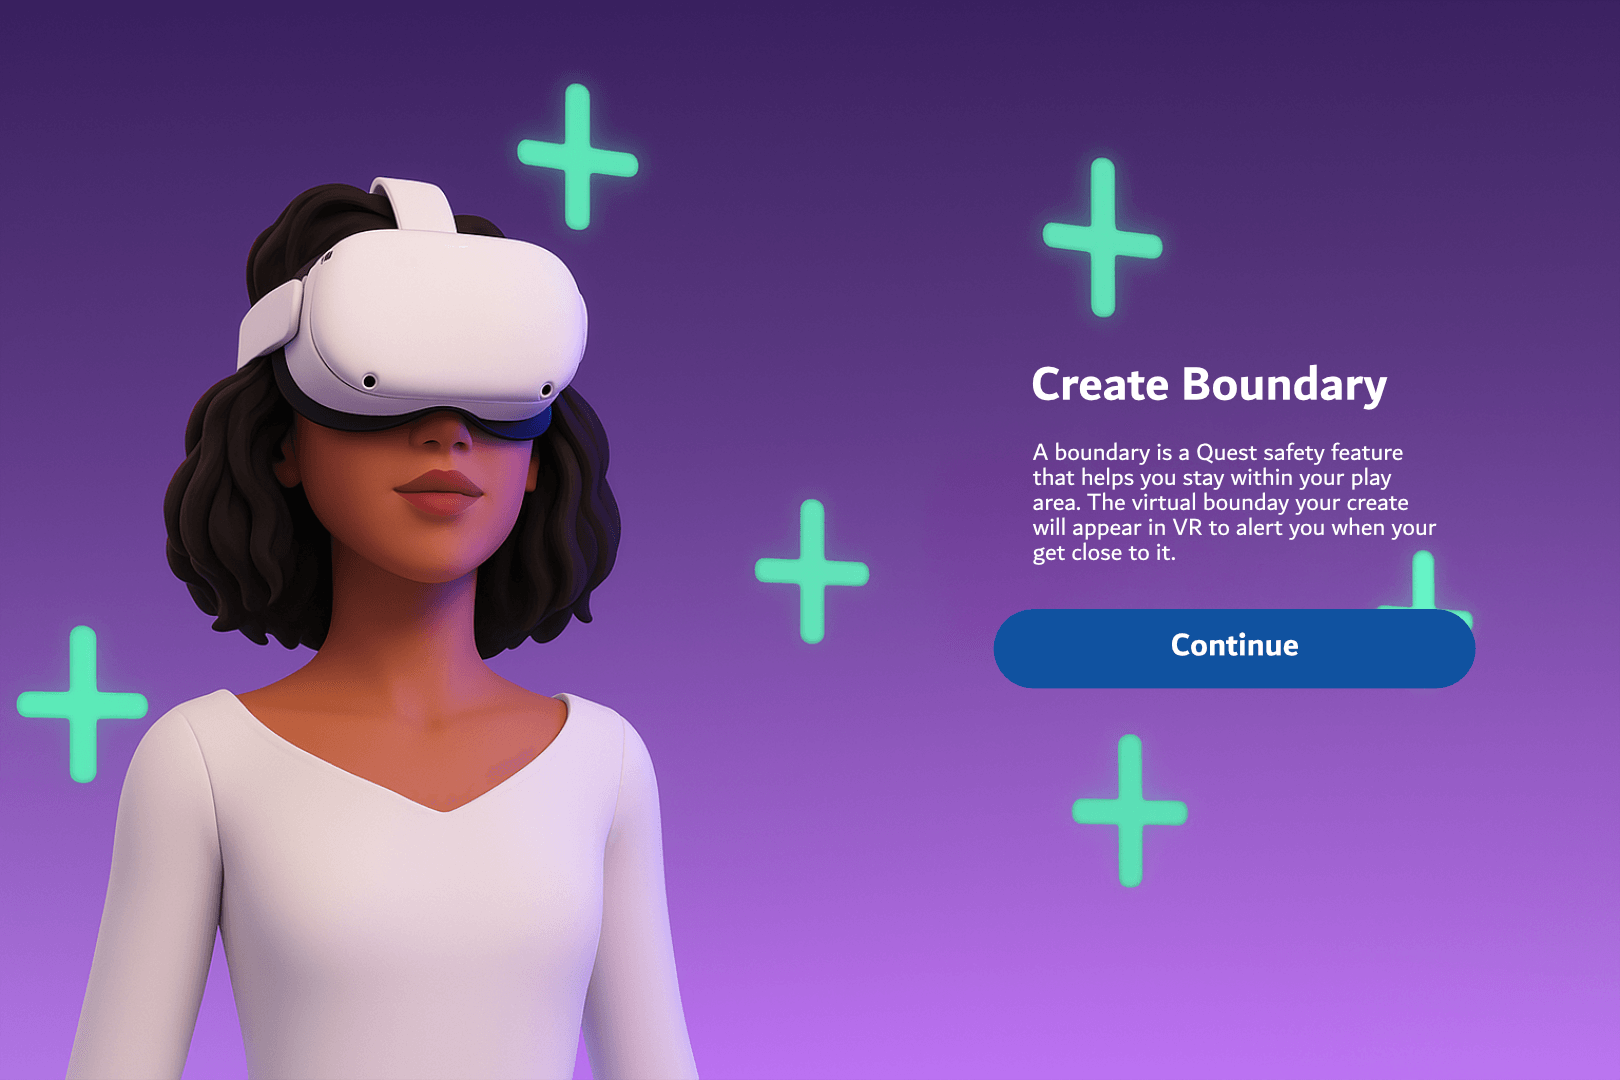](https://docs.nwxr.app/uploads/images/gallery/2025-04/step14.png) 27. **Learn to Reset View:** - You’ll be shown how to **recenter your view** by holding the **Meta button** on the right controller. Press **Continue**. [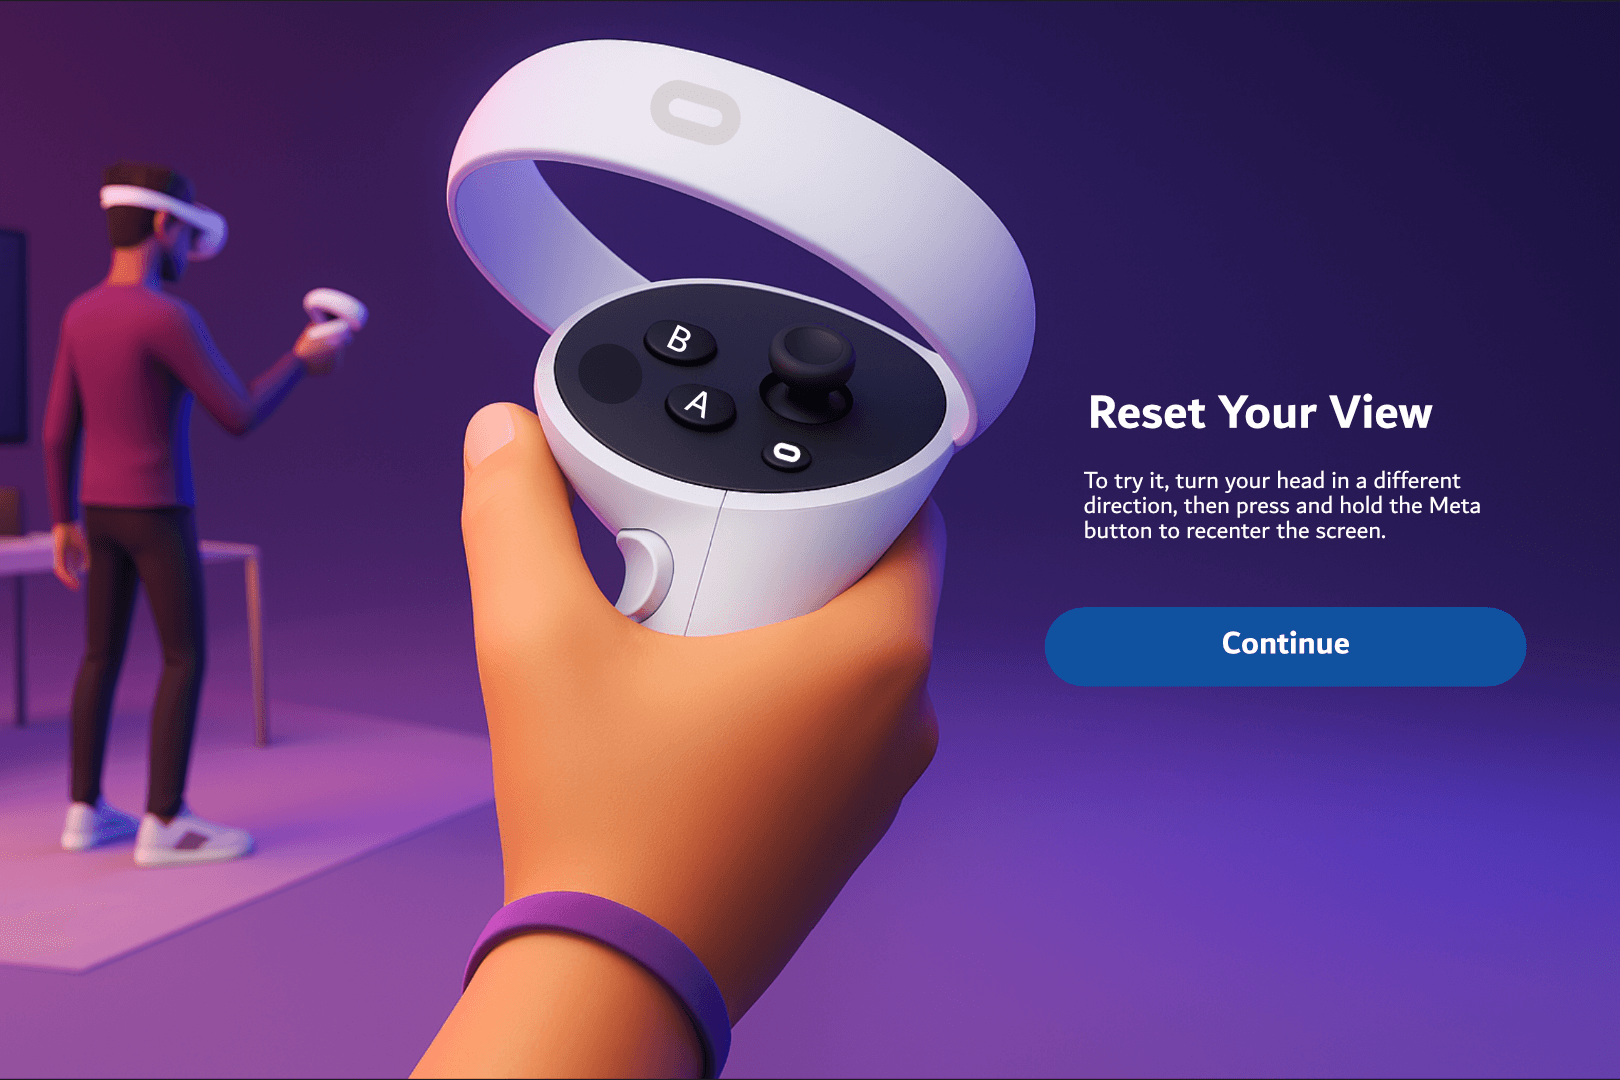](https://docs.nwxr.app/uploads/images/gallery/2025-04/step15.png) 28. **Complete Setup:** - The final screen will show **“Device Setup Complete.”** - Press the **Meta button** to enter the Home environment. [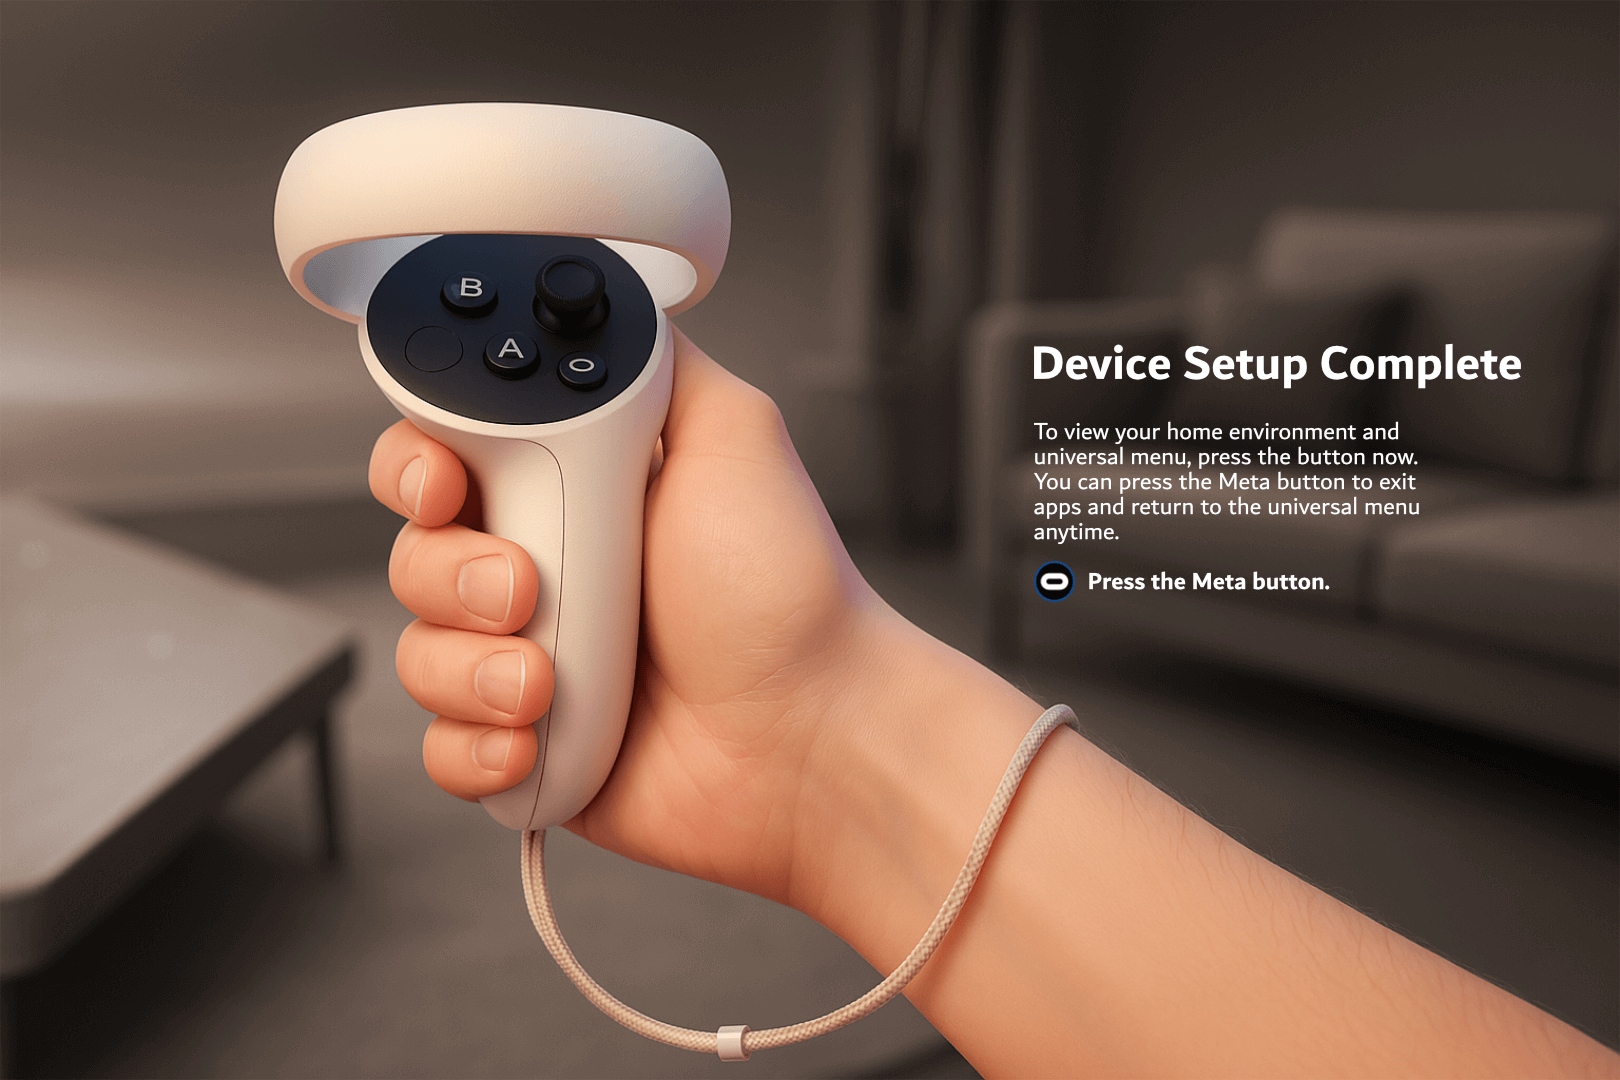](https://docs.nwxr.app/uploads/images/gallery/2025-04/step17.png) --- ## **Section 4: Accessing Next World Software on Your HMS Headset** 29. From the **Home screen**, open the **Library**. 30. Navigate to the **“For Work”** tab to find the **Next World** app. 31. The app will launch in **Demo Mode** by default. 32. **Enroll Device in Next World Platform:** - Log in to the **Next World Platform.** - Register the device using the displayed Device ID under your organization's account. - This will unlock access to all assigned content and features associated with your subscription. # Whitelisting Domains Required By Next World Services For networks that have strict policies which may prevent access to certain websites or domains that are required for Next World's services to function, you may need to contact your IT team to whitelist the following URLs and hostnames depending on your network's configuration and restrictions. The below are required for our services to function, including to download necessary apps and components, and to sync events to our LMS: #### **Primary URL Pattern for Next World-specific Downloads****Examples of specific download locations that are handled by the above whitelisted URL pattern** • Next World's "Agent" Android application: https://app.nextworldenterprises.com/nwagent/nwagent.apk • Experience download example: https://app.nextworldenterprises.com/packs/com-nextworld-manualhandling.2.7.1.intl.nwpz **Alternative S3 URLs** Since these files are hosted in S3 buckets, the actual Amazon AWS S3 links would replace "app.nextworldenterprises.com" with "app.nextworldenterprises.com.s3.amazonaws.com". However, allowing traffic from "app.nextworldenterprises.com/\*" should work fine for your needs.
#### **Bodyswaps Soft-Skills Library**